| 2 |
1 | 3 |
0 | 4 |
| bar |
Fig. 1
Normal Pressure
| 2 |
1 | 3 |
0 | 4 |
| bar |
Fig. 2 | Requires |
| |
Repressurising | |
| 2 |
1 | 3 |
0 | 4 |
| bar |
Fig. 3 | Fault |
|
TapCap
Tap
Wing Nut
Boiler Taps & Connections, as viewed from underneath
3.0Repressurising System
3.1Central Heating System Pressure
1.The water pressure in the central heating system is indicated by the pressure gauge.
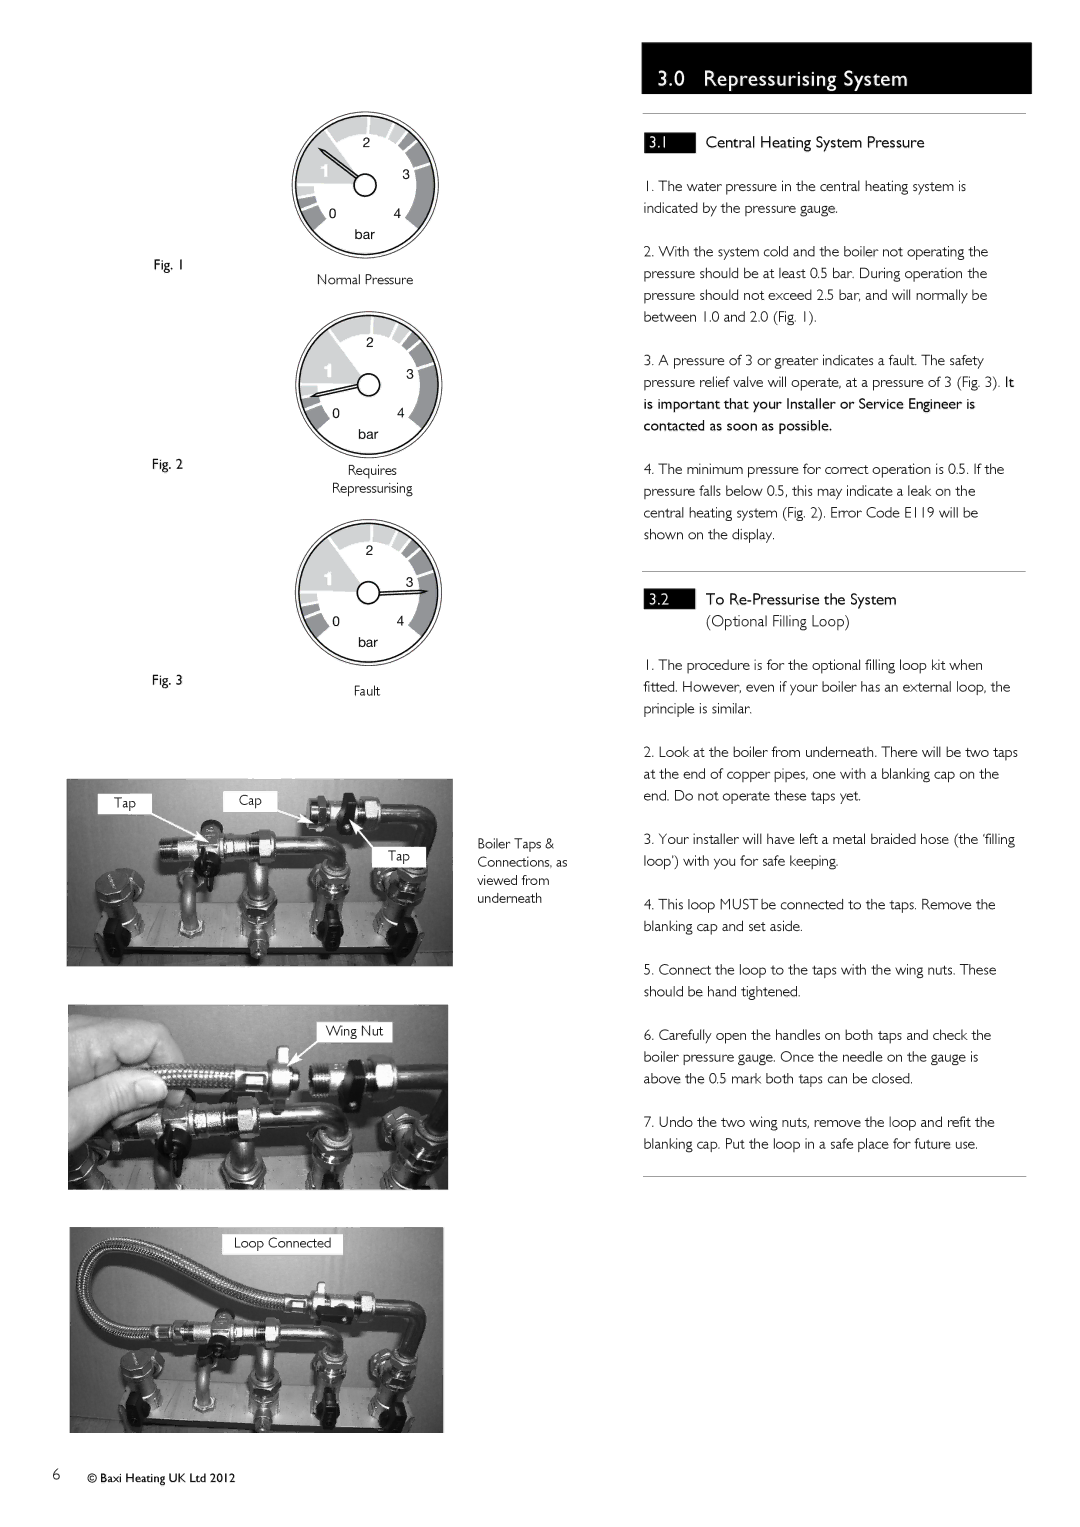
2.With the system cold and the boiler not operating the pressure should be at least 0.5 bar. During operation the pressure should not exceed 2.5 bar, and will normally be between 1.0 and 2.0 (Fig. 1).
3.A pressure of 3 or greater indicates a fault. The safety pressure relief valve will operate, at a pressure of 3 (Fig. 3). It is important that your Installer or Service Engineer is contacted as soon as possible.
4.The minimum pressure for correct operation is 0.5. If the pressure falls below 0.5, this may indicate a leak on the central heating system (Fig. 2). Error Code E119 will be shown on the display.
3.2To
1.The procedure is for the optional filling loop kit when fitted. However, even if your boiler has an external loop, the principle is similar.
2.Look at the boiler from underneath. There will be two taps at the end of copper pipes, one with a blanking cap on the end. Do not operate these taps yet.
3.Your installer will have left a metal braided hose (the ‘filling loop’) with you for safe keeping.
4.This loop MUST be connected to the taps. Remove the blanking cap and set aside.
5.Connect the loop to the taps with the wing nuts. These should be hand tightened.
6.Carefully open the handles on both taps and check the boiler pressure gauge. Once the needle on the gauge is above the 0.5 mark both taps can be closed.
7.Undo the two wing nuts, remove the loop and refit the blanking cap. Put the loop in a safe place for future use.
Loop Connected
6© Baxi Heating UK Ltd 2012
