EUROLIVE B415DSP
4. Application examples
4.1 Presentations
With just one B415DSP and one or two dynamic microphones, you can set up a basic audio system with very little effort. Thanks to the
Connecting microphones:
sTurn the LEVEL controls ![]() fully to the left.
fully to the left.
sConnect your microphones to the MIC/LINE inputs.
sSwitch on the B415DSP.
sTurn the LEVEL controls ![]() gradually clockwise to set the volume of your choice. Observe the CLIP LEDs while adusting the volume. Make sure they never shine constantly but only light up at peak levels.
gradually clockwise to set the volume of your choice. Observe the CLIP LEDs while adusting the volume. Make sure they never shine constantly but only light up at peak levels.
sUse the LINE OUT connector ![]() to connect an (optional) second B415DSP.
to connect an (optional) second B415DSP.
+Never place a microphone directly in front of the loudspeaker owing to danger of feedback! When operating the B415DSP make sure that you always stay behind the loudspeaker to avoid feedback.
Fig. 4.1: Connecting microphones
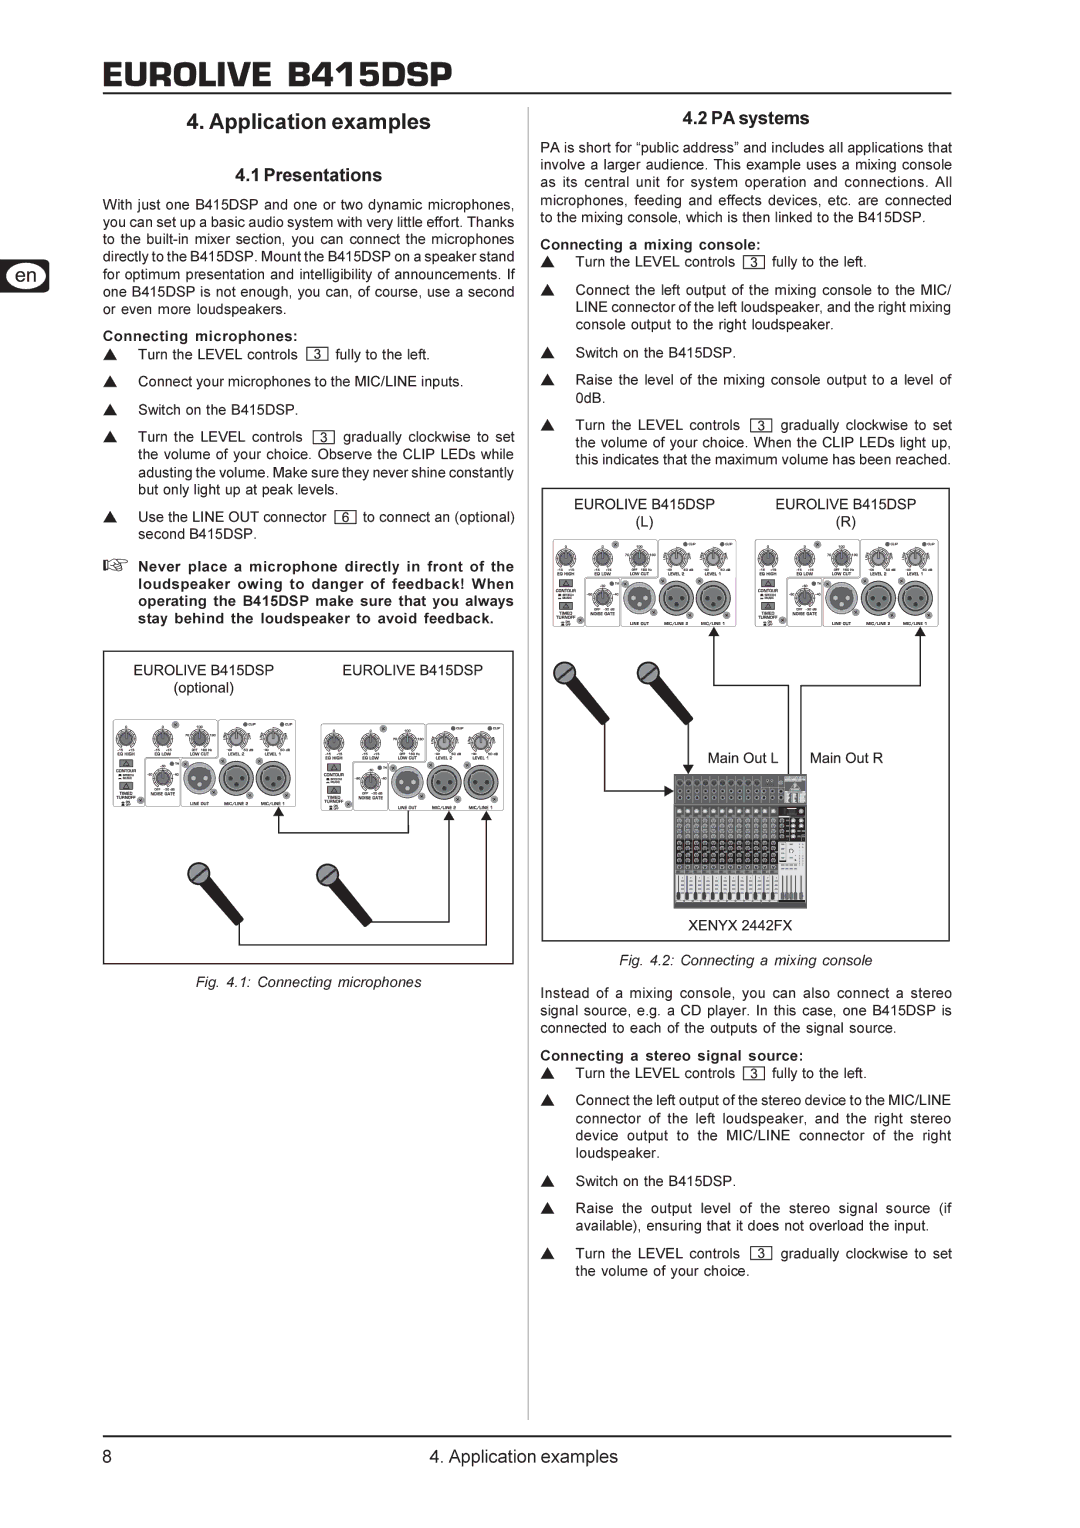
4.2 PA systems
PA is short for “public address” and includes all applications that involve a larger audience. This example uses a mixing console as its central unit for system operation and connections. All microphones, feeding and effects devices, etc. are connected to the mixing console, which is then linked to the B415DSP.
Connecting a mixing console:
sTurn the LEVEL controls ![]() fully to the left.
fully to the left.
sConnect the left output of the mixing console to the MIC/ LINE connector of the left loudspeaker, and the right mixing console output to the right loudspeaker.
sSwitch on the B415DSP.
sRaise the level of the mixing console output to a level of 0dB.
sTurn the LEVEL controls ![]() gradually clockwise to set the volume of your choice. When the CLIP LEDs light up, this indicates that the maximum volume has been reached.
gradually clockwise to set the volume of your choice. When the CLIP LEDs light up, this indicates that the maximum volume has been reached.
Fig. 4.2: Connecting a mixing console
Instead of a mixing console, you can also connect a stereo signal source, e.g. a CD player. In this case, one B415DSP is connected to each of the outputs of the signal source.
Connecting a stereo signal source:
sTurn the LEVEL controls ![]()
![]()
![]() fully to the left.
fully to the left.
sConnect the left output of the stereo device to the MIC/LINE connector of the left loudspeaker, and the right stereo device output to the MIC/LINE connector of the right loudspeaker.
sSwitch on the B415DSP.
sRaise the output level of the stereo signal source (if available), ensuring that it does not overload the input.
sTurn the LEVEL controls ![]() gradually clockwise to set the volume of your choice.
gradually clockwise to set the volume of your choice.
8 | 4. Application examples |