V-TONE GM110
2.CONTROL ELEMENTS
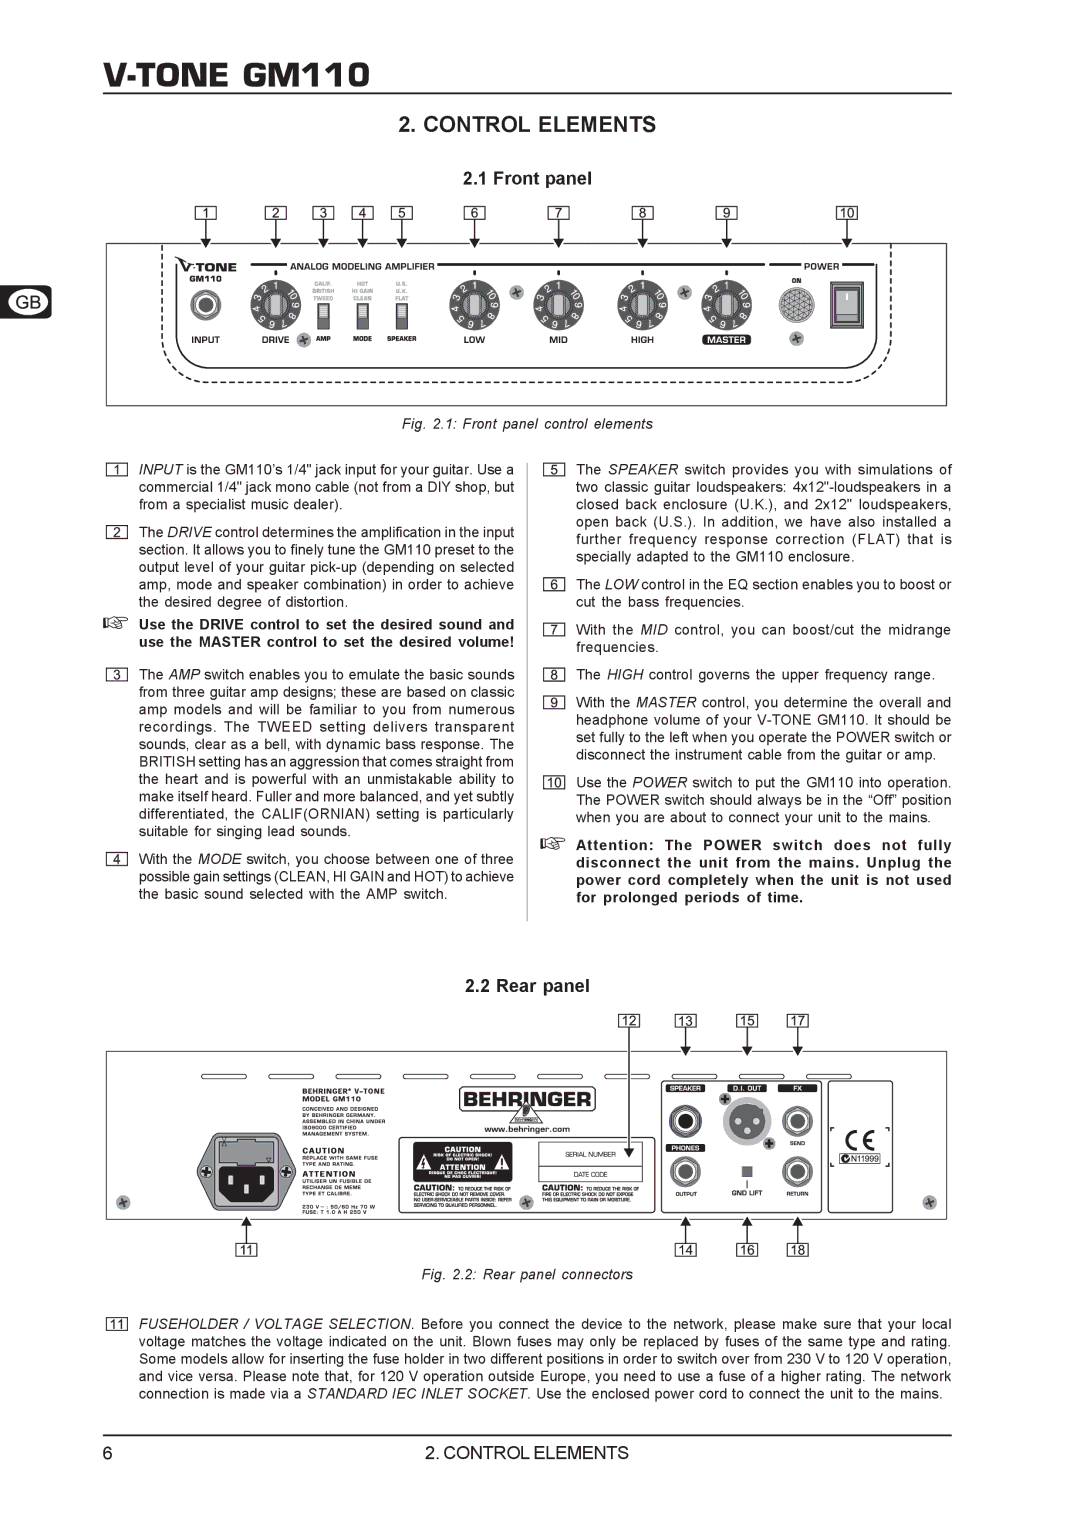
2.1Front panel
Fig. 2.1: Front panel control elements | |||
INPUT is the GM110’s 1/4" jack input for your guitar. Use a |
|
| The SPEAKER switch provides you with simulations of |
|
| ||
commercial 1/4" jack mono cable (not from a DIY shop, but |
|
| two classic guitar loudspeakers: |
from a specialist music dealer). |
|
| closed back enclosure (U.K.), and 2x12" loudspeakers, |
The DRIVE control determines the amplification in the input |
|
| open back (U.S.). In addition, we have also installed a |
|
| further frequency response correction (FLAT) that is | |
section. It allows you to finely tune the GM110 preset to the |
|
| |
|
| specially adapted to the GM110 enclosure. | |
output level of your guitar |
|
| |
|
|
| |
amp, mode and speaker combination) in order to achieve |
|
| The LOW control in the EQ section enables you to boost or |
|
| ||
the desired degree of distortion. |
|
| cut the bass frequencies. |
Use the DRIVE control to set the desired sound and |
|
| With the MID control, you can boost/cut the midrange |
|
| ||
use the MASTER control to set the desired volume! |
|
| frequencies. |
The AMP switch enables you to emulate the basic sounds |
|
| The HIGH control governs the upper frequency range. |
|
| ||
from three guitar amp designs; these are based on classic |
|
| With the MASTER control, you determine the overall and |
amp models and will be familiar to you from numerous |
|
| |
|
| headphone volume of your | |
recordings. The TWEED setting delivers transparent |
|
| |
|
| set fully to the left when you operate the POWER switch or | |
sounds, clear as a bell, with dynamic bass response. The |
|
| |
|
| disconnect the instrument cable from the guitar or amp. | |
BRITISH setting has an aggression that comes straight from |
|
| |
|
|
| |
the heart and is powerful with an unmistakable ability to |
|
| Use the POWER switch to put the GM110 into operation. |
|
| ||
make itself heard. Fuller and more balanced, and yet subtly |
|
| The POWER switch should always be in the “Off” position |
differentiated, the CALIF(ORNIAN) setting is particularly |
|
| when you are about to connect your unit to the mains. |
suitable for singing lead sounds. |
|
| Attention: The POWER switch does not fully |
With the MODE switch, you choose between one of three |
|
| |
|
| disconnect the unit from the mains. Unplug the | |
possible gain settings (CLEAN, HI GAIN and HOT) to achieve |
|
| power cord completely when the unit is not used |
the basic sound selected with the AMP switch. |
|
| for prolonged periods of time. |
|
|
|
|
2.2 Rear panel
Fig. 2.2: Rear panel connectors
FUSEHOLDER / VOLTAGE SELECTION. Before you connect the device to the network, please make sure that your local voltage matches the voltage indicated on the unit. Blown fuses may only be replaced by fuses of the same type and rating. Some models allow for inserting the fuse holder in two different positions in order to switch over from 230 V to 120 V operation, and vice versa. Please note that, for 120 V operation outside Europe, you need to use a fuse of a higher rating. The network connection is made via a STANDARD IEC INLET SOCKET. Use the enclosed power cord to connect the unit to the mains.
6 | 2. CONTROL ELEMENTS |