F1DA116T specifications
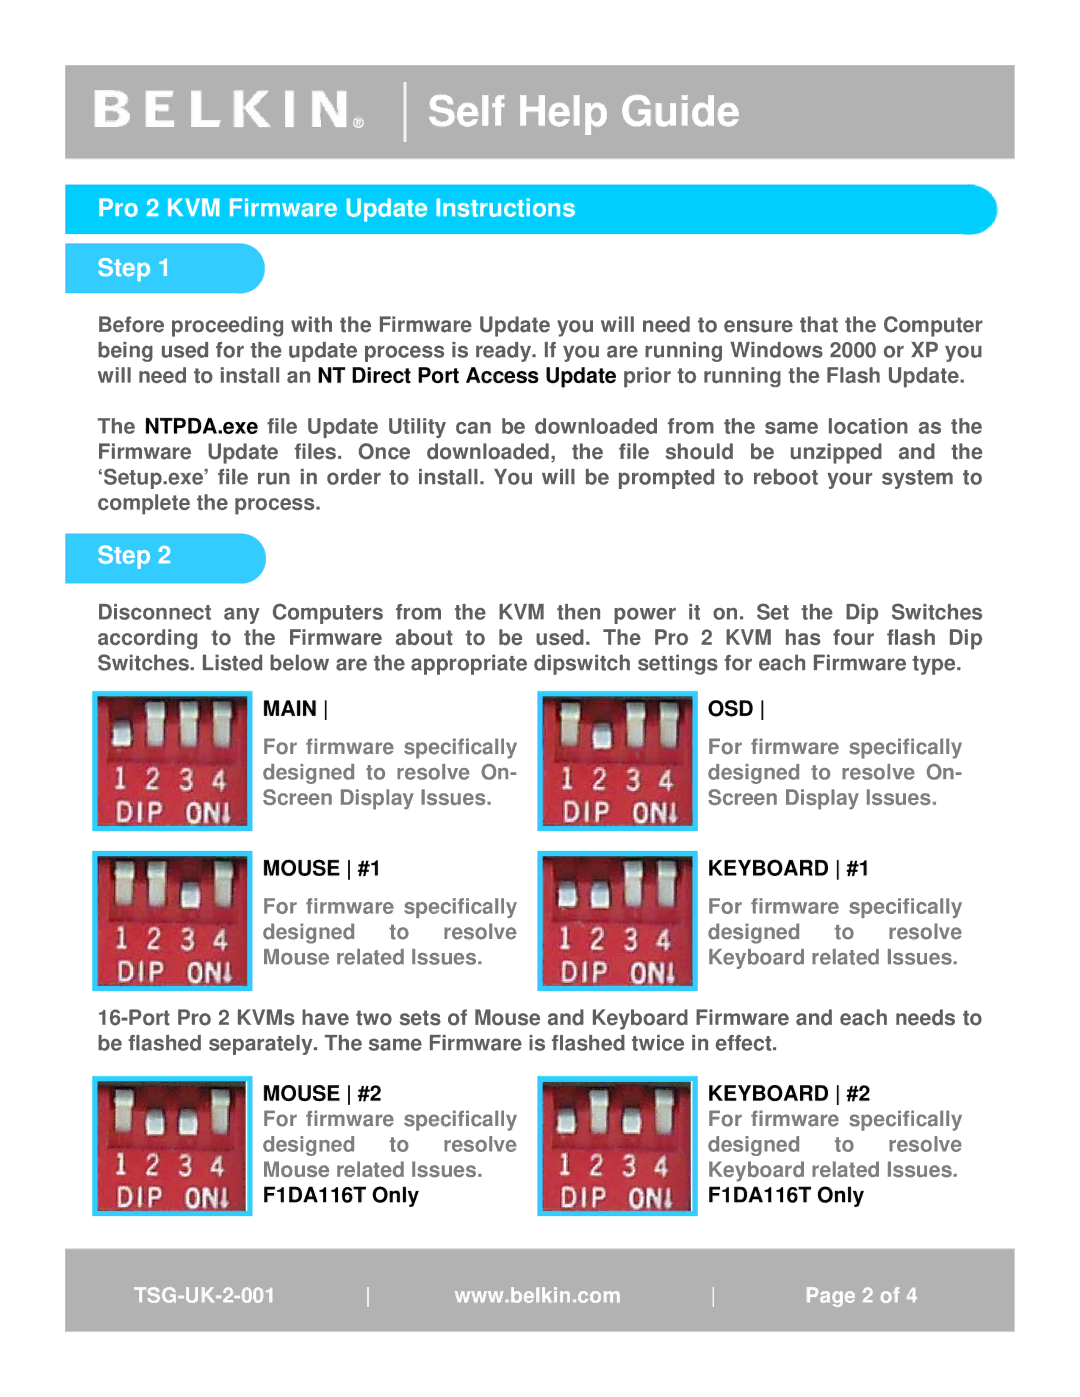
The Belkin F1DA116T is a versatile KVM (Keyboard, Video, Mouse) switch designed to help users seamlessly control multiple computers from a single set of peripherals. This device is particularly appealing to individuals who manage multiple systems or servers, allowing for efficient multitasking without the hassle of switching between different keyboards and mice.One of the standout features of the F1DA116T is its ability to support up to four computers. This is done through a simple toggle mechanism that enables users to switch between connected devices easily. Users can connect a variety of computer types, including PCs and Mac systems, thanks to the switch's compatibility with different operating systems. This flexibility makes it an ideal solution for tech enthusiasts, IT professionals, or anyone with multiple computer setups.
In terms of connectivity, the F1DA116T offers an impressive array of ports. It includes a combination of USB and VGA connectors, allowing users to connect their keyboards, mice, and monitors effortlessly. The device supports resolutions up to 2048 x 1536, ensuring high-quality visuals for users who require sharp and clear output. This capability is particularly beneficial for tasks involving graphic design, video editing, or any application that demands a high level of detail.
Furthermore, the Belkin F1DA116T boasts a plug-and-play design, eliminating the need for additional software or drivers. This feature streamlines the setup process, allowing users to quickly connect their devices and start using the switch almost immediately. The compact design of the KVM switch also ensures that it can fit into various workspace environments, maintaining an organized and clutter-free setup.
Another notable characteristic of the F1DA116T is its keyboard emulation technology, which guarantees that users experience a seamless transition when switching between computers. This technology ensures that none of the keystrokes are lost during the switch, further enhancing the user experience.
In summary, the Belkin F1DA116T KVM switch is an efficient solution for anyone needing to control multiple computers from a single interface. Its support for multiple operating systems, high-resolution output, and plug-and-play functionality make it an excellent choice for professionals and home users alike. Whether for office use or multimedia tasks, the F1DA116T simplifies the management of multiple systems without compromising on performance or quality.

