FORCE BLOWER PUSH Owner’s Manual
ASSEMBLY
1.Follow the steps in figures A and B, then securely tighten all hardware shown. 2.Connect spark plug wire.
Figure A | Figure B |
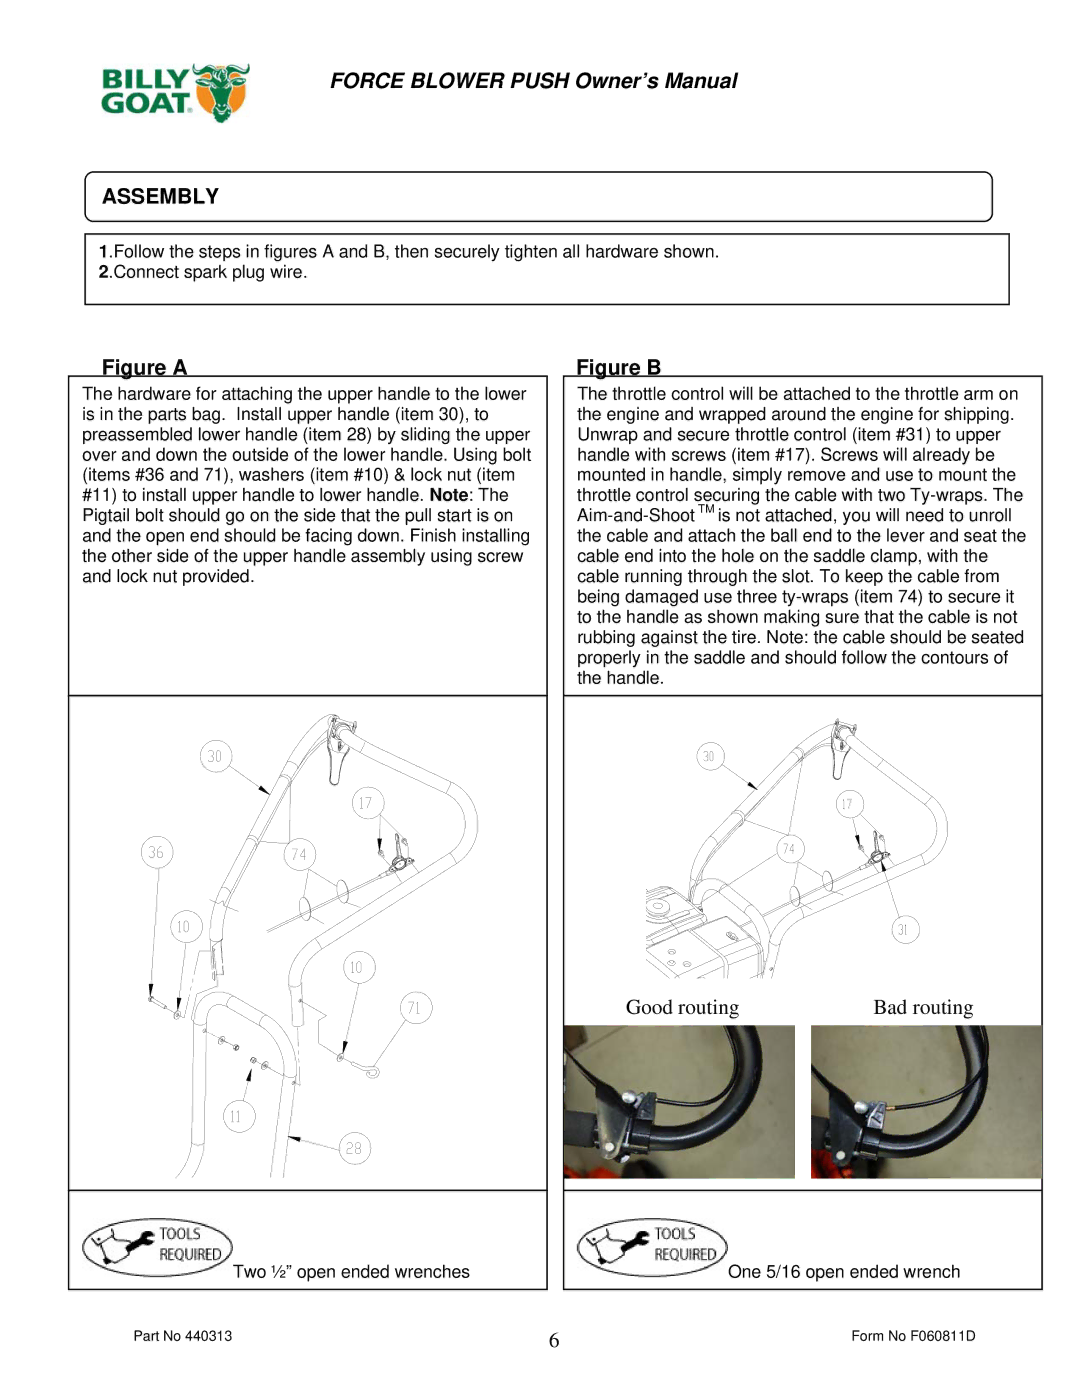
The hardware for attaching the upper handle to the lower is in the parts bag. Install upper handle (item 30), to preassembled lower handle (item 28) by sliding the upper over and down the outside of the lower handle. Using bolt (items #36 and 71), washers (item #10) & lock nut (item #11) to install upper handle to lower handle. Note: The Pigtail bolt should go on the side that the pull start is on and the open end should be facing down. Finish installing the other side of the upper handle assembly using screw and lock nut provided.
The throttle control will be attached to the throttle arm on the engine and wrapped around the engine for shipping. Unwrap and secure throttle control (item #31) to upper handle with screws (item #17). Screws will already be mounted in handle, simply remove and use to mount the throttle control securing the cable with two
Good routing | Bad routing |
![]() Two ½” open ended wrenches
Two ½” open ended wrenches
![]() One 5/16 open ended wrench
One 5/16 open ended wrench
Part No 440313 | 6 | Form No F060811D |