
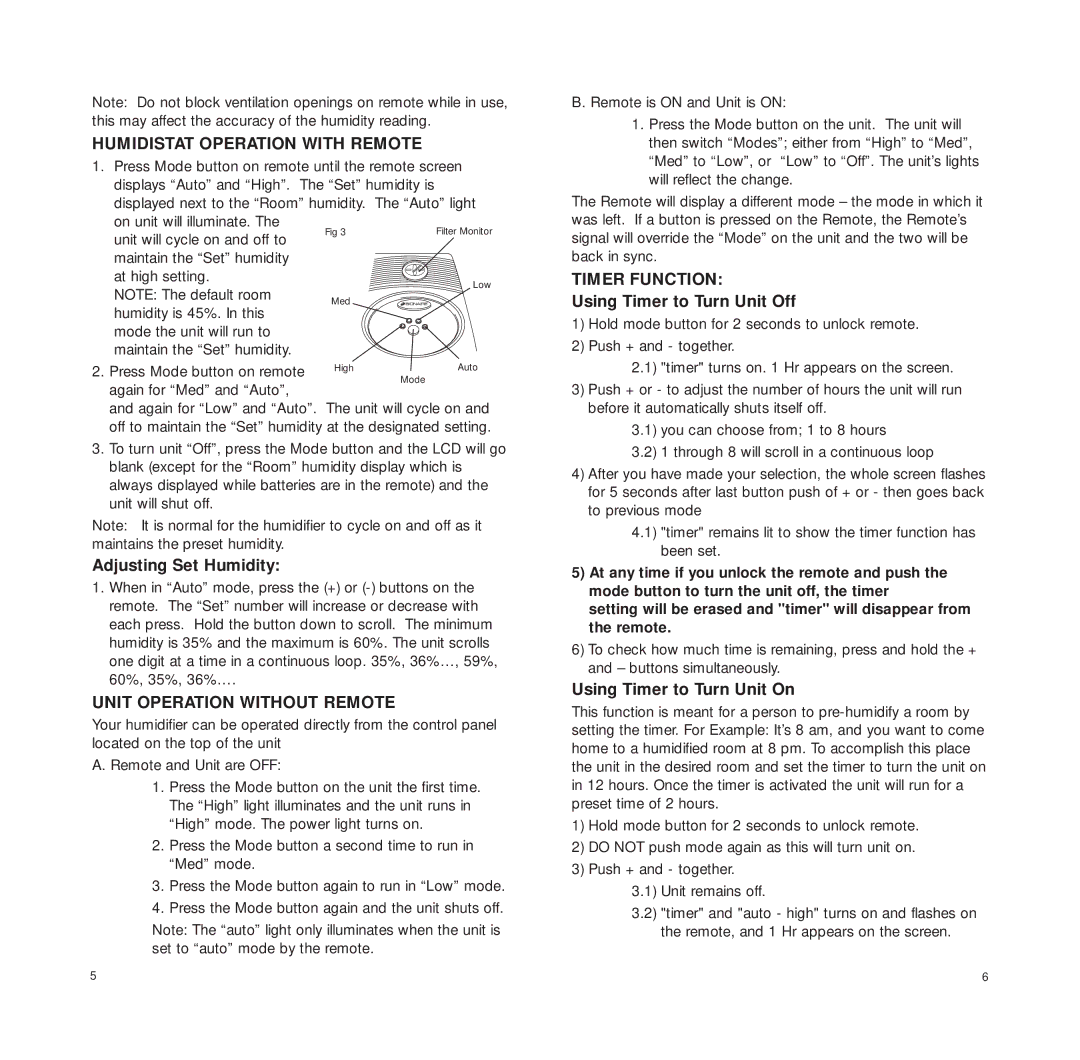
BCM6100 specifications
The Bionaire BCM6100 is a versatile and innovative air purifier designed to improve indoor air quality and provide a healthier living environment. This model stands out with its advanced features that cater to diverse air purification needs for households.One of the primary features of the BCM6100 is its multi-stage filtration system, which includes a HEPA filter capable of capturing up to 99.97% of airborne particles as small as 0.3 microns. This ensures that common allergens such as dust, pollen, pet dander, and smoke are effectively removed from the air. Additionally, the unit includes a pre-filter that traps larger particles, extending the life of the HEPA filter and enhancing the overall purification process.
The BCM6100 utilizes activated carbon technology to combat odors, making it ideal for homes with pets or cooking odors. The carbon filter absorbs harmful gases and volatile organic compounds, creating a fresher and more pleasant indoor atmosphere. This comprehensive approach to filtration ensures that both particulate and gaseous pollutants are addressed.
In terms of user experience, the Bionaire BCM6100 is designed with convenience in mind. It features an intuitive control panel that allows users to easily adjust the fan speed based on their air purification needs. With three different fan speed settings, users can choose a quiet operation for nighttime or a more powerful setting for faster air cleaning.
Energy efficiency is another highlight of the BCM6100. Designed with eco-friendly technologies, this air purifier is Energy Star certified, meaning it meets strict energy efficiency guidelines set by the U.S. Environmental Protection Agency. This allows users to enjoy purified air without significantly increasing energy costs.
Portability is an added advantage, as the BCM6100 is lightweight and comes with an integrated handle, making it easy to move between rooms. Whether in the bedroom, living room, or office, users can ensure that they are breathing clean air wherever they go.
In conclusion, the Bionaire BCM6100 air purifier combines advanced filtration technology, ease of use, energy efficiency, and portability. Its multi-stage filtration system, including HEPA and activated carbon filters, ensures that various airborne pollutants are effectively removed, promoting a healthier indoor environment. Whether for allergy sufferers or anyone seeking cleaner air, the BCM6100 stands as a reliable solution for modern air purification needs.