Assembly
The only tool you’ll need to assemble your vacuum cleaner is a
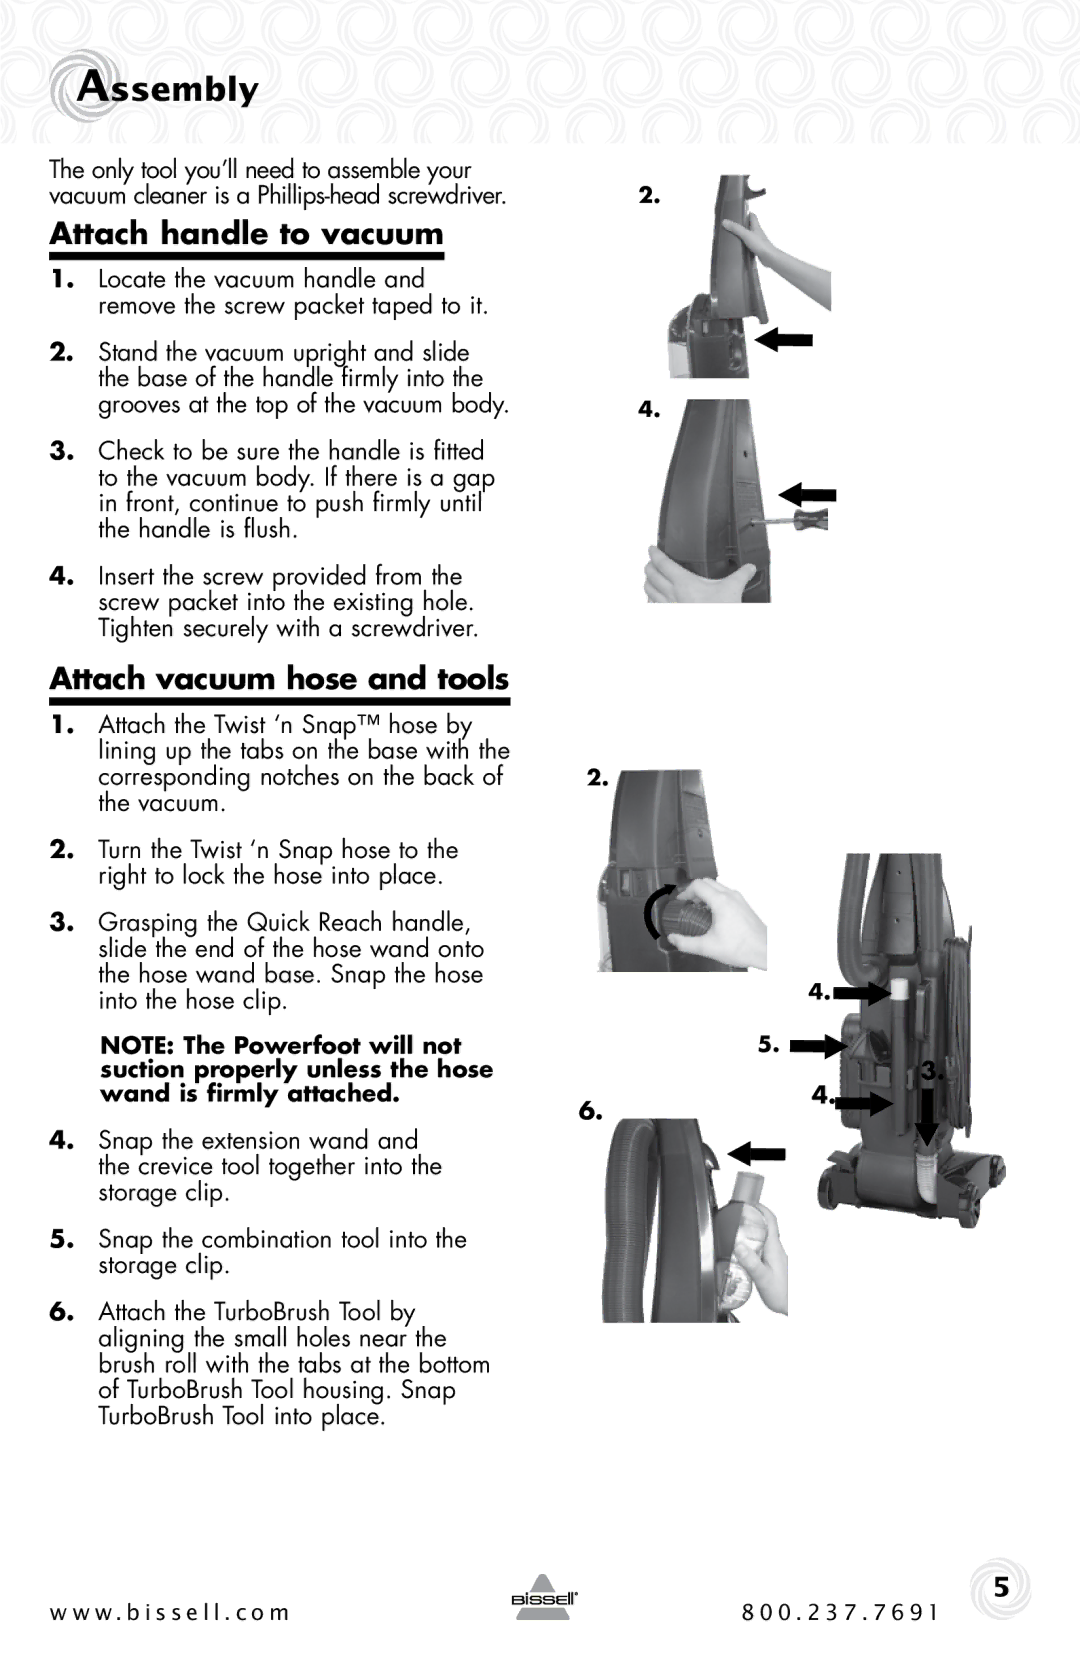
Attach handle to vacuum
1.Locate the vacuum handle and remove the screw packet taped to it.
2.Stand the vacuum upright and slide the base of the handle firmly into the grooves at the top of the vacuum body.
3.Check to be sure the handle is fitted to the vacuum body. If there is a gap in front, continue to push firmly until the handle is flush.
4.Insert the screw provided from the screw packet into the existing hole. Tighten securely with a screwdriver.
Attach vacuum hose and tools
1.Attach the Twist ‘n Snap™ hose by lining up the tabs on the base with the corresponding notches on the back of the vacuum.
2.Turn the Twist ‘n Snap hose to the right to lock the hose into place.
3.Grasping the Quick Reach handle, slide the end of the hose wand onto the hose wand base. Snap the hose into the hose clip.
NOTE: The Powerfoot will not suction properly unless the hose wand is firmly attached.
4.Snap the extension wand and the crevice tool together into the storage clip.
5.Snap the combination tool into the storage clip.
6.Attach the TurboBrush Tool by aligning the small holes near the brush roll with the tabs at the bottom of TurboBrush Tool housing. Snap TurboBrush Tool into place.
2.
4.
2.
4.
5.
6.4.
3.
5
w w w. b i s s e l l . c o m | 8 0 0 . 2 3 7 . 7 6 9 1 |