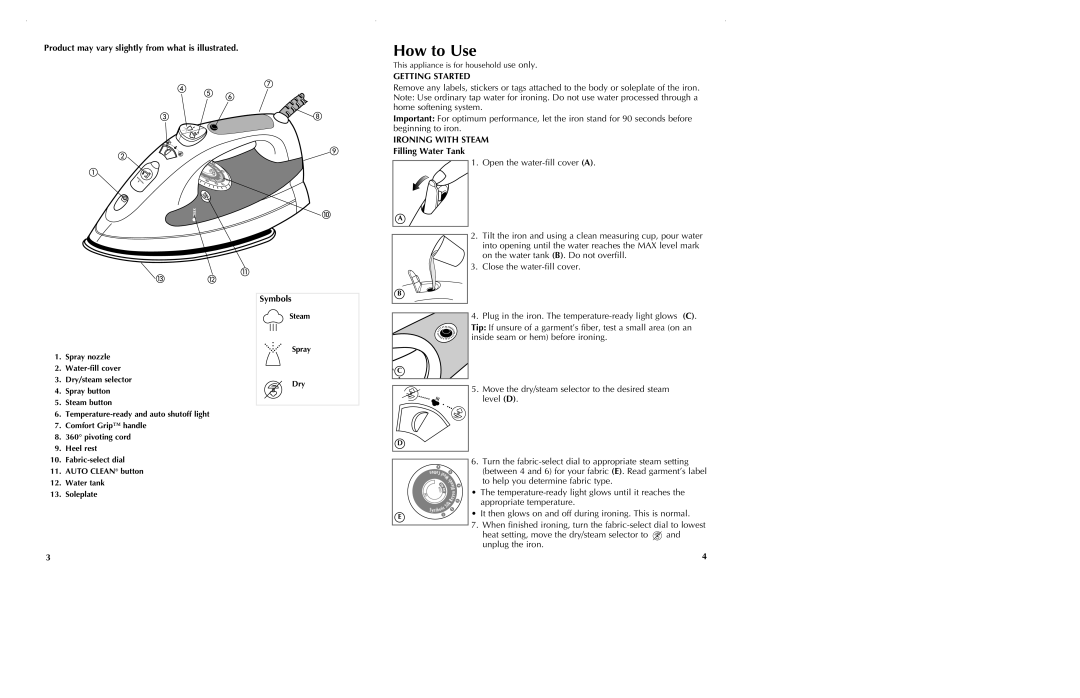
Product may vary slightly from what is illustrated.
Symbols
How to Use
This appliance is for household use only.
GETTING STARTED
Remove any labels, stickers or tags attached to the body or soleplate of the iron. Note: Use ordinary tap water for ironing. Do not use water processed through a home softening system.
Important: For optimum performance, let the iron stand for 90 seconds before beginning to iron.
IRONING WITH STEAM
Filling Water Tank
1. Open the
A
2.Tilt the iron and using a clean measuring cup, pour water into opening until the water reaches the MAX level mark on the water tank (B). Do not overfill.
3.Close the
B
1. | Spray nozzle |
2. | |
3. | Dry/steam selector |
4. | Spray button |
5. | Steam button |
6. | |
7. | Comfort Grip™ handle |
8. | 360° pivoting cord |
9. | Heel rest |
Steam
Spray
Dry
C |
D |
4. Plug in the iron. The
Tip: If unsure of a garment’s fiber, test a small area (on an inside seam or hem) before ironing.
5.Move the dry/steam selector to the desired steam level (D).
10. | |
11. | AUTO CLEAN® button |
12. | Water tank |
13. | Soleplate |
6. Turn the
• The
E | • It then glows on and off during ironing. This is normal. |
|
7.When finished ironing, turn the
heat setting, move the dry/steam selector to ![]() and unplug the iron.
and unplug the iron.
3
4