TO REDUCE THE RISK OF KICKBACK
• Keep a firm grip on saw with both hands at all times.
• Stay alert – exercise control.
• Support long overhanging materials. As the material is cut and weakens, it will sag, causing a pinched blade.
• Support large panels as shown (Figure C). Material supported only at the ends (Figure B) will lead to blade pinching.
• Avoid sawing overhead. Material can sag and will pinch blade.
• Insure that the material to be cut is clamped (Figure E) and solidly supported and balanced on a strong, stable and level work surface. Support the work so that the wide portion of the saw shoe is on the portion of the material that doesn’t fall after the cut is made. Never hold cut off piece by hand (Figure D).
• Keep blades sharp and clean.
• Use fence or straight edge guide when ripping. Be careful as the cut off strip can sag or twist, closing the cut and pinching the blade, leading to KICKBACK.
• Don’t force tool. Wood variables such as knots, hardness, toughness, wetness, pressure treated and freshly cut green lumber can heavily load the saw which can lead to stalling. Push the saw slower when this occurs.
• Don’t remove saw from work during a cut while the blade is moving.
• Allow saw to reach full speed before blade contacts material to be cut. Starting the saw with the blade against the work or pushed forward into cut can lead to stalling or sudden backward movement of saw.
• Never attempt to lift saw when making a bevel cut. This leads to blade binding and stalling.
• Always secure work to prevent workpiece movement during cut.
• Do not try to force saw back on line if your cut begins to go off line. This can cause KICKBACK. Stop saw and allow blade to coast down to a stop. Withdraw from cut and start a new cut on the line.
• Do not back up a rotating blade in the cut. Twisting the saw can cause the back edge of the blade to dig into the material, climb out of the work and run back toward the operator.
• Avoid cutting nails. Inspect for and remove all nails from lumber before cutting.
1 |
| |
| 6 | |
2 | 8 | |
3 | ||
| ||
4 | 5 | |
| ||
| 7 | |
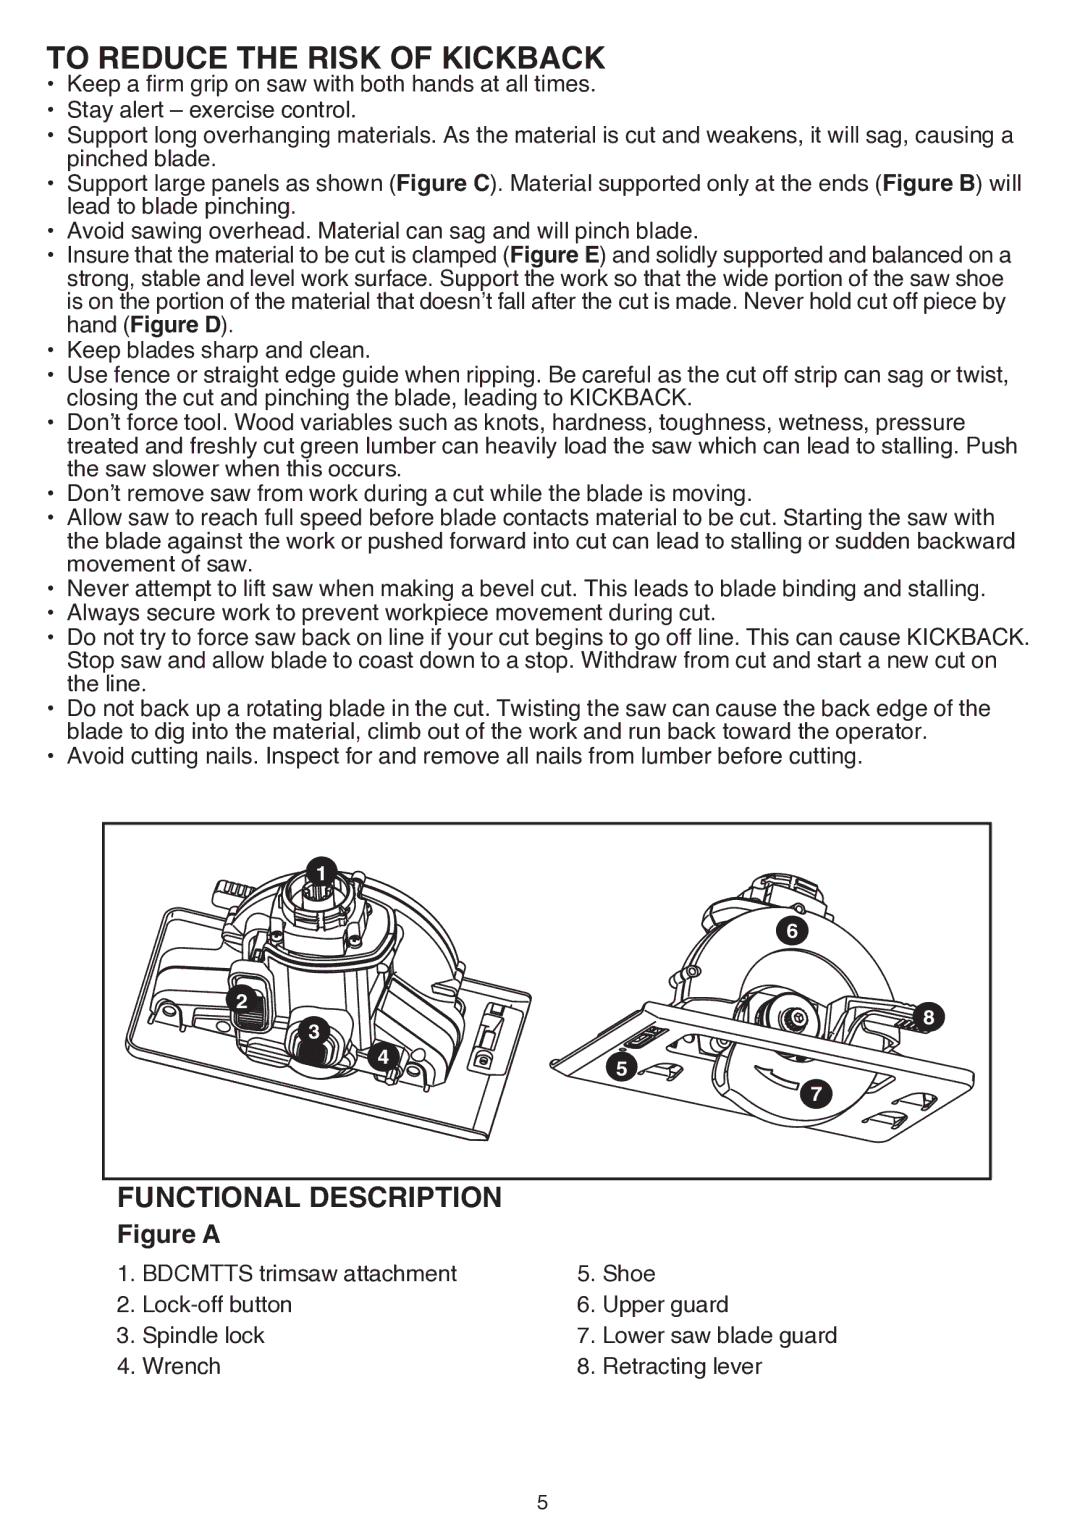
FUNCTIONAL DESCRIPTION |
|
Figure A
1. BDCMTTS trimsaw attachment | 5. Shoe | |
2. | 6. | Upper guard |
3. Spindle lock | 7. Lower saw blade guard | |
4. Wrench | 8. | Retracting lever |
5