
BX260, BX3500, BX210, BX180 specifications
Black & Decker has established itself as a reliable name in the realm of power tools and home improvement products, and its lineup of products including the BX180, BX210, BX3500, and BX260 exemplifies that commitment to quality and innovation. Each model is designed with specific features that cater to various needs, from DIY enthusiasts to professional users.The Black & Decker BX180 is a compact and lightweight electric hand mixer that offers a powerful 150-watt motor. It features five speed settings, allowing users to mix, whip, and knead a variety of ingredients with precision. The BX180 is equipped with a comfortable grip that ensures ease of use during extended periods, and its detachable stainless steel beaters make cleaning a breeze. This model is perfect for those who want reliable performance in a kitchen mixer without taking up too much space.
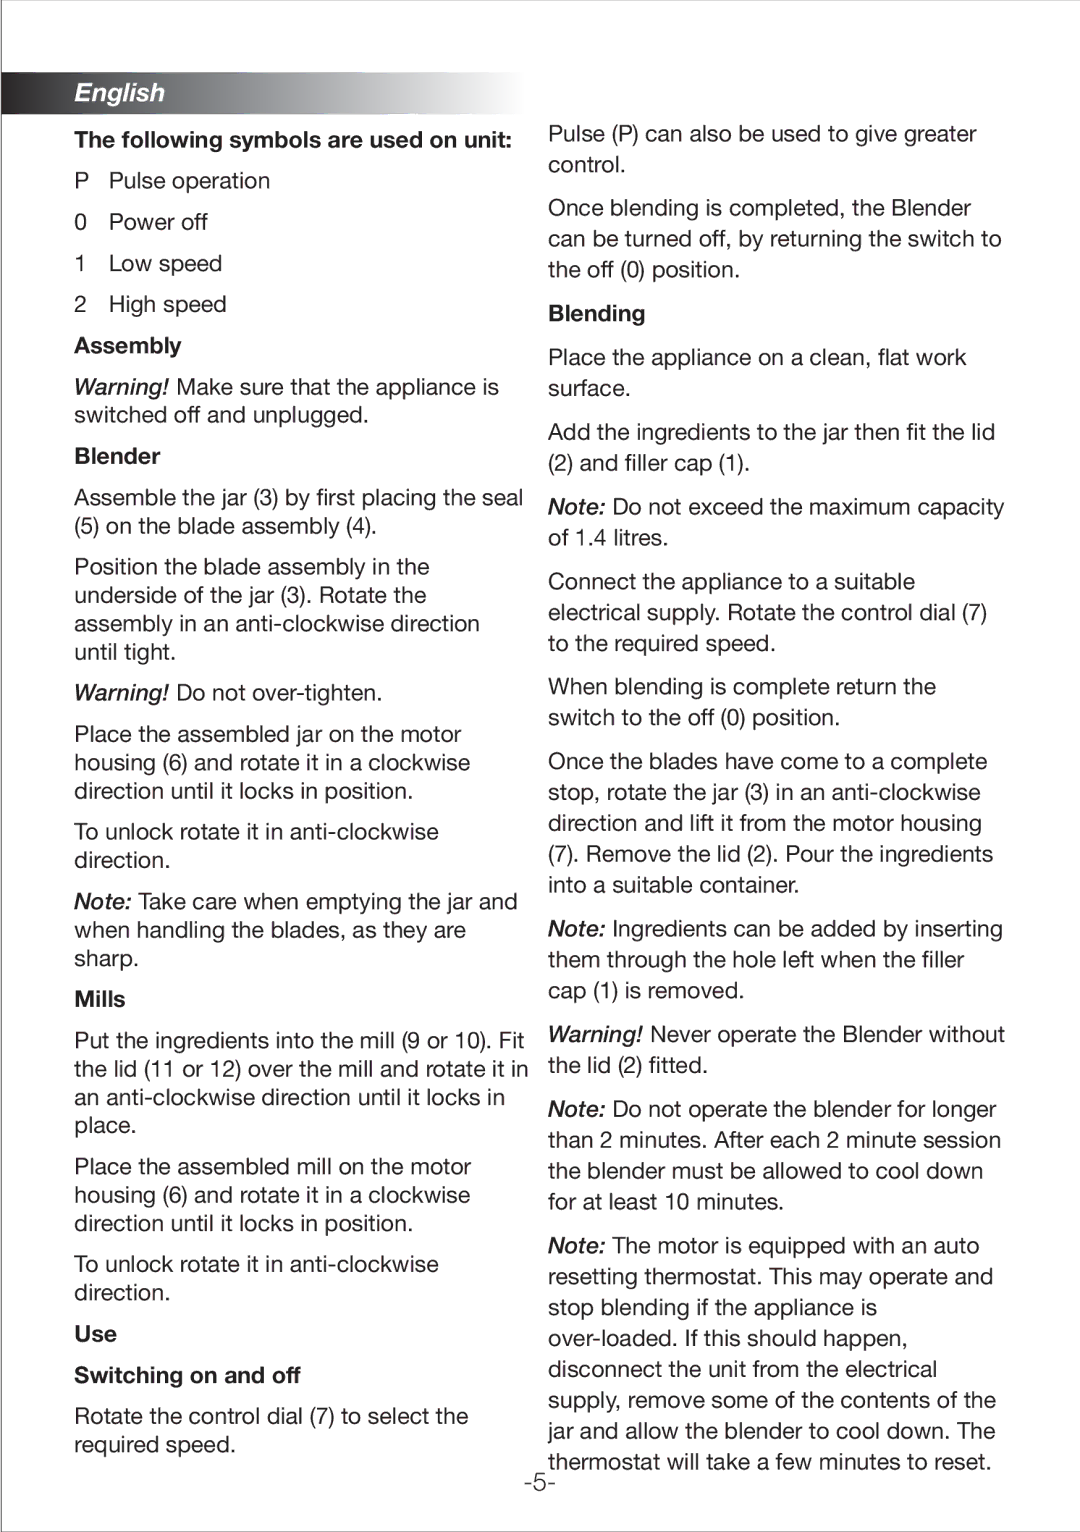
Moving on to the BX210, this model is a versatile and efficient blender that boasts a robust 500-watt motor, making it easy to blend smoothies, soups, and sauces with ease. It features a 1.5-liter glass jar that can handle both hot and cold ingredients, along with a pulse function for added control over blending tasks. The BX210 also includes stainless steel blades designed for maximum cutting efficiency, while its compact design allows for easy storage in small kitchens.
The Black & Decker BX3500 stands out as a powerful drilling and driving tool, ideal for heavy-duty tasks. It offers a variable speed of up to 1,600 RPM, giving users the flexibility to adapt to different materials, whether wood, metal, or masonry. This model includes an impressive 13mm keyless chuck for easy bit changes, along with an ergonomic handle that provides comfort and control. The BX3500 is particularly suitable for renovation projects and professional applications.
Finally, the BX260 is designed for those looking for a reliable and efficient steam iron. With a 1800-watt power output, it heats up quickly and delivers a continuous flow of steam for effortless wrinkle removal. The BX260 is equipped with a non-stick soleplate that glides smoothly over fabrics, while its variable steam control lets users adjust the steam output for various garment types. Safety is highlighted in this model with an automatic shut-off feature that kicks in when the iron is left unattended.
In summary, Black & Decker’s BX180, BX210, BX3500, and BX260 each bring unique features and technologies to the table, making them excellent choices for a variety of users. From mixing to blending, drilling to ironing, these tools reflect the brand’s dedication to performance, versatility, and user-friendly design. Whether you’re a hobbyist or a professional, Black & Decker has a solution for your needs.