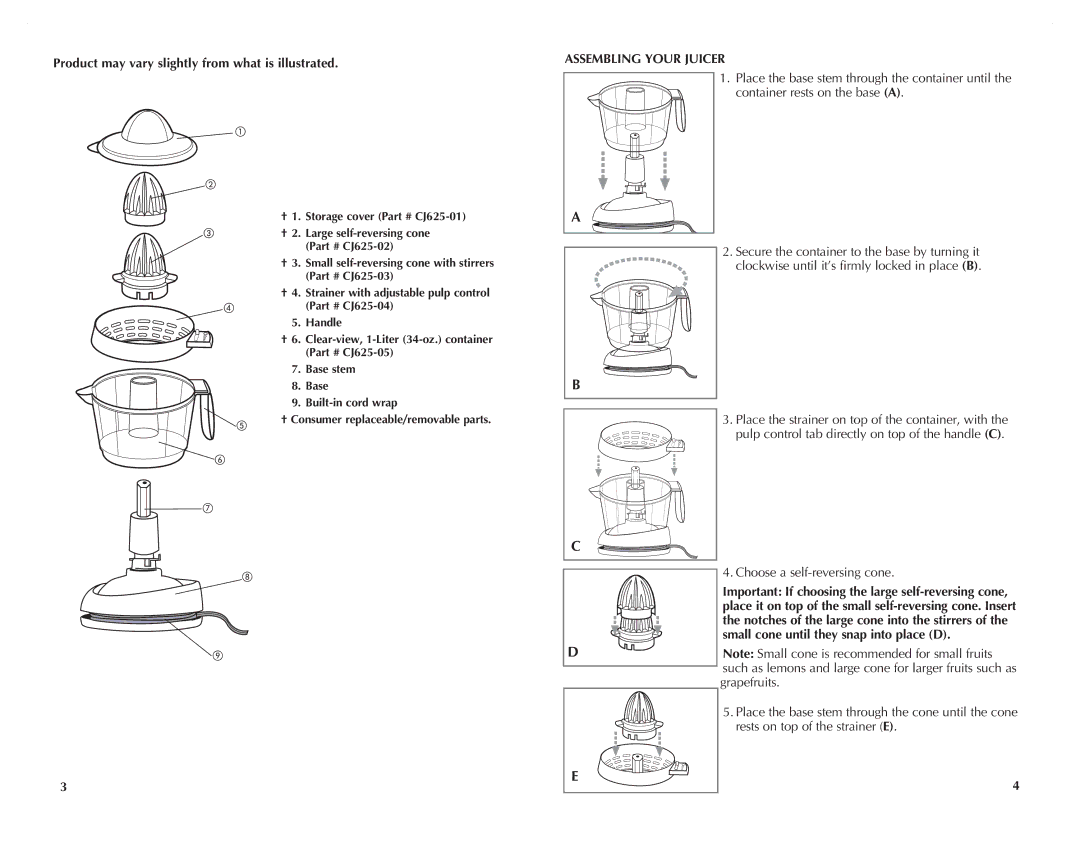
Product may vary slightly from what is illustrated.
| |
|
|
|
|
|
|
|
| † 1. | Storage cover (Part # |
|
| † 2. | Large |
|
|
| (Part # |
|
| † 3. | Small |
|
|
| (Part # |
|
| † 4. | Strainer with adjustable pulp control |
|
|
| (Part # |
|
| 5. | Handle |
|
| † 6. | |
|
|
| (Part # |
|
| 7. | Base stem |
|
| 8. | Base |
|
| 9. | |
| | † Consumer replaceable/removable parts. | |
|
|
| |
|
|
|
|
|
|
|
|
3
Assembling your Juicer
1. Place the base stem through the container until the container rests on the base (A).
A
2. Secure the container to the base by turning it clockwise until it’s firmly locked in place (B).
B
3. Place the strainer on top of the container, with the pulp control tab directly on top of the handle (C).
C
| 4. Choose a |
| Important: If choosing the large |
| place it on top of the small |
| the notches of the large cone into the stirrers of the |
| small cone until they snap into place (D). |
D | Note: Small cone is recommended for small fruits |
| such as lemons and large cone for larger fruits such as |
| grapefruits. |
| 5. Place the base stem through the cone until the cone |
| rests on top of the strainer (E). |
E | 4 |
|
