CHARGING THE POWER PACK
THE BATTERIES IN YOUR POWER PACK ARE NOT FULLY CHARGED AT THE FACTORY. BEFORE ATTEMPTING TO CHARGE THEM, THOROUGHLY READ ALL OF THE SAFETY INSTRUCTIONS.
The charger is designed to use standard household 120 volt 60 Hz power.
1.Plug the charger into any standard 120 Volt 60 Hz electrical outlet.
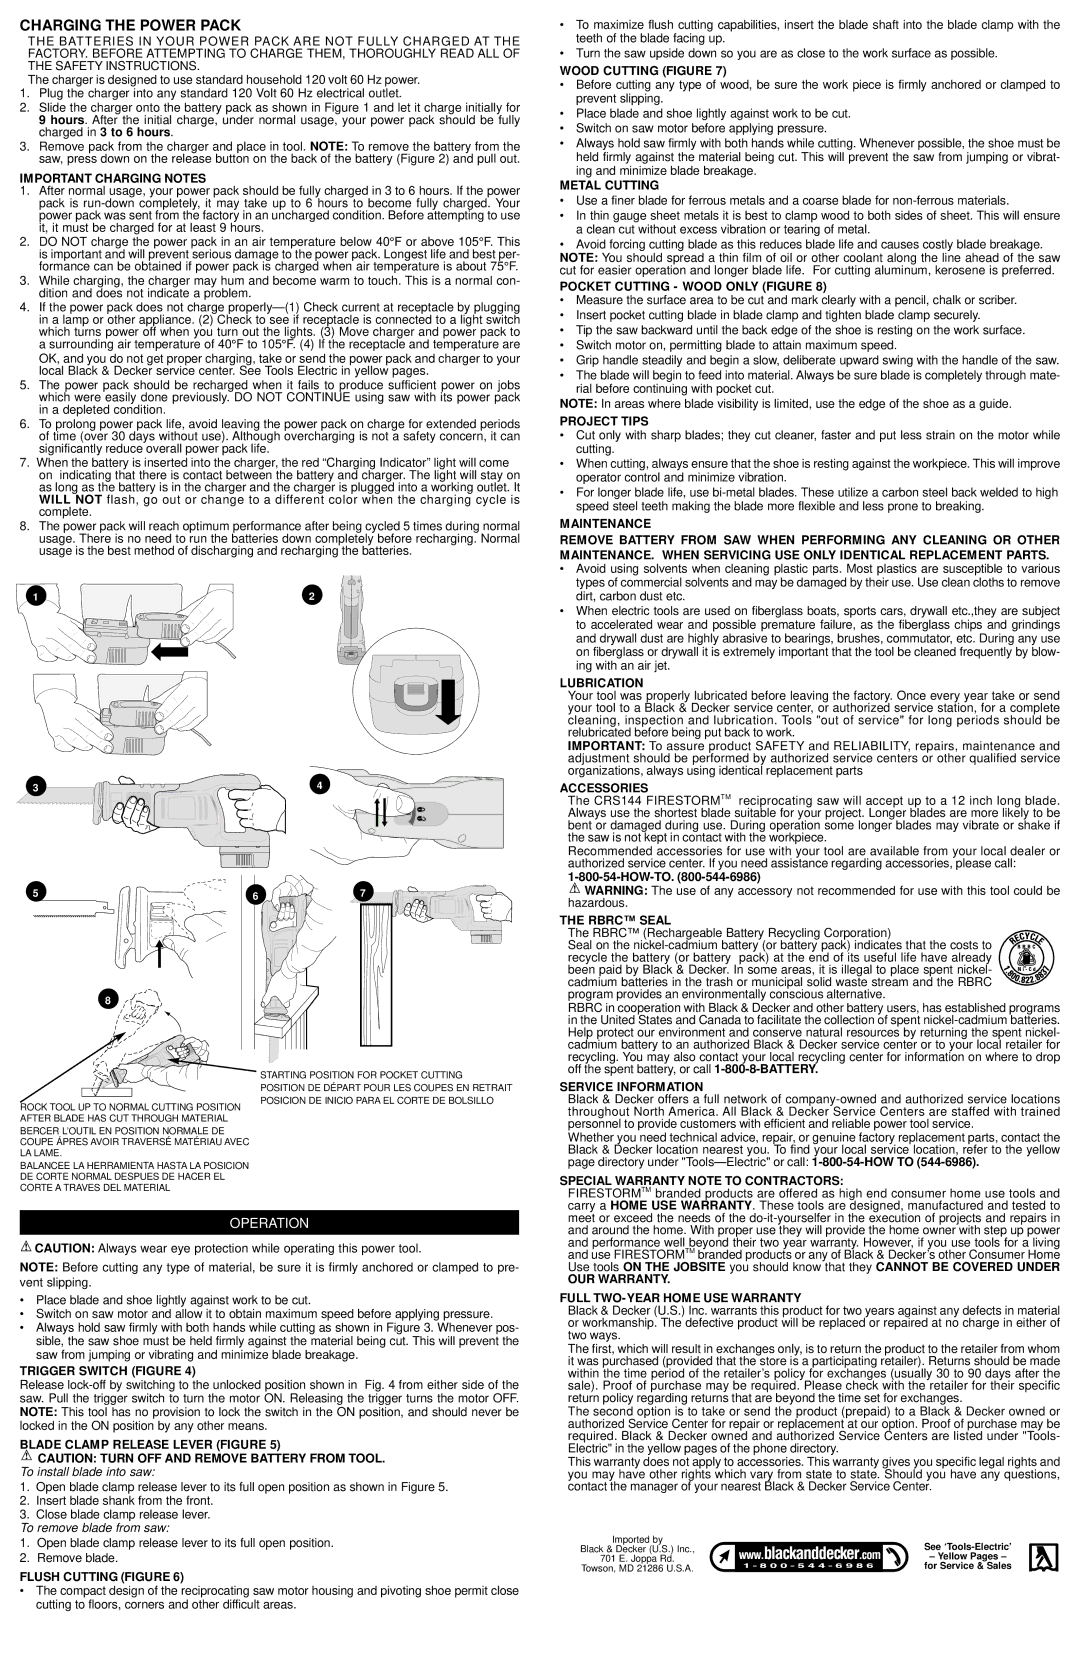
2.Slide the charger onto the battery pack as shown in Figure 1 and let it charge initially for 9 hours. After the initial charge, under normal usage, your power pack should be fully charged in 3 to 6 hours.
3.Remove pack from the charger and place in tool. NOTE: To remove the battery from the saw, press down on the release button on the back of the battery (Figure 2) and pull out.
IMPORTANT CHARGING NOTES
1.After normal usage, your power pack should be fully charged in 3 to 6 hours. If the power pack is run-down completely, it may take up to 6 hours to become fully charged. Your power pack was sent from the factory in an uncharged condition. Before attempting to use it, it must be charged for at least 9 hours.
2.DO NOT charge the power pack in an air temperature below 40°F or above 105°F. This is important and will prevent serious damage to the power pack. Longest life and best per- formance can be obtained if power pack is charged when air temperature is about 75°F.
3.While charging, the charger may hum and become warm to touch. This is a normal con- dition and does not indicate a problem.
4.If the power pack does not charge properly— (1) Check current at receptacle by plugging in a lamp or other appliance. (2) Check to see if receptacle is connected to a light switch which turns power off when you turn out the lights. (3) Move charger and power pack to a surrounding air temperature of 40°F to 105°F. (4) If the receptacle and temperature are
OK, and you do not get proper charging, take or send the power pack and charger to your local Black & Decker service center. See Tools Electric in yellow pages.
5.The power pack should be recharged when it fails to produce sufficient power on jobs which were easily done previously. DO NOT CONTINUE using saw with its power pack in a depleted condition.
6.To prolong power pack life, avoid leaving the power pack on charge for extended periods of time (over 30 days without use). Although overcharging is not a safety concern, it can significantly reduce overall power pack life.
7.When the battery is inserted into the charger, the red “Charging Indicator” light will come on indicating that there is contact between the battery and charger. The light will stay on as long as the battery is in the charger and the charger is plugged into a working outlet. It WILL NOT flash, go out or change to a different color when the charging cycle is complete.
8.The power pack will reach optimum performance after being cycled 5 times during normal usage. There is no need to run the batteries down completely before recharging. Normal usage is the best method of discharging and recharging the batteries.
•To maximize flush cutting capabilities, insert the blade shaft into the blade clamp with the teeth of the blade facing up.
•Turn the saw upside down so you are as close to the work surface as possible.
WOOD CUTTING (FIGURE 7)
•Before cutting any type of wood, be sure the work piece is firmly anchored or clamped to prevent slipping.
•Place blade and shoe lightly against work to be cut.
•Switch on saw motor before applying pressure.
•Always hold saw firmly with both hands while cutting. Whenever possible, the shoe must be held firmly against the material being cut. This will prevent the saw from jumping or vibrat- ing and minimize blade breakage.
METAL CUTTING
•Use a finer blade for ferrous metals and a coarse blade for non-ferrous materials.
•In thin gauge sheet metals it is best to clamp wood to both sides of sheet. This will ensure a clean cut without excess vibration or tearing of metal.
•Avoid forcing cutting blade as this reduces blade life and causes costly blade breakage.
NOTE: You should spread a thin film of oil or other coolant along the line ahead of the saw cut for easier operation and longer blade life. For cutting aluminum, kerosene is preferred.
POCKET CUTTING - WOOD ONLY (FIGURE 8)
•Measure the surface area to be cut and mark clearly with a pencil, chalk or scriber.
•Insert pocket cutting blade in blade clamp and tighten blade clamp securely.
•Tip the saw backward until the back edge of the shoe is resting on the work surface.
•Switch motor on, permitting blade to attain maximum speed.
•Grip handle steadily and begin a slow, deliberate upward swing with the handle of the saw.
•The blade will begin to feed into material. Always be sure blade is completely through mate- rial before continuing with pocket cut.
NOTE: In areas where blade visibility is limited, use the edge of the shoe as a guide.
PROJECT TIPS
•Cut only with sharp blades; they cut cleaner, faster and put less strain on the motor while cutting.
•When cutting, always ensure that the shoe is resting against the workpiece. This will improve operator control and minimize vibration.
•For longer blade life, use bi-metal blades. These utilize a carbon steel back welded to high speed steel teeth making the blade more flexible and less prone to breaking.
MAINTENANCE
REMOVE BATTERY FROM SAW WHEN PERFORMING ANY CLEANING OR OTHER MAINTENANCE. WHEN SERVICING USE ONLY IDENTICAL REPLACEMENT PARTS.
•Avoid using solvents when cleaning plastic parts. Most plastics are susceptible to various types of commercial solvents and may be damaged by their use. Use clean cloths to remove dirt, carbon dust etc.
•When electric tools are used on fiberglass boats, sports cars, drywall etc.,they are subject to accelerated wear and possible premature failure, as the fiberglass chips and grindings and drywall dust are highly abrasive to bearings, brushes, commutator, etc. During any use on fiberglass or drywall it is extremely important that the tool be cleaned frequently by blow- ing with an air jet.
LUBRICATION
Your tool was properly lubricated before leaving the factory. Once every year take or send your tool to a Black & Decker service center, or authorized service station, for a complete cleaning, inspection and lubrication. Tools "out of service" for long periods should be relubricated before being put back to work.
IMPORTANT: To assure product SAFETY and RELIABILITY, repairs, maintenance and adjustment should be performed by authorized service centers or other qualified service organizations, always using identical replacement parts
ACCESSORIES
The CRS144 FIRESTORMTM reciprocating saw will accept up to a 12 inch long blade. Always use the shortest blade suitable for your project. Longer blades are more likely to be bent or damaged during use. During operation some longer blades may vibrate or shake if the saw is not kept in contact with the workpiece.
Recommended accessories for use with your tool are available from your local dealer or authorized service center. If you need assistance regarding accessories, please call:
1-800-54-HOW-TO. (800-544-6986)
 WARNING: The use of any accessory not recommended for use with this tool could be hazardous.
THE RBRC™ SEAL
The RBRC™ (Rechargeable Battery Recycling Corporation)