D2000.Pub178674RV06 1/17/06 3:29 PM Page 6
"Auto Off" will flash in the unlighted window until the iron is unplugged. When the iron is picked up or moved, it will
scratch or discolor the iron.
•After cleaning, iron with steam over an old cloth to remove any residue from the steam vents.
About the
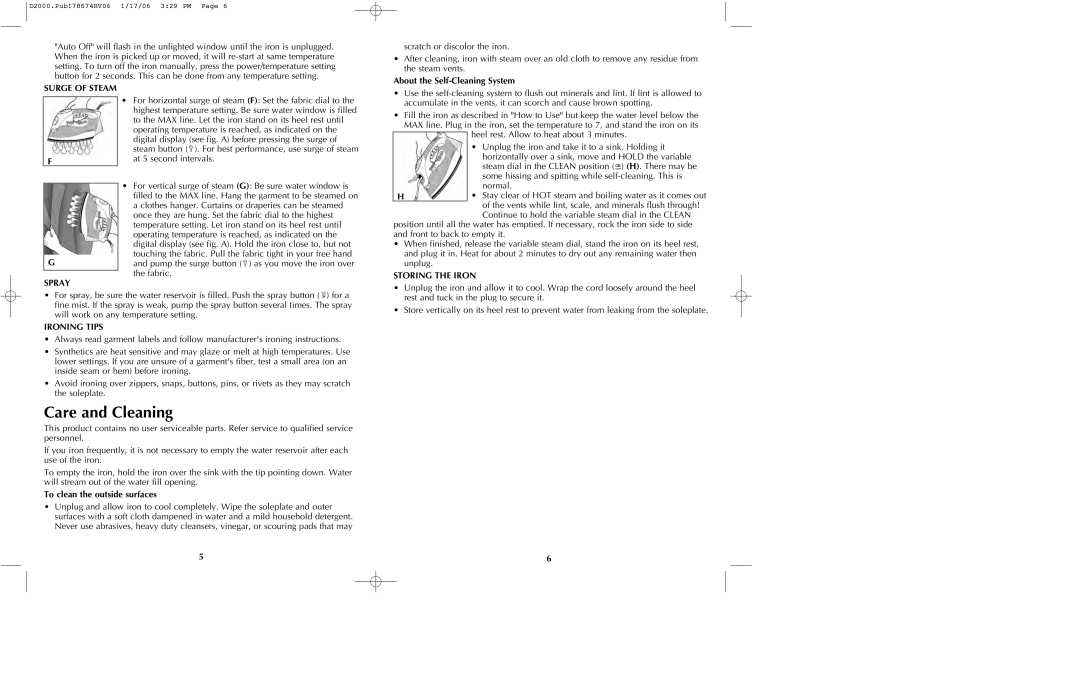
SURGE OF STEAM
F
G
SPRAY
•For horizontal surge of steam (F): Set the fabric dial to the highest temperature setting. Be sure water window is filled to the MAX line. Let the iron stand on its heel rest until operating temperature is reached, as indicated on the digital display (see fig. A) before pressing the surge of steam button ( ![]() ). For best performance, use surge of steam at 5 second intervals.
). For best performance, use surge of steam at 5 second intervals.
•For vertical surge of steam (G): Be sure water window is filled to the MAX line. Hang the garment to be steamed on a clothes hanger. Curtains or draperies can be steamed once they are hung. Set the fabric dial to the highest temperature setting. Let iron stand on its heel rest until operating temperature is reached, as indicated on the digital display (see fig. A). Hold the iron close to, but not touching the fabric. Pull the fabric tight in your free hand and pump the surge button ( ![]() ) as you move the iron over the fabric.
) as you move the iron over the fabric.
•Use the
•Fill the iron as described in "How to Use" but keep the water level below the MAX line. Plug in the iron, set the temperature to 7, and stand the iron on its
heel rest. Allow to heat about 3 minutes.
|
|
| • | Unplug the iron and take it to a sink. Holding it |
|
|
|
| horizontally over a sink, move and HOLD the variable |
|
|
|
| steam dial in the CLEAN position ( ) (H). There may be |
|
|
|
| some hissing and spitting while |
|
|
|
| normal. |
|
|
| • | Stay clear of HOT steam and boiling water as it comes out |
| H | |||
|
|
|
| of the vents while lint, scale, and minerals flush through! |
|
|
|
| Continue to hold the variable steam dial in the CLEAN |
position until all the water has emptied. If necessary, rock the iron side to side and front to back to empty it.
•When finished, release the variable steam dial, stand the iron on its heel rest, and plug it in. Heat for about 2 minutes to dry out any remaining water then unplug.
STORING THE IRON
• Unplug the iron and allow it to cool. Wrap the cord loosely around the heel |
•For spray, be sure the water reservoir is filled. Push the spray button ( ![]() ) for a fine mist. If the spray is weak, pump the spray button several times. The spray will work on any temperature setting.
) for a fine mist. If the spray is weak, pump the spray button several times. The spray will work on any temperature setting.
IRONING TIPS
•Always read garment labels and follow manufacturer's ironing instructions.
•Synthetics are heat sensitive and may glaze or melt at high temperatures. Use lower settings. If you are unsure of a garment's fiber, test a small area (on an inside seam or hem) before ironing.
•Avoid ironing over zippers, snaps, buttons, pins, or rivets as they may scratch the soleplate.
Care and Cleaning
This product contains no user serviceable parts. Refer service to qualified service personnel.
If you iron frequently, it is not necessary to empty the water reservoir after each use of the iron.
To empty the iron, hold the iron over the sink with the tip pointing down. Water will stream out of the water fill opening.
To clean the outside surfaces
•Unplug and allow iron to cool completely. Wipe the soleplate and outer surfaces with a soft cloth dampened in water and a mild household detergent. Never use abrasives, heavy duty cleansers, vinegar, or scouring pads that may
rest and tuck in the plug to secure it. |
• Store vertically on its heel rest to prevent water from leaking from the soleplate. |
5 | 6 |