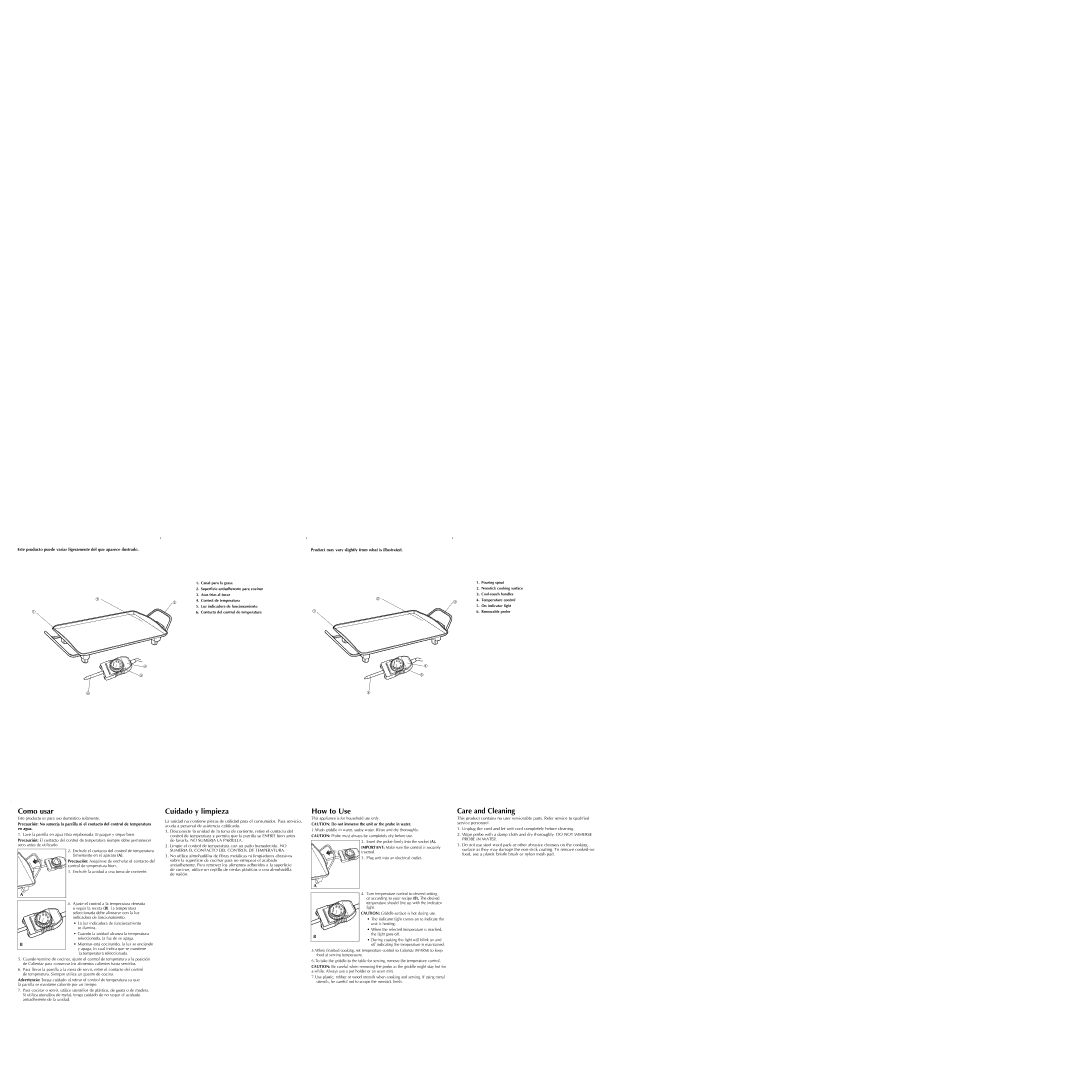
Este producto puede variar ligeramente del que aparece ilustrado.


1.

Canal para la grasa


2.

Superficie antiadherente para cocinar


3.

Asas frías al tocar


￿

￿

4.

Control de temperatura


5.

Luz indicadora de funcionamiento

￿


6. Contacto del control de temperatura

￿

￿

￿

Product may vary slightly from what is illustrated.


1.

Pouring spout


2.

Nonstick cooking surface


3.

Cool-touch handles


￿

￿

4.

Temperature control


5.

On indicator light

￿


6. Removable probe

￿

￿

￿

Como usar

Este producto es para uso doméstico solamente.

Precaución: No sumerja la parrilla ni el contacto del control de temperatura en agua.

1. Lave la parrilla en agua tibia enjabonada. Enjuague y seque bien.

Precaución: El contacto del control de temperatura siempre debe permanecer seco antes de utilizarlo.

Cuidado y limpieza

La unidad no contiene piezas de utilidad para el consumidor. Para servicio, acuda a personal de asistencia calificado.

1.

Desconecte la unidad de la toma de corriente, retire el contacto del


control de temperatura y permita que la parrilla se ENFRÍE bien antes


de lavarla. NO SUMERJA LA PARRILLA.

2.

Limpie el control de temperatura con un paño humedecido. NO

How to Use

This appliance is for household use only.

CAUTION: Do not immerse the unit or the probe in water.

1.Wash griddle in warm, sudsy water. Rinse and dry thoroughly. CAUTION: Probe must always be completely dry before use.

2. Insert the probe firmly into the socket (A). IMPORTANT: Make sure the control is securely

Care and Cleaning

This product contains no user serviceable parts. Refer service to qualified service personnel.

1.

Unplug the cord and let unit cool completely before cleaning.

2.

Wipe probe with a damp cloth and dry thoroughly. DO NOT IMMERSE


PROBE IN WATER.

3.

Do not use steel wool pads or other abrasive cleaners on the cooking

A

2.Enchufe el contacto del control de temperatura firmemente en el aparato (A).

Precaución: Asegúrese de enchufar el contacto del control de temperatura bien.

3. Enchufe la unidad a una toma de corriente.

4. Ajuste el control a la temperatura deseada

o según la receta (B). La temperatura

seleccionada debe alinearse con la luz

indicadora de funcionamiento.

• La luz indicadora de funcionamiento

se ilumina.

• Cuando la unidad alcanza la temperatura

seleccionada, la luz de se apaga.

• Mientras está cocinando, la luz se enciende

y apaga, lo cual indica que se mantiene

SUMERJA EL CONTACTO DEL CONTROL DE TEMPERATURA.

3. No utilice almohadillas de fibras metálicas ni limpiadores abrasivos

sobre la superficie de cocinar para no estropear el acabado

antiadherente. Para remover los alimentos adheridos a la superficie

de cocinar, utilice un cepillo de cerdas plásticas o una almohadilla

de nailón.

A

B

inserted.

3. Plug unit into an electrical outlet.

4.Turn temperature control to desired setting or according to your recipe (B). The desired temperature should line up with the indicator light.

CAUTION: Griddle surface is hot during use.

The indicator light comes on to indicate the unit is heating.

When the selected temperature is reached, the light goes off.

During cooking the light will blink on and off indicating the temperature is maintained.

surface as they may damage the non-stick coating. To remove cooked-on

food, use a plastic bristle brush or nylon mesh pad.

la temperatura seleccionada.

5. When finished cooking, set temperature control to Calentar (WARM) to keep

food at serving temperature.

5.Cuando termine de cocinar, ajuste el control de temperatura a la posición de Calientar para conservar los alimentos calientes hasta servirlos.

6.Para llevar la parrilla a la mesa de servir, retire el contacto del control de temperatura. Siempre utilice un guante de cocina.

Advertencia: Tenga cuidado al retirar el control de temperatura ya que la parrilla se mantiene caliente por un tiempo.

7.Para cocinar o servir, utilice utensilios de plástico, de goma o de madera. Si utiliza utensilios de metal, tenga cuidado de no raspar el acabado antiadherente de la unidad.

6. To take the griddle to the table for serving, remove the temperature control.

CAUTION: Be careful when removing the probe as the griddle might stay hot for a while. Always use a pot holder or an oven mitt.

7.Use plastic, rubber or wood utensils when cooking and serving. If using metal utensils, be careful not to scrape the nonstick finish.

Page 2
Image 2
Black & Decker EG70-CL Como usar, Cuidado y limpieza, How to Use, Care and Cleaning, Contacto del control de temperatura

EG70-CL specifications

Black & Decker has long been a trusted name in power tools and home improvement products, and the EG70-CL electric garden cultivator is no exception. This versatile and efficient tool is designed to make gardening tasks easier, allowing users to cultivate, aerate, and prepare their soil with minimal effort.

One of the main features of the EG70-CL is its powerful 700-watt motor, which delivers consistent performance for a variety of gardening tasks. This robust motor provides ample power to break up tough soil, making it an ideal choice for both novice gardeners and seasoned horticulturists alike. Additionally, the cultivator is equipped with a 40 cm working width, enabling users to cover a larger area in a shorter amount of time.

The Black & Decker EG70-CL boasts a set of durable steel tines that provide exceptional penetration into the soil. These tines are designed for maximum efficiency, allowing the cultivator to effortlessly break up compacted earth and mix in compost or fertilizer. The adjustable depth control feature allows users to choose the desired cultivation depth, facilitating the proper care for various types of plants and soil conditions.

Another notable characteristic of the EG70-CL is its lightweight and ergonomic design. Weighing in at just 12 kg, this cultivator is easy to maneuver, reducing user strain during extended gardening sessions. The soft-grip handle enhances comfort, providing a secure grip that ensures stability while in use.

In terms of technology, the Black & Decker EG70-CL features a safety lock-off switch that prevents accidental starts, ensuring peace of mind for users of all experience levels. The electric design eliminates the need for gas or oil, making it an eco-friendly option that generates no emissions, which is particularly appealing for environmentally conscious gardeners.

Furthermore, the EG70-CL's compact size allows for easy storage, while the straightforward assembly process gets users started with minimal fuss. Maintenance is also hassle-free, as electric tools require less upkeep compared to their gas-powered counterparts.

In summary, the Black & Decker EG70-CL electric garden cultivator combines power, efficiency, and user-friendly features in a single, reliable tool. With its robust motor, adjustable tines, and ergonomic design, it stands out as a valuable addition to any gardener's toolkit, simplifying the process of soil preparation and cultivation. Whether you are starting a new garden or maintaining an existing one, the EG70-CL is sure to enhance your gardening experience.