2
3 | 4 |
|
5
USE OF EXTENSION CORDS
Make sure the extension cord is in good condition before using. Always use the proper size extension cords with the tool – that is, proper wire size for various lengths of cord and heavy enough to carry the current the tool will draw. Use of an undersized cord will cause a drop in line voltage resulting in loss of power and overheating. For proper size cords see chart below.
|
|
| Minimum Gage for Cord Sets | |||
Volts |
| Total Length of Cord in Feet | ||||
120V |
| |||||
240V |
| |||||
Ampere Rating |
|
|
| |||
More | Not more | American Wire Gage |
| |||
Than | Than |
|
|
|
| |
0 | - | 6 | 18 | 16 | 16 | 14 |
6 | - | 10 | 18 | 16 | 14 | 12 |
10 | - | 12 | 16 | 16 | 14 | 12 |
12 | - | 16 | 14 | 12 | Not Recommended | |
MOTOR
Your Black & Decker tool is powered by a Black &
SAVE THESE INSTRUCTIONS
ASSEMBLY/ADJUSTMENT SET-UP
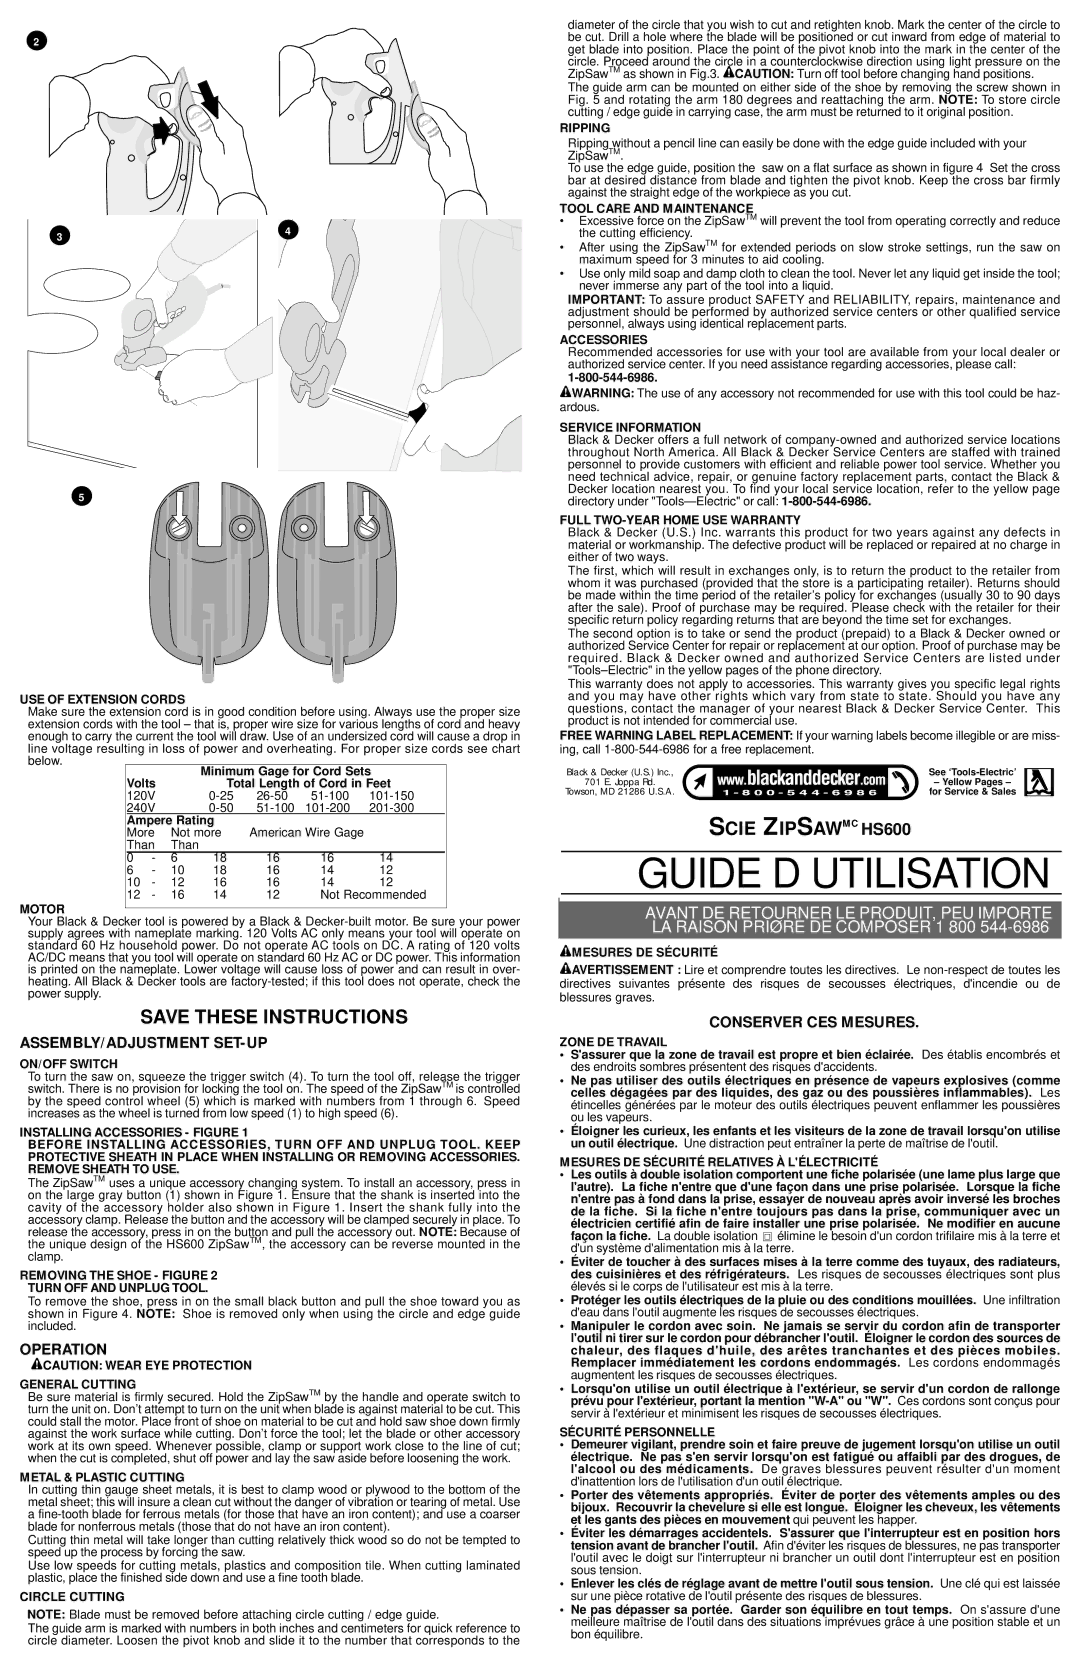
ON/OFF SWITCH
To turn the saw on, squeeze the trigger switch (4). To turn the tool off, release the trigger switch. There is no provision for locking the tool on. The speed of the ZipSawTM is controlled by the speed control wheel (5) which is marked with numbers from 1 through 6. Speed increases as the wheel is turned from low speed (1) to high speed (6).
INSTALLING ACCESSORIES - FIGURE 1
BEFORE INSTALLING ACCESSORIES, TURN OFF AND UNPLUG TOOL. KEEP PROTECTIVE SHEATH IN PLACE WHEN INSTALLING OR REMOVING ACCESSORIES. REMOVE SHEATH TO USE.
The ZipSawTM uses a unique accessory changing system. To install an accessory, press in on the large gray button (1) shown in Figure 1. Ensure that the shank is inserted into the cavity of the accessory holder also shown in Figure 1. Insert the shank fully into the accessory clamp. Release the button and the accessory will be clamped securely in place. To release the accessory, press in on the button and pull the accessory out. NOTE: Because of the unique design of the HS600 ZipSawTM, the accessory can be reverse mounted in the clamp.
REMOVING THE SHOE - FIGURE 2
TURN OFF AND UNPLUG TOOL.
To remove the shoe, press in on the small black button and pull the shoe toward you as shown in Figure 4. NOTE: Shoe is removed only when using the circle and edge guide included.
OPERATION
![]() CAUTION: WEAR EYE PROTECTION
CAUTION: WEAR EYE PROTECTION
GENERAL CUTTING
Be sure material is firmly secured. Hold the ZipSawTM by the handle and operate switch to turn the unit on. Don’t attempt to turn on the unit when blade is against material to be cut. This could stall the motor. Place front of shoe on material to be cut and hold saw shoe down firmly against the work surface while cutting. Don’t force the tool; let the blade or other accessory work at its own speed. Whenever possible, clamp or support work close to the line of cut; when the cut is completed, shut off power and lay the saw aside before loosening the work.
METAL & PLASTIC CUTTING
In cutting thin gauge sheet metals, it is best to clamp wood or plywood to the bottom of the metal sheet; this will insure a clean cut without the danger of vibration or tearing of metal. Use a
Cutting thin metal will take longer than cutting relatively thick wood so do not be tempted to speed up the process by forcing the saw.
Use low speeds for cutting metals, plastics and composition tile. When cutting laminated plastic, place the finished side down and use a fine tooth blade.
CIRCLE CUTTING
NOTE: Blade must be removed before attaching circle cutting / edge guide.
The guide arm is marked with numbers in both inches and centimeters for quick reference to circle diameter. Loosen the pivot knob and slide it to the number that corresponds to the
diameter of the circle that you wish to cut and retighten knob. Mark the center of the circle to be cut. Drill a hole where the blade will be positioned or cut inward from edge of material to get blade into position. Place the point of the pivot knob into the mark in the center of the circle. Proceed around the circle in a counterclockwise direction using light pressure on the ZipSawTM as shown in Fig.3. ![]() CAUTION: Turn off tool before changing hand positions.
CAUTION: Turn off tool before changing hand positions.
The guide arm can be mounted on either side of the shoe by removing the screw shown in Fig. 5 and rotating the arm 180 degrees and reattaching the arm. NOTE: To store circle cutting / edge guide in carrying case, the arm must be returned to it original position.
RIPPING
Ripping without a pencil line can easily be done with the edge guide included with your ZipSawTM.
To use the edge guide, position the saw on a flat surface as shown in figure 4 Set the cross bar at desired distance from blade and tighten the pivot knob. Keep the cross bar firmly against the straight edge of the workpiece as you cut.
TOOL CARE AND MAINTENANCE
•Excessive force on the ZipSawTM will prevent the tool from operating correctly and reduce the cutting efficiency.
•After using the ZipSawTM for extended periods on slow stroke settings, run the saw on maximum speed for 3 minutes to aid cooling.
•Use only mild soap and damp cloth to clean the tool. Never let any liquid get inside the tool; never immerse any part of the tool into a liquid.
IMPORTANT: To assure product SAFETY and RELIABILITY, repairs, maintenance and adjustment should be performed by authorized service centers or other qualified service personnel, always using identical replacement parts.
ACCESSORIES
Recommended accessories for use with your tool are available from your local dealer or authorized service center. If you need assistance regarding accessories, please call:
![]() WARNING: The use of any accessory not recommended for use with this tool could be haz- ardous.
WARNING: The use of any accessory not recommended for use with this tool could be haz- ardous.
SERVICE INFORMATION
Black & Decker offers a full network of
FULL TWO-YEAR HOME USE WARRANTY
Black & Decker (U.S.) Inc. warrants this product for two years against any defects in material or workmanship. The defective product will be replaced or repaired at no charge in either of two ways.
The first, which will result in exchanges only, is to return the product to the retailer from whom it was purchased (provided that the store is a participating retailer). Returns should be made within the time period of the retailer’s policy for exchanges (usually 30 to 90 days after the sale). Proof of purchase may be required. Please check with the retailer for their specific return policy regarding returns that are beyond the time set for exchanges.
The second option is to take or send the product (prepaid) to a Black & Decker owned or authorized Service Center for repair or replacement at our option. Proof of purchase may be required. Black & Decker owned and authorized Service Centers are listed under
This warranty does not apply to accessories. This warranty gives you specific legal rights and you may have other rights which vary from state to state. Should you have any questions, contact the manager of your nearest Black & Decker Service Center. This product is not intended for commercial use.
FREE WARNING LABEL REPLACEMENT: If your warning labels become illegible or are miss- ing, call
Black & Decker (U.S.) Inc., |
| See |
701 E. Joppa Rd. |
| – Yellow Pages – |
Towson, MD 21286 U.S.A. |
| for Service & Sales |
| ||
|
|
|
SCIE ZIPSAWMC HS600
GUIDE D’UTILISATION
AVANT DE RETOURNER LE PRODUIT, PEU IMPORTE
LA RAISON PRIÈRE DE COMPOSER 1 800
 MESURES DE SÉCURITÉ
![]() AVERTISSEMENT : Lire et comprendre toutes les directives. Le
AVERTISSEMENT : Lire et comprendre toutes les directives. Le
CONSERVER CES MESURES.
ZONE DE TRAVAIL
•S'assurer que la zone de travail est propre et bien éclairée. Des établis encombrés et des endroits sombres présentent des risques d'accidents.
•Ne pas utiliser des outils électriques en présence de vapeurs explosives (comme celles dégagées par des liquides, des gaz ou des poussières inflammables). Les étincelles générées par le moteur des outils électriques peuvent enflammer les poussières ou les vapeurs.
•Éloigner les curieux, les enfants et les visiteurs de la zone de travail lorsqu'on utilise un outil électrique. Une distraction peut entraîner la perte de maîtrise de l'outil.
MESURES DE SÉCURITÉ RELATIVES À L'ÉLECTRICITÉ
•Les outils à double isolation comportent une fiche polarisée (une lame plus large que l'autre). La fiche n'entre que d'une façon dans une prise polarisée. Lorsque la fiche n'entre pas à fond dans la prise, essayer de nouveau après avoir inversé les broches de la fiche. Si la fiche n'entre toujours pas dans la prise, communiquer avec un électricien certifié afin de faire installer une prise polarisée. Ne modifier en aucune façon la fiche. La double isolation ![]() élimine le besoin d'un cordon trifilaire mis à la terre et d'un système d'alimentation mis à la terre.
élimine le besoin d'un cordon trifilaire mis à la terre et d'un système d'alimentation mis à la terre.
•Éviter de toucher à des surfaces mises à la terre comme des tuyaux, des radiateurs, des cuisinières et des réfrigérateurs. Les risques de secousses électriques sont plus élevés si le corps de l'utilisateur est mis à la terre.
•Protéger les outils électriques de la pluie ou des conditions mouillées. Une infiltration d'eau dans l'outil augmente les risques de secousses électriques.
•Manipuler le cordon avec soin. Ne jamais se servir du cordon afin de transporter l'outil ni tirer sur le cordon pour débrancher l'outil. Éloigner le cordon des sources de chaleur, des flaques d'huile, des arêtes tranchantes et des pièces mobiles. Remplacer immédiatement les cordons endommagés. Les cordons endommagés augmentent les risques de secousses électriques.
•Lorsqu'on utilise un outil électrique à l'extérieur, se servir d'un cordon de rallonge prévu pour l'extérieur, portant la mention
SÉCURITÉ PERSONNELLE
•Demeurer vigilant, prendre soin et faire preuve de jugement lorsqu'on utilise un outil électrique. Ne pas s'en servir lorsqu'on est fatigué ou affaibli par des drogues, de l'alcool ou des médicaments. De graves blessures peuvent résulter d'un moment d'inattention lors de l'utilisation d'un outil électrique.
•Porter des vêtements appropriés. Éviter de porter des vêtements amples ou des bijoux. Recouvrir la chevelure si elle est longue. Éloigner les cheveux, les vêtements et les gants des pièces en mouvement qui peuvent les happer.
•Éviter les démarrages accidentels. S'assurer que l'interrupteur est en position hors tension avant de brancher l'outil.Afin d'éviter les risques de blessures, ne pas transporter l'outil avec le doigt sur l'interrupteur ni brancher un outil dont l'interrupteur est en position sous tension.
•Enlever les clés de réglage avant de mettre l'outil sous tension. Une clé qui est laissée sur une pièce rotative de l'outil présente des risques de blessures.
•Ne pas dépasser sa portée. Garder son équilibre en tout temps. On s'assure d'une meilleure maîtrise de l'outil dans des situations imprévues grâce à une position stable et un bon équilibre.