TCM850Pub1000001038R1 10/20/05 9:02 AM Page 6

THERMAL CARAFE

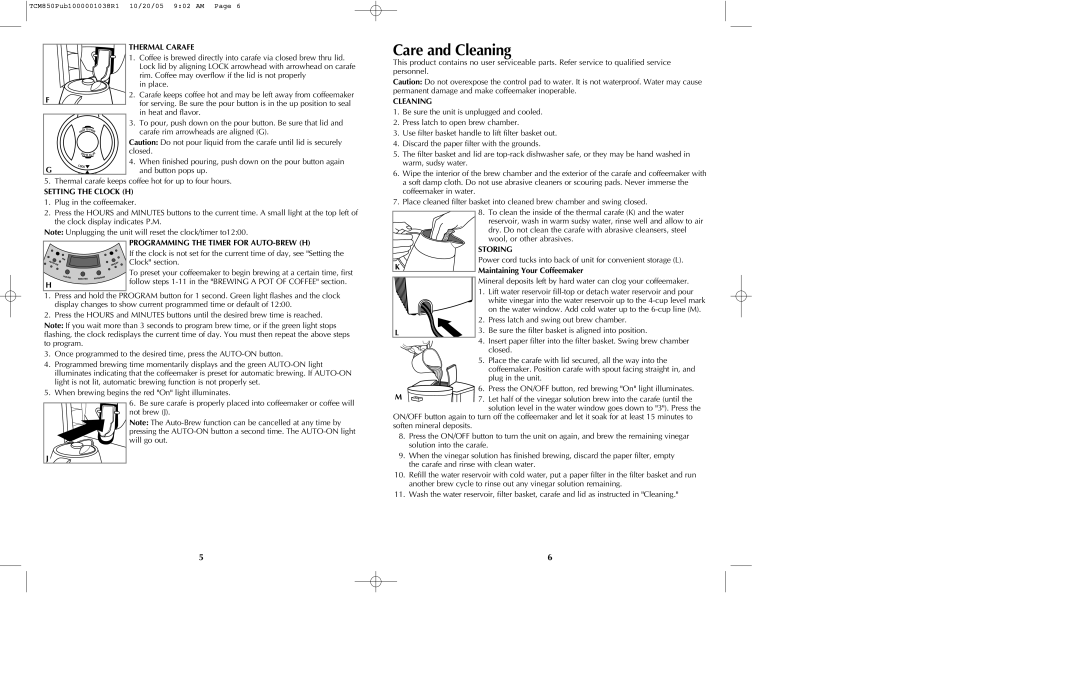
1. Coffee is brewed directly into carafe via closed brew thru lid. Lock lid by aligning LOCK arrowhead with arrowhead on carafe

rim. Coffee may overflow if the lid is not properly

in place.

2. Carafe keeps coffee hot and may be left away from coffeemaker

Ffor serving. Be sure the pour button is in the up position to seal in heat and flavor.

3. To pour, push down on the pour button. Be sure that lid and carafe rim arrowheads are aligned (G).

Caution: Do not pour liquid from the carafe until lid is securely closed.

G

4. When finished pouring, push down on the pour button again

and button pops up.

5.Thermal carafe keeps coffee hot for up to four hours.

SETTING THE CLOCK (H)

1.Plug in the coffeemaker.

2.Press the HOURS and MINUTES buttons to the current time. A small light at the top left of the clock display indicates P.M.

Note: Unplugging the unit will reset the clock/timer to12:00.

PROGRAMMING THE TIMER FOR AUTO-BREW (H)

If the clock is not set for the current time of day, see "Setting the

Clock" section.


To preset your coffeemaker to begin brewing at a certain time, first

H

follow steps 1-11 in the "BREWING A POT OF COFFEE" section.


1.Press and hold the PROGRAM button for 1 second. Green light flashes and the clock display changes to show current programmed time or default of 12:00.

2.Press the HOURS and MINUTES buttons until the desired brew time is reached.

Note: If you wait more than 3 seconds to program brew time, or if the green light stops flashing, the clock redisplays the current time of day. You must then repeat the above steps to program.

3.Once programmed to the desired time, press the AUTO-ON button.

4.Programmed brewing time momentarily displays and the green AUTO-ON light illuminates indicating that the coffeemaker is preset for automatic brewing. If AUTO-ON light is not lit, automatic brewing function is not properly set.

5.When brewing begins the red "On" light illuminates.

6. Be sure carafe is properly placed into coffeemaker or coffee will

not brew (J).

Note: The Auto-Brew function can be cancelled at any time by pressing the AUTO-ON button a second time. The AUTO-ON light will go out.

J

Care and Cleaning

This product contains no user serviceable parts. Refer service to qualified service personnel.

Caution: Do not overexpose the control pad to water. It is not waterproof. Water may cause permanent damage and make coffeemaker inoperable.

CLEANING

1.Be sure the unit is unplugged and cooled.

2.Press latch to open brew chamber.

3.Use filter basket handle to lift filter basket out.

4.Discard the paper filter with the grounds.

5.The filter basket and lid are top-rack dishwasher safe, or they may be hand washed in warm, sudsy water.

6.Wipe the interior of the brew chamber and the exterior of the carafe and coffeemaker with a soft damp cloth. Do not use abrasive cleaners or scouring pads. Never immerse the coffeemaker in water.

7.Place cleaned filter basket into cleaned brew chamber and swing closed.

8.To clean the inside of the thermal carafe (K) and the water reservoir, wash in warm sudsy water, rinse well and allow to air

dry. Do not clean the carafe with abrasive cleansers, steel wool, or other abrasives.


STORING

K

Power cord tucks into back of unit for convenient storage (L).

Maintaining Your Coffeemaker


Mineral deposits left by hard water can clog your coffeemaker.


1.

Lift water reservoir fill-top or detach water reservoir and pour


white vinegar into the water reservoir up to the 4-cup level mark


on the water window. Add cold water up to the 6-cup line (M).


2.

Press latch and swing out brew chamber.

L

3. Be sure the filter basket is aligned into position.


4.

Insert paper filter into the filter basket. Swing brew chamber


closed.


5.

Place the carafe with lid secured, all the way into the


coffeemaker. Position carafe with spout facing straight in, and


plug in the unit.

M

6.

Press the ON/OFF button, red brewing "On" light illuminates.

7. Let half of the vinegar solution brew into the carafe (until the


solution level in the water window goes down to "3"). Press the

ON/OFF button again to turn off the coffeemaker and let it soak for at least 15 minutes to soften mineral deposits.

8.Press the ON/OFF button to turn the unit on again, and brew the remaining vinegar solution into the carafe.

9.When the vinegar solution has finished brewing, discard the paper filter, empty the carafe and rinse with clean water.

10.Refill the water reservoir with cold water, put a paper filter in the filter basket and run another brew cycle to rinse out any vinegar solution remaining.

11.Wash the water reservoir, filter basket, carafe and lid as instructed in "Cleaning."

5

6

Page 4
Image 4
Black & Decker TCMKT850C manual Care and Cleaning

TCMKT850C specifications

The Black & Decker TCMKT850C is a versatile and innovative kitchen appliance designed to simplify meal preparation while enhancing the cooking experience. This product stands out in the competitive market of kitchen gadgets due to its combination of functionality, design, and advanced technology.

One of the key features of the TCMKT850C is its powerful cooking performance. With an efficient heating element, this appliance allows for rapid cooking, ensuring meals are ready in no time. Its large cooking capacity is perfect for families or gatherings, accommodating multiple servings with ease. The TCMKT850C includes adjustable temperature settings, enabling users to achieve the perfect level of doneness for any dish.

The design of the Black & Decker TCMKT850C is user-friendly, featuring an intuitive control panel that makes operation straightforward, even for beginners. A digital display provides clear visibility of the settings, ensuring that users can monitor the cooking process at a glance. The sleek and modern aesthetic of the appliance makes it a stylish addition to any kitchen countertop.

Moreover, this appliance is equipped with several cooking modes, offering a range of options such as grilling, steaming, and roasting. This versatility allows users to explore culinary creativity, preparing various dishes from meats to vegetables with consistent results. The built-in timer and automatic shut-off features add an additional layer of convenience and safety, allowing users to step away from the kitchen without worry.

The TCMKT850C also emphasizes ease of cleaning, with non-stick surfaces that reduce food sticking and a design that allows for easy access to all areas. Removable parts are dishwasher safe, making post-cooking cleanup a breeze.

Incorporating advanced technologies, the Black & Decker TCMKT850C features a smart sensor that adjusts cooking time and temperature according to the type and amount of food being cooked. This ensures optimal results with minimal guesswork.

Overall, the Black & Decker TCMKT850C is a reliable and efficient appliance that brings together cutting-edge technology, functionality, and stylish design. It is an excellent choice for those looking to enhance their cooking capabilities while enjoying a streamlined and user-friendly experience in the kitchen. Whether cooking for one or many, this appliance delivers consistent results, making it a valuable addition to any home chef's toolkit.