VC2000Pub1000001239 7/9/04 9:19 AM Page 8
3. | Adjust the suction power by sliding the vacuum suction |
| control (H). |
4. | Press the foot pedal on the sweeper to switch to floors or |
| carpets (J). |
5. | As you vacuum, check frequently the bag "full" indicator |
Cleaning Permanent Dust Bag
1.Hand wash the dust bag with soap and water.
2.Hang it up to air dry thoroughly before replacing in the dust bag compartment.
Reinstalling Permanent Dust Bag
H |
J |
| on the canister (K). It will change to red when the bag is |
| full. To empty the permanent bag, see Emptying |
| Permanent Bag in the Care and Cleaning section. |
6. | When finished vacuuming, press the On/Off push button |
| to turn off the unit. |
7. | Unplug unit. |
8. | Press the retractable cord button with your foot or hand. |
| The cord winds back into the unit (L). |
P |
1.Slide clip onto the dust bag.
2.Press and hold the bag latch.
3.Insert the bag collar with arrow in the down position. Place collar all the way down into the track guides (P).
4.Release the bag latch.
5.Latch locks on top of collar to secure dust bag in place.
6.Close the canister lid.
Cleaning or Replacing Dust Filter
Caution:
• The cord moves fast when retracting. Stand clear of the |
cord as it rewinds so it does not swing into you. |
The dust filter is located in the back of the dust bag compartment. 1. Open the canister lid.
K |
• To prevent cord from whipping when rewinding, hold plug |
when rewinding onto cord reel. |
USING CLEANING TOOLS
Dusting Brush and Crevice Tool
•Use dusting brush to dust furniture, draperies, lamps and shelves.
•Use crevice tool for tight narrow spaces.
Q |
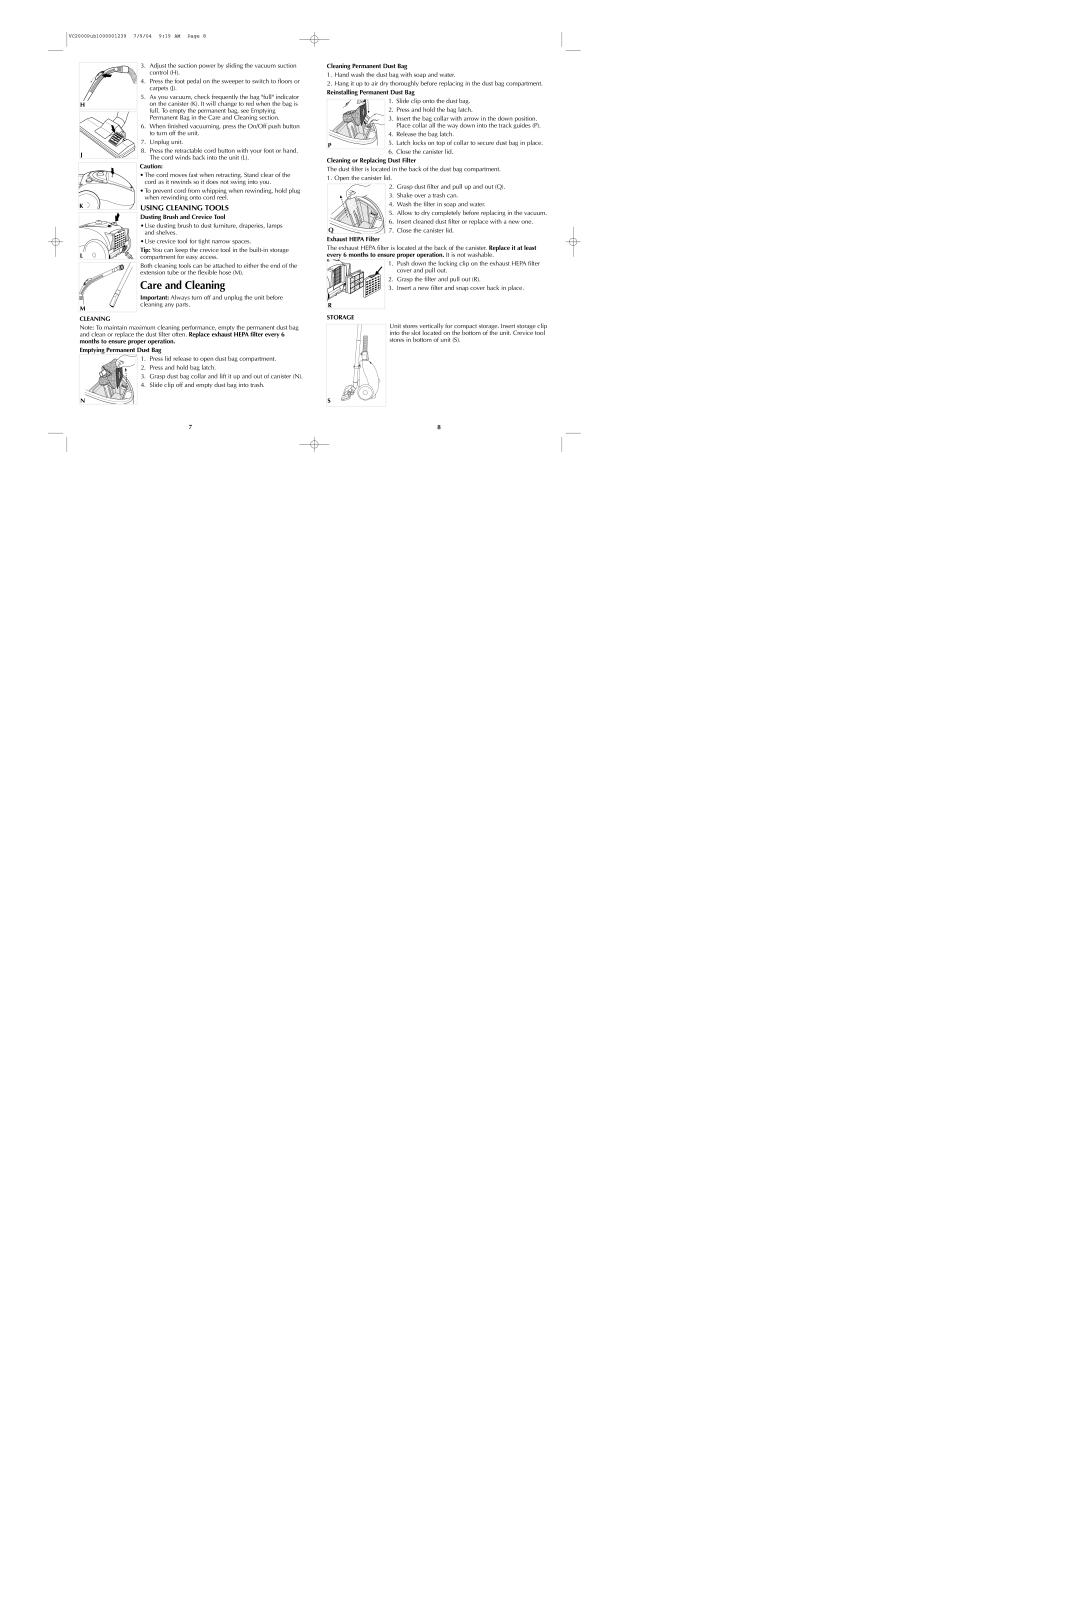
Exhaust HEPA Filter
2.Grasp dust filter and pull up and out (Q).
3.Shake over a trash can.
4.Wash the filter in soap and water.
5.Allow to dry completely before replacing in the vacuum.
6.Insert cleaned dust filter or replace with a new one.
7.Close the canister lid.
L |
Tip: You can keep the crevice tool in the
The exhaust HEPA filter is located at the back of the canister. Replace it at least every 6 months to ensure proper operation. It is not washable.
M
Both cleaning tools can be attached to either the end of the extension tube or the flexible hose (M).
Care and Cleaning
Important: Always turn off and unplug the unit before cleaning any parts.
CLEANING
Note: To maintain maximum cleaning performance, empty the permanent dust bag and clean or replace the dust filter often. Replace exhaust HEPA filter every 6 months to ensure proper operation.
Emptying Permanent Dust Bag
1. | Press lid release to open dust bag compartment. |
2. | Press and hold bag latch. |
3. | Grasp dust bag collar and lift it up and out of canister (N). |
4. | Slide clip off and empty dust bag into trash. |
N |
|
R |
STORAGE |
1.Push down the locking clip on the exhaust HEPA filter cover and pull out.
2.Grasp the filter and pull out (R).
3.Insert a new filter and snap cover back in place.
Unit stores vertically for compact storage. Insert storage clip into the slot located on the bottom of the unit. Crevice tool stores in bottom of unit (S).
S
7 | 8 |