Setup
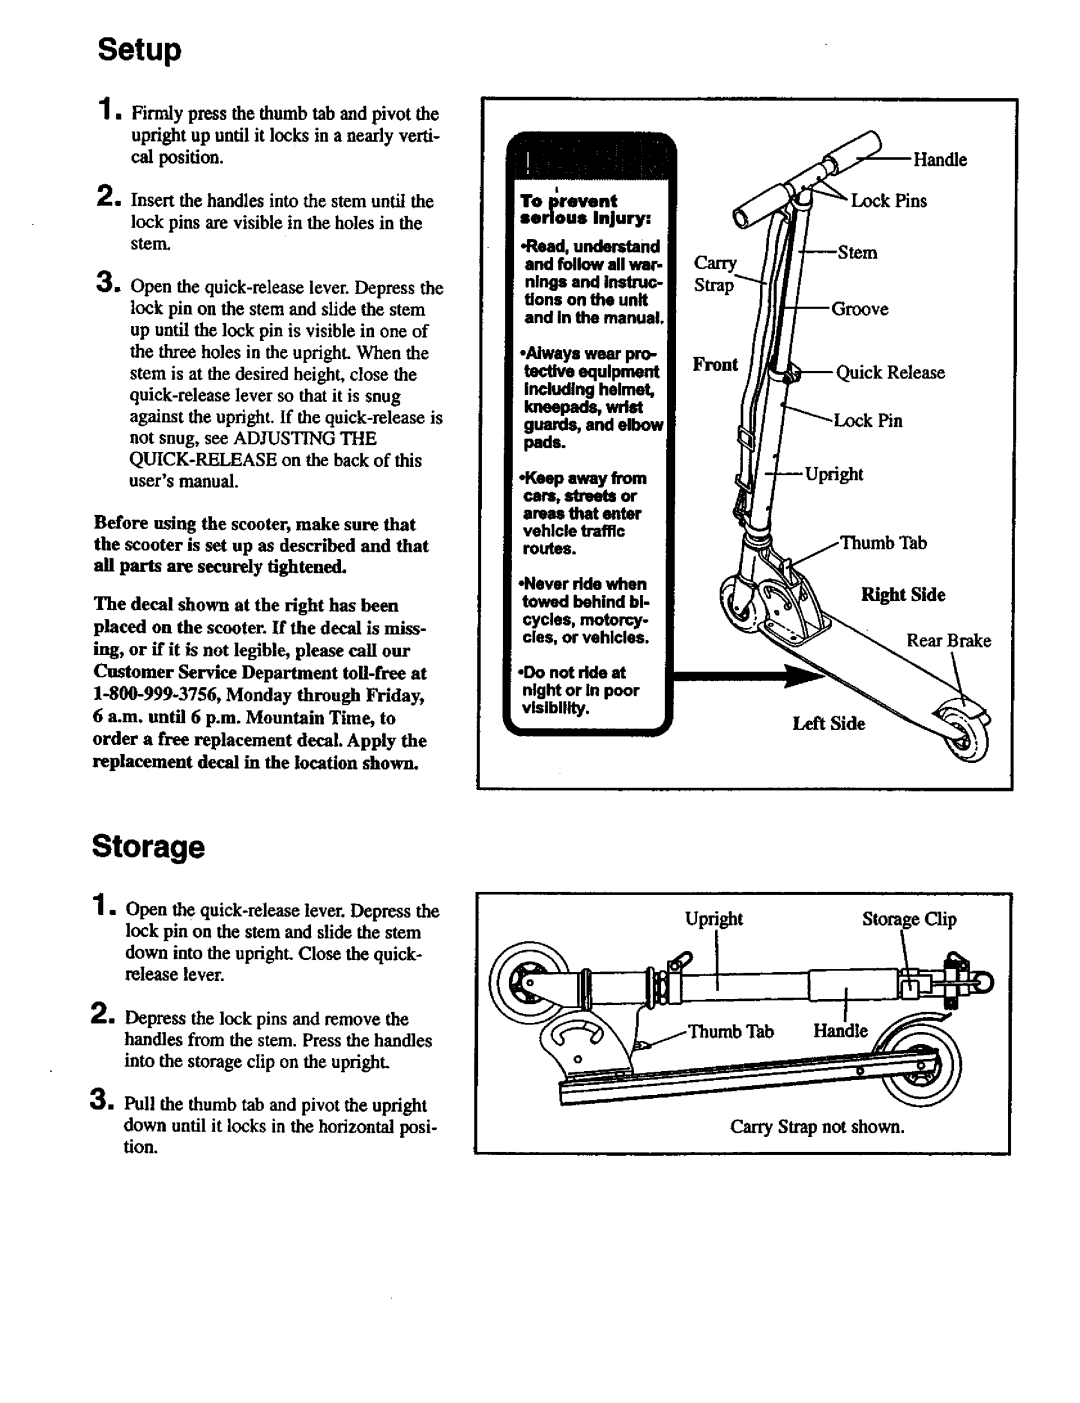
1, Firmly press the thumb tab and pivot the upright up until it locks in a nearly verti- cal position.
2. Insert the handles into the stem until the
lock pins are visible in the holes in the stem.
3.Openthe
Before using the scooter, make sure that
the scooter is set up as descried and that all parts are securely tightened.
The decal shown at the right has been placed on the scooter. If the decal is miss-
ing, or if it is not legible, please call our Customer Service Department
replacement decal in the location shown.
t |
|
| |
Toprevent |
| ||
serious | Injury: |
| |
•Read, understand |
| ||
and follow all war- | Carry | ||
nlngs and instruc- |
| ||
tions on the unit |
| ||
and in the manual. |
| ||
•Always wear pro- |
| ||
tective equipment |
| ||
Including helmet, |
| ||
kneepads,wast |
| ||
guards, and elbow |
| ||
pads. |
|
| |
• Keep away from |
| ||
cars, stnlets or |
| ||
areas that enter |
| ||
vehicle | traffic |
| |
routes. |
|
| |
.Neverddewhen | Right Side | ||
towedbehind bl- | |||
| |||
cycles, motorcy- |
| ||
cles, orvehlcles. | Rear Brake | ||
•Do not dde at night or In poor visibility.
Left Side
Storage
1.
down into the upright. Close the quick- release lever.
2.Depress the lock pins and remove the handles from the stem. Press the handles into the storage clip on the upright.
3.Pull the thumb tab and pivot the upright
down until it locks in the horizontal posi- tion.
UprightClip
Carry Strap notshown.
