Installation
Caution: Installation of the MCPB requires removal of equipment covers, exposing the risk of electrical shock. Unauthorized modification can also void the warranty. For this reason, installation should be performed by quali- fied service individuals only.
Accessory Connector
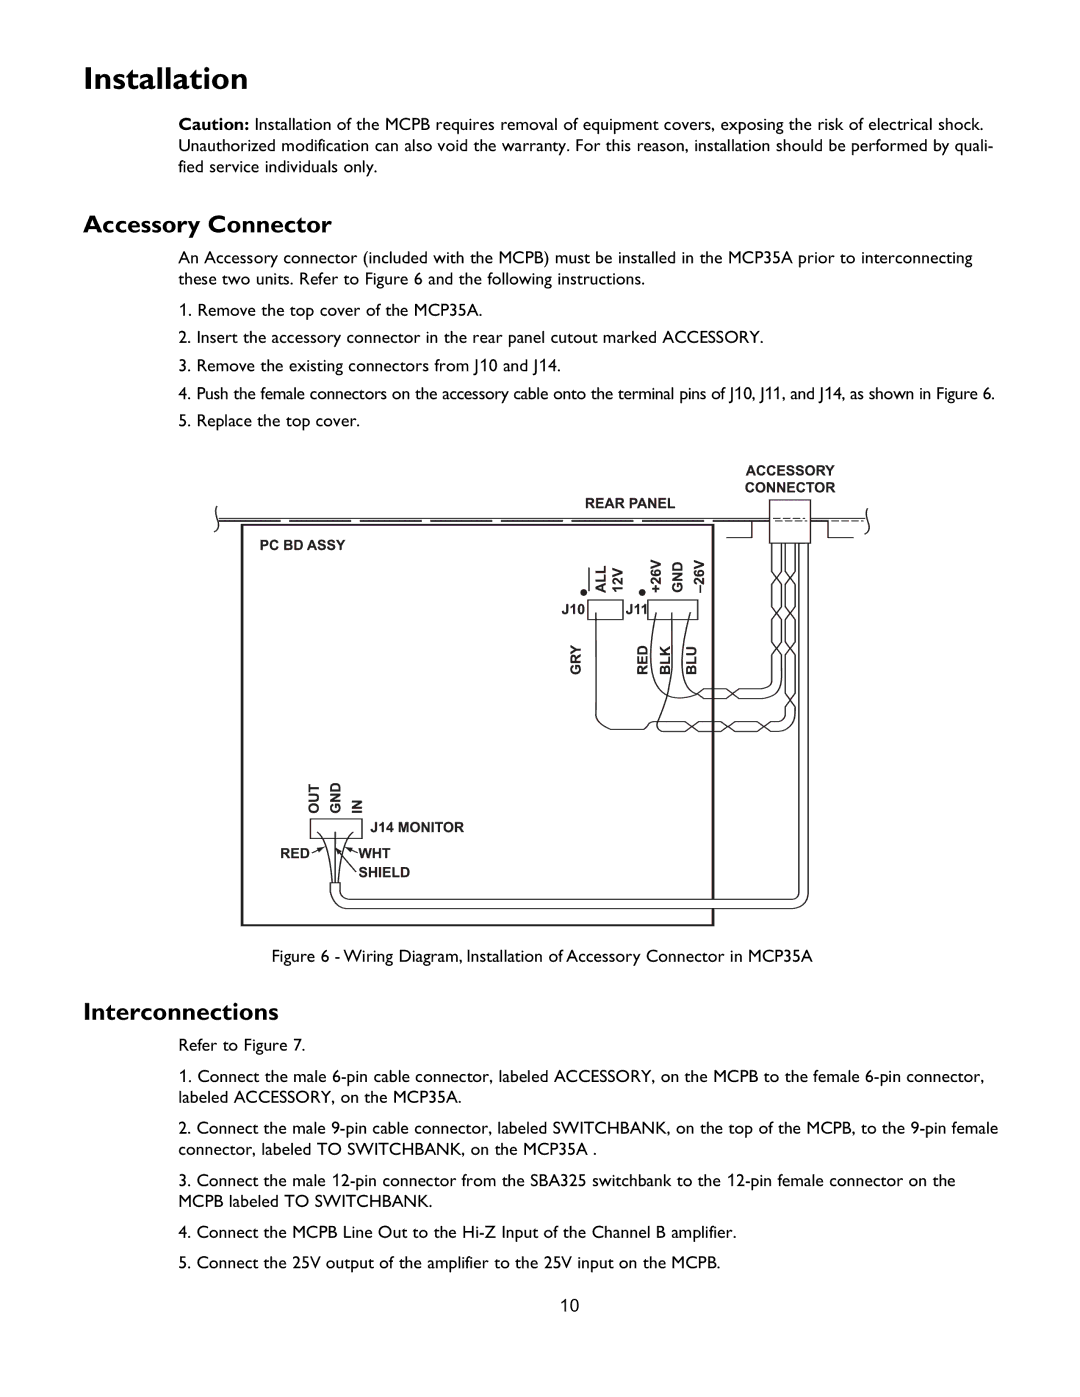
An Accessory connector (included with the MCPB) must be installed in the MCP35A prior to interconnecting these two units. Refer to Figure 6 and the following instructions.
1. Remove the top cover of the MCP35A.
2.Insert the accessory connector in the rear panel cutout marked ACCESSORY.
3.Remove the existing connectors from J10 and J14.
4.Push the female connectors on the accessory cable onto the terminal pins of J10, J11, and J14, as shown in Figure 6.
5.Replace the top cover.
Figure 6 - Wiring Diagram, Installation of Accessory Connector in MCP35A
Interconnections
Refer to Figure 7.
1. Connect the male
2.Connect the male
3.Connect the male
4.Connect the MCPB Line Out to the
5.Connect the 25V output of the amplifier to the 25V input on the MCPB.
10
