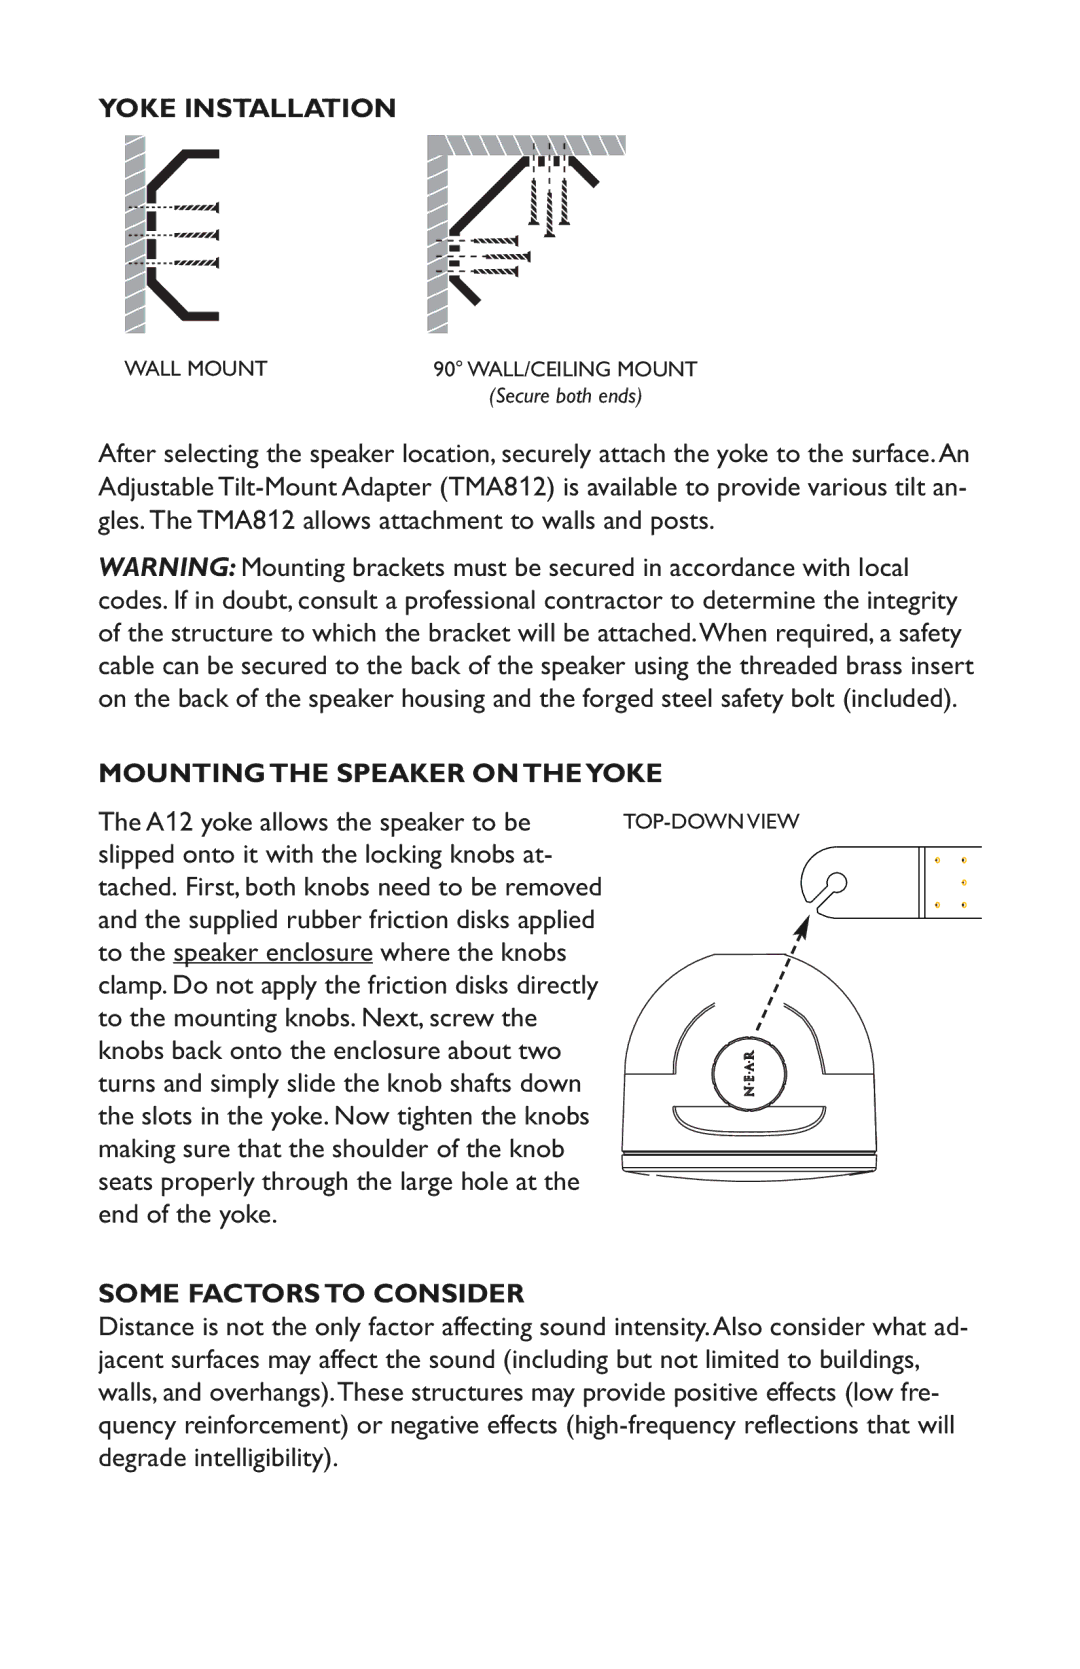
YOKE INSTALLATION
WALL MOUNT | 90°WALL/CEILING MOUNT |
| (Secure both ends) |
After selecting the speaker location, securely attach the yoke to the surface.An
WARNING:Mounting brackets must be secured in accordance with local codes. If in doubt, consult a professional contractor to determine the integrity of the structure to which the bracket will be attached.When required, a safety cable can be secured to the back of the speaker using the threaded brass insert on the back of the speaker housing and the forged steel safety bolt (included).
MOUNTINGTHE SPEAKER ONTHEYOKE
The A12 yoke allows the speaker to be | |
slipped onto it with the locking knobs at- |
|
tached. First, both knobs need to be removed |
|
and the supplied rubber friction disks applied |
|
to the speaker enclosure where the knobs |
|
clamp. Do not apply the friction disks directly |
|
to the mounting knobs. Next, screw the |
|
knobs back onto the enclosure about two |
|
turns and simply slide the knob shafts down |
|
the slots in the yoke. Now tighten the knobs |
|
making sure that the shoulder of the knob |
|
seats properly through the large hole at the |
|
end of the yoke. |
|
SOME FACTORSTO CONSIDER
Distance is not the only factor affecting sound intensity.Also consider what ad- jacent surfaces may affect the sound (including but not limited to buildings, walls, and overhangs).These structures may provide positive effects (low fre- quency reinforcement) or negative effects