Edge Guide
Installation
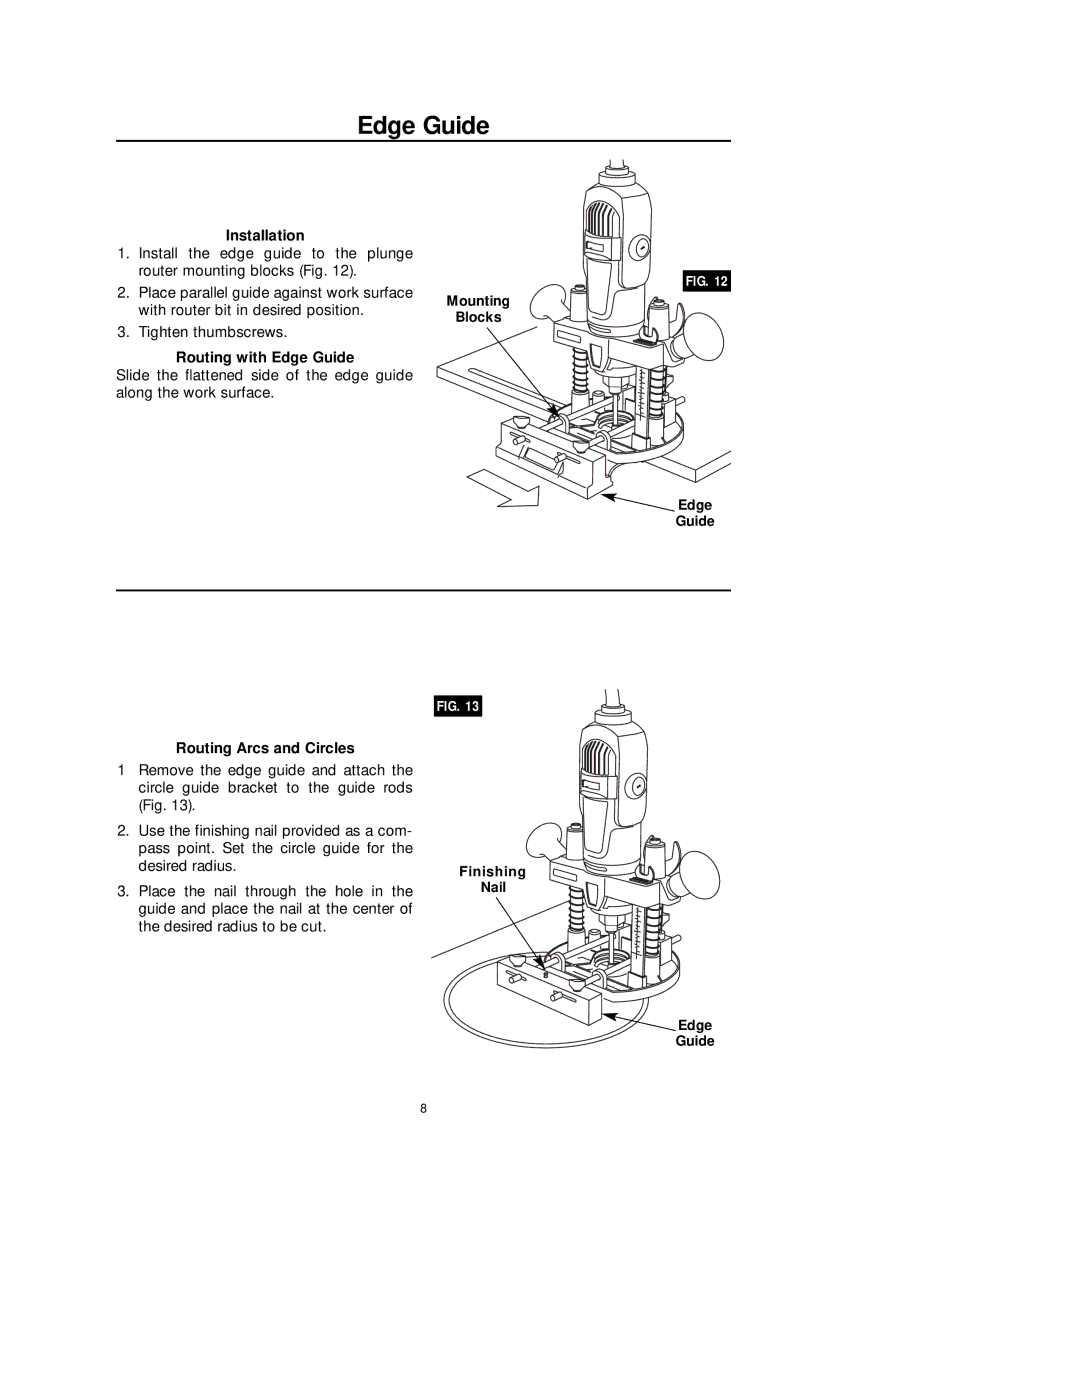
1.Install the edge guide to the plunge router mounting blocks (Fig. 12).
2.Place parallel guide against work surface with router bit in desired position.
3.Tighten thumbscrews.
Routing with Edge Guide
Slide the flattened side of the edge guide along the work surface.
FIG. 12
Mounting
Blocks
 Edge
Edge
Guide
Routing Arcs and Circles
1Remove the edge guide and attach the circle guide bracket to the guide rods (Fig. 13).
2.Use the finishing nail provided as a com- pass point. Set the circle guide for the desired radius.
3.Place the nail through the hole in the guide and place the nail at the center of the desired radius to be cut.
FIG. 13
Finishing
Nail
 Edge Guide
8