Safety Warnings and Instructions: Drills | B | ||
| WARNING: |
| |
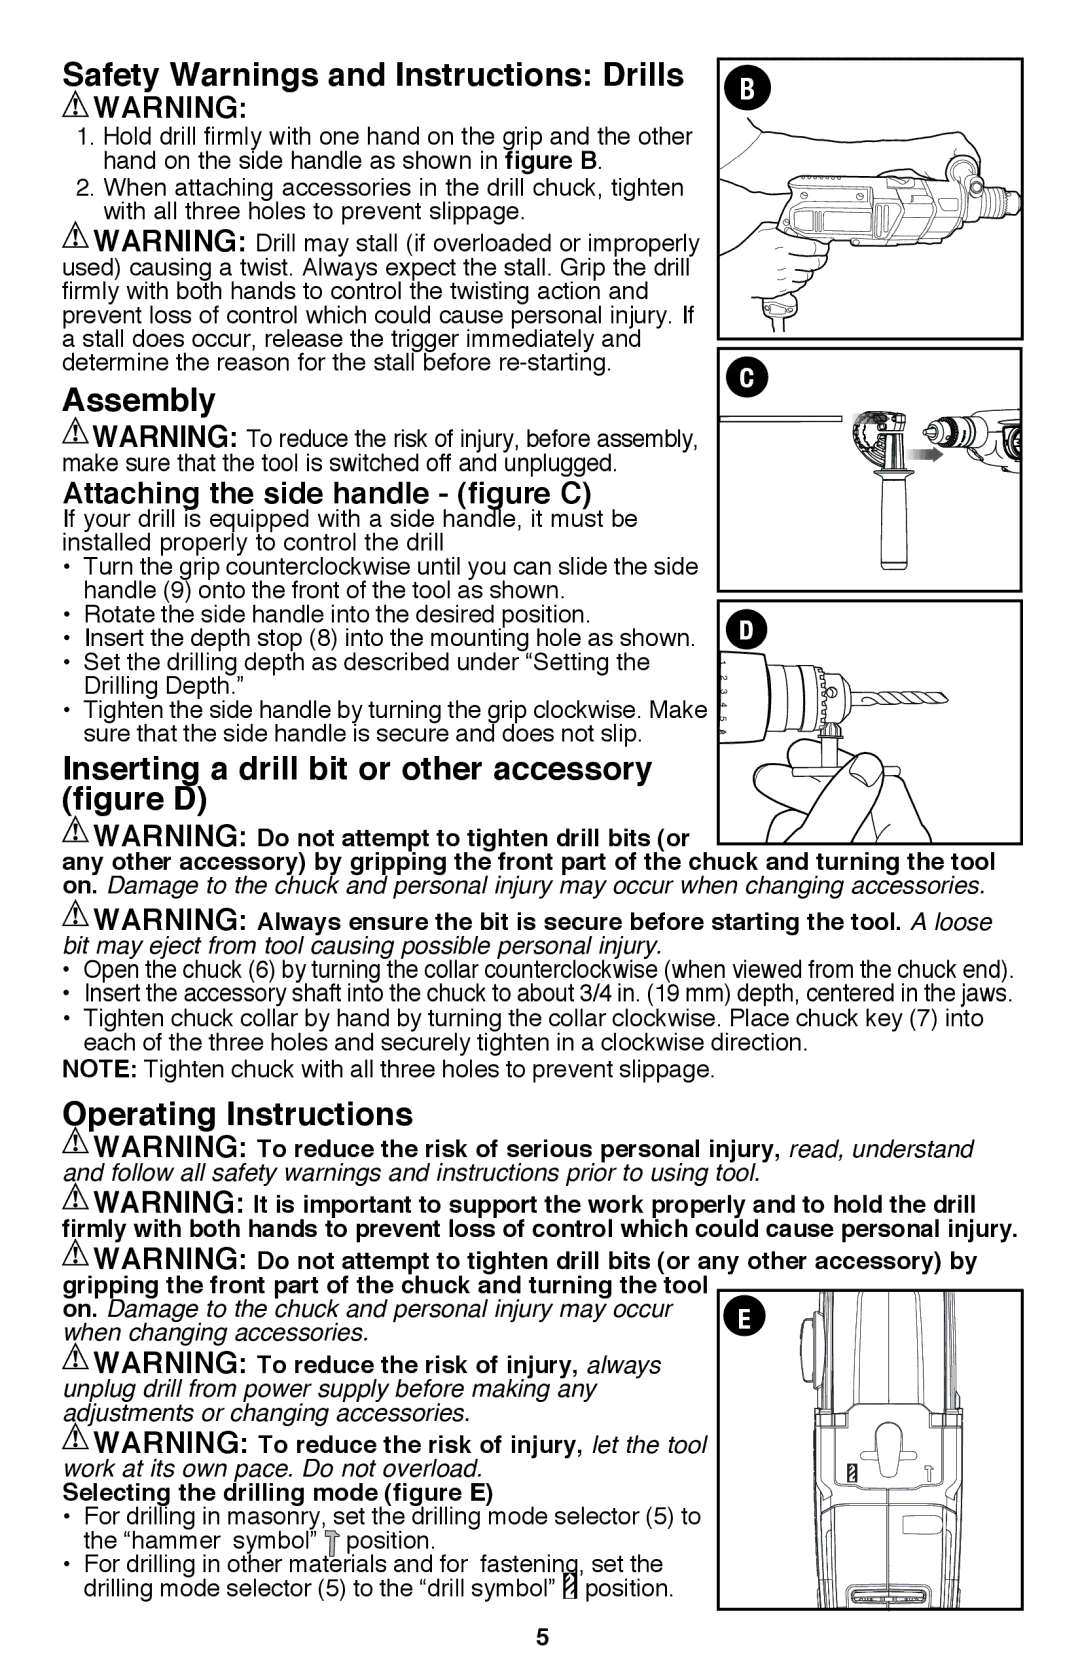
| 1. Hold drill firmly with one hand on the grip and the other |
| |
| hand on the side handle as shown in figure B. |
| |
| 2. When attaching accessories in the drill chuck, tighten |
| |
| with all three holes to prevent slippage. |
| |
| WARNING: Drill may stall (if overloaded or improperly |
| |
used) causing a twist. Always expect the stall. Grip the drill |
| ||
firmly with both hands to control the twisting action and |
| ||
prevent loss of control which could cause personal injury. If |
| ||
a stall does occur, release the trigger immediately and |
| ||
determine the reason for the stall before | C | ||
Assembly | |||
| |||
| WARNING: To reduce the risk of injury, before assembly, |
| |
make sure that the tool is switched off and unplugged. |
| ||
Attaching the side handle - (figure C) |
| ||
If your drill is equipped with a side handle, it must be |
| ||
installed properly to control the drill |
| ||
• | Turn the grip counterclockwise until you can slide the side |
| |
• | handle (9) onto the front of the tool as shown. |
| |
Rotate the side handle into the desired position. | D | ||
• | Insert the depth stop (8) into the mounting hole as shown. | ||
• | Set the drilling depth as described under “Setting the | 2 | |
| Drilling Depth.” | 1 | |
| 4 | ||
• Tighten the side handle by turning the grip clockwise. Make | 3 | ||
5 | |||
| sure that the side handle is secure and does not slip. |
| |
Inserting a drill bit or other accessory |
| ||
(figure D) |
| ||
| WARNING: Do not attempt to tighten drill bits (or |
| |
any other accessory) by gripping the front part of the chuck and turning the tool | |||
on. Damage to the chuck and personal injury may occur when changing accessories. | |||
![]() WARNING: Always ensure the bit is secure before starting the tool. A loose bit may eject from tool causing possible personal injury.
WARNING: Always ensure the bit is secure before starting the tool. A loose bit may eject from tool causing possible personal injury.
• Open the chuck (6) by turning the collar counterclockwise (when viewed from the chuck end).
• Insert the accessory shaft into the chuck to about 3/4 in. (19 mm) depth, centered in the jaws.
• Tighten chuck collar by hand by turning the collar clockwise. Place chuck key (7) into each of the three holes and securely tighten in a clockwise direction.
NOTE: Tighten chuck with all three holes to prevent slippage.
Operating Instructions |
|
| ||
| WARNING: To reduce the risk of serious personal injury, read, understand | |||
and follow all safety warnings and instructions prior to using tool. | ||||
| WARNING: It is important to support the work properly and to hold the drill | |||
firmly with both hands to prevent loss of control which could cause personal injury. | ||||
| WARNING: Do not attempt to tighten drill bits (or any other accessory) by | |||
gripping the front part of the chuck and turning the tool | E | |||
on. Damage to the chuck and personal injury may occur | ||||
when changing accessories. |
|
| ||
| WARNING: To reduce the risk of injury, always |
| ||
unplug drill from power supply before making any |
| |||
adjustments or changing accessories. |
|
| ||
| WARNING: To reduce the risk of injury, let the tool |
| ||
work at its own pace. Do not overload. |
|
| ||
Selecting the drilling mode (figure E) |
|
| ||
• | For drilling in masonry, set the drilling mode selector (5) to |
| ||
• | the “hammer symbol” | position. |
|
|
For drilling in other materials and for fastening, set the |
| |||
| drilling mode selector (5) to the “drill symbol” | position. |
| |
5