Shoe Replacement |
| |
| WARNING: Before attempting any of the following operations, make sure that the | |
tool is switched off and unplugged. |
| |
• | Check to make sure shoe is in the 0 degree bevel position. |
|
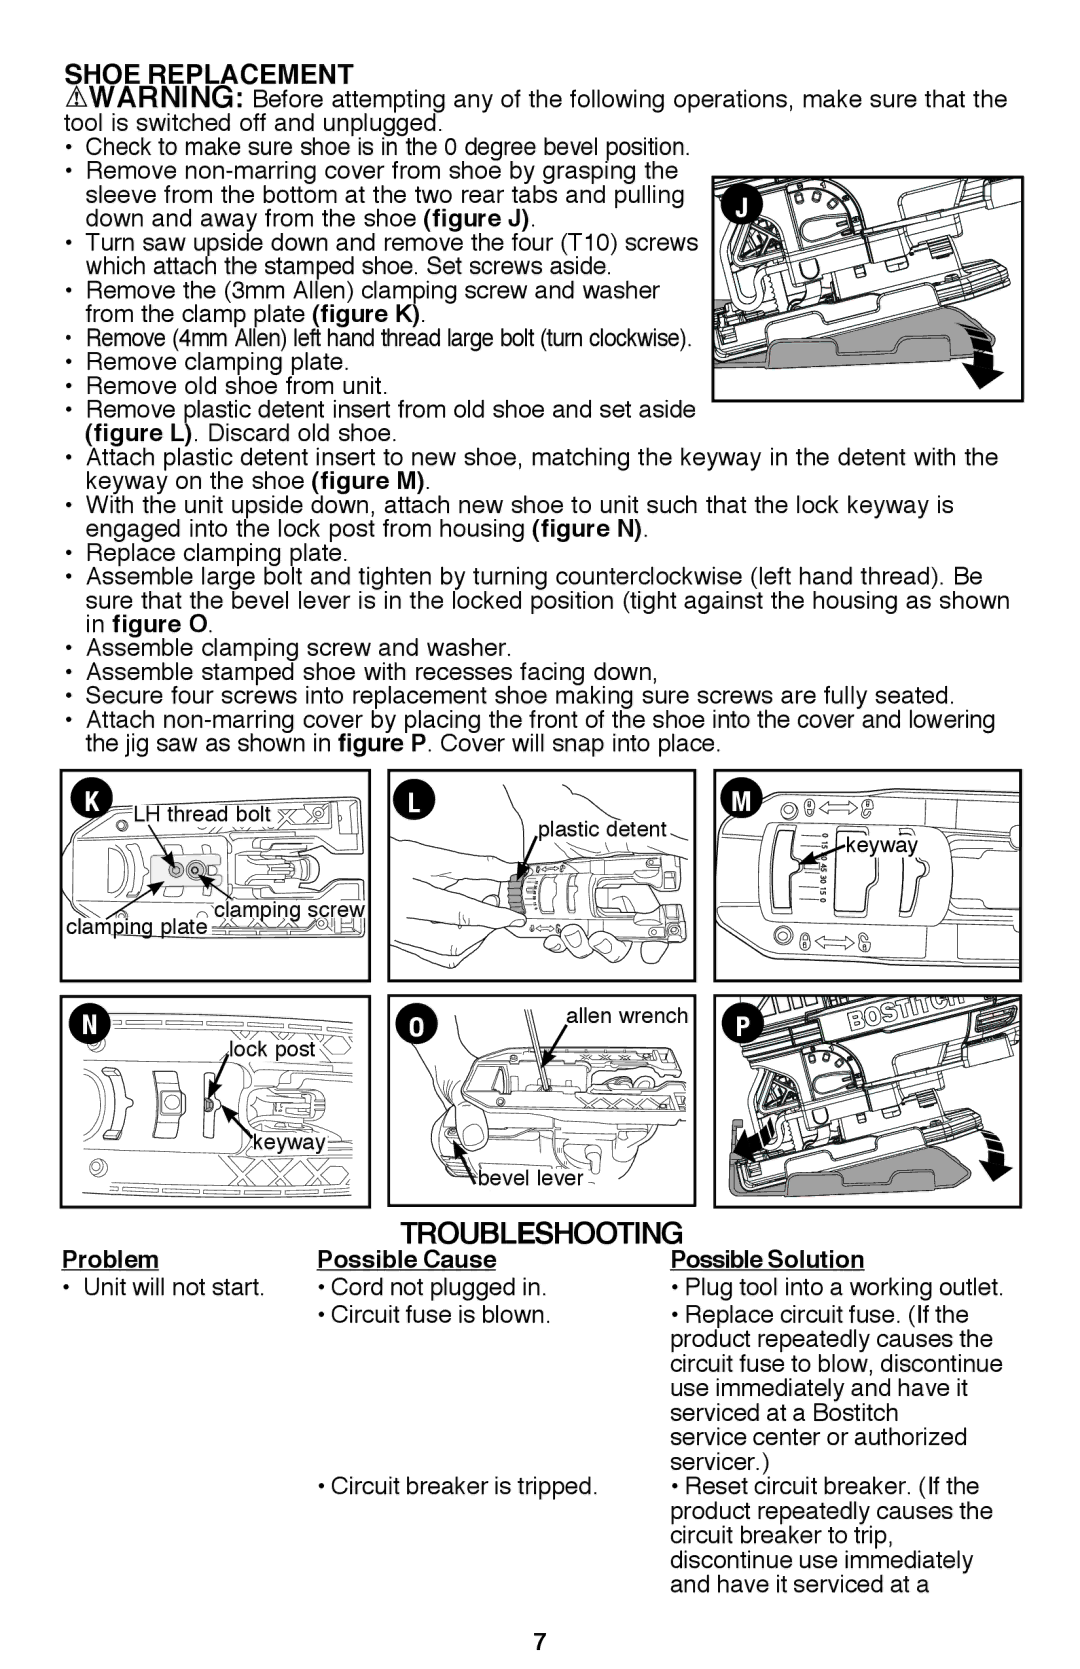
• Remove |
| |
| sleeve from the bottom at the two rear tabs and pulling | J |
| down and away from the shoe (figure J). | |
• Turn saw upside down and remove the four (T10) screws |
| |
| which attach the stamped shoe. Set screws aside. |
|
• Remove the (3mm Allen) clamping screw and washer |
| |
| from the clamp plate (figure K). |
|
• Remove (4mm Allen) left hand thread large bolt (turn clockwise). |
| |
• Remove clamping plate. |
| |
• Remove old shoe from unit. |
| |
• | Remove plastic detent insert from old shoe and set aside |
|
• | (figure L). Discard old shoe. |
|
Attach plastic detent insert to new shoe, matching the keyway in the detent with the | ||
• | keyway on the shoe (figure M). |
|
With the unit upside down, attach new shoe to unit such that the lock keyway is | ||
• | engaged into the lock post from housing (figure N). |
|
Replace clamping plate. |
| |
• | Assemble large bolt and tighten by turning counterclockwise (left hand thread). Be | |
| sure that the bevel lever is in the locked position (tight against the housing as shown | |
| in figure O. |
|
• Assemble clamping screw and washer. |
| |
• Assemble stamped shoe with recesses facing down, |
| |
• | Secure four screws into replacement shoe making sure screws are fully seated. | |
• | Attach | |
| the jig saw as shown in figure P. Cover will snap into place. |
|
K | LH thread bolt | L | plastic detent | M |
|
| keyway | ||
|
|
| ||
|
|
|
| |
clamping plate clamping screw |
|
|
| |
N | lock post | O | allen wrench | P |
| ||||
|
|
|
| |
| keyway |
|
|
|
|
|
| bevel lever |
|
Problem | Troubleshooting | |
Possible Cause | Possible Solution | |
• Unit will not start. | • Cord not plugged in. | • Plug tool into a working outlet. |
| • Circuit fuse is blown. | • Replace circuit fuse. (If the |
|
| product repeatedly causes the |
|
| circuit fuse to blow, discontinue |
|
| use immediately and have it |
|
| serviced at a Bostitch |
|
| service center or authorized |
| • Circuit breaker is tripped. | servicer.) |
| • Reset circuit breaker. (If the | |
|
| product repeatedly causes the |
|
| circuit breaker to trip, |
|
| discontinue use immediately |
|
| and have it serviced at a |
7