Contents
Unpacking and Setting Up Your Horizon Solo | 4 | Alarm Clock Features | 8 |
Placement | 4 | Setting the Alarm Time | 8 |
Horizontal or Vertical Position | 4 | Setting an Alarm | 9 |
Power Connection | 5 | How the Alarms Work | 9 |
AM and FM Antennas | 5 | The Snooze Feature | 9 |
About the Front Panel Controls | 5 | Sleep Function | 10 |
Basic Control Operations | 6 | Audio Controls | 10 |
Turning the Solo On or Off | 6 | Other Control Settings | 11 |
Adjusting the Volume | 6 | Display Information | 11 |
Setting the Clock | 6 | Display Brightness | 11 |
Radio Operation | 6 | Connecting Other Equipment | 12 |
Selecting a Source | 6 | Connecting Headphones | 12 |
Tuning In a Radio Station | 7 | Using the Aux Input | 12 |
Station Seek | 7 | Security Cable Connection | 12 |
Setting a Station Preset | 7 | About Clock Memory | 12 |
About Station Presets | 7 | Limited Warranty | 13 |
Tuning in a Preset Station | 8 | If Service Seems Necessary | 13 |
Removing One or More Presets | 8 |
|
|
Unpacking and Setting Up Your Horizon Solo
Carefully unpack your Horizon Solo. If there is any sign of damage from transit, report it immediately to your dealer and/or delivery service. Keep the shipping carton and packing materials for future use. Be sure to keep your purchase receipt in a safe place, as it may be required for warranty purposes.
In the box, you should find the Solo, the FM antenna, and the power cord.
Placement
Your Horizon Solo will sound great just about anywhere. But if you put it near a wall or corner the bass response will be enhanced. Blocking the bass port will result in a loss of performance.
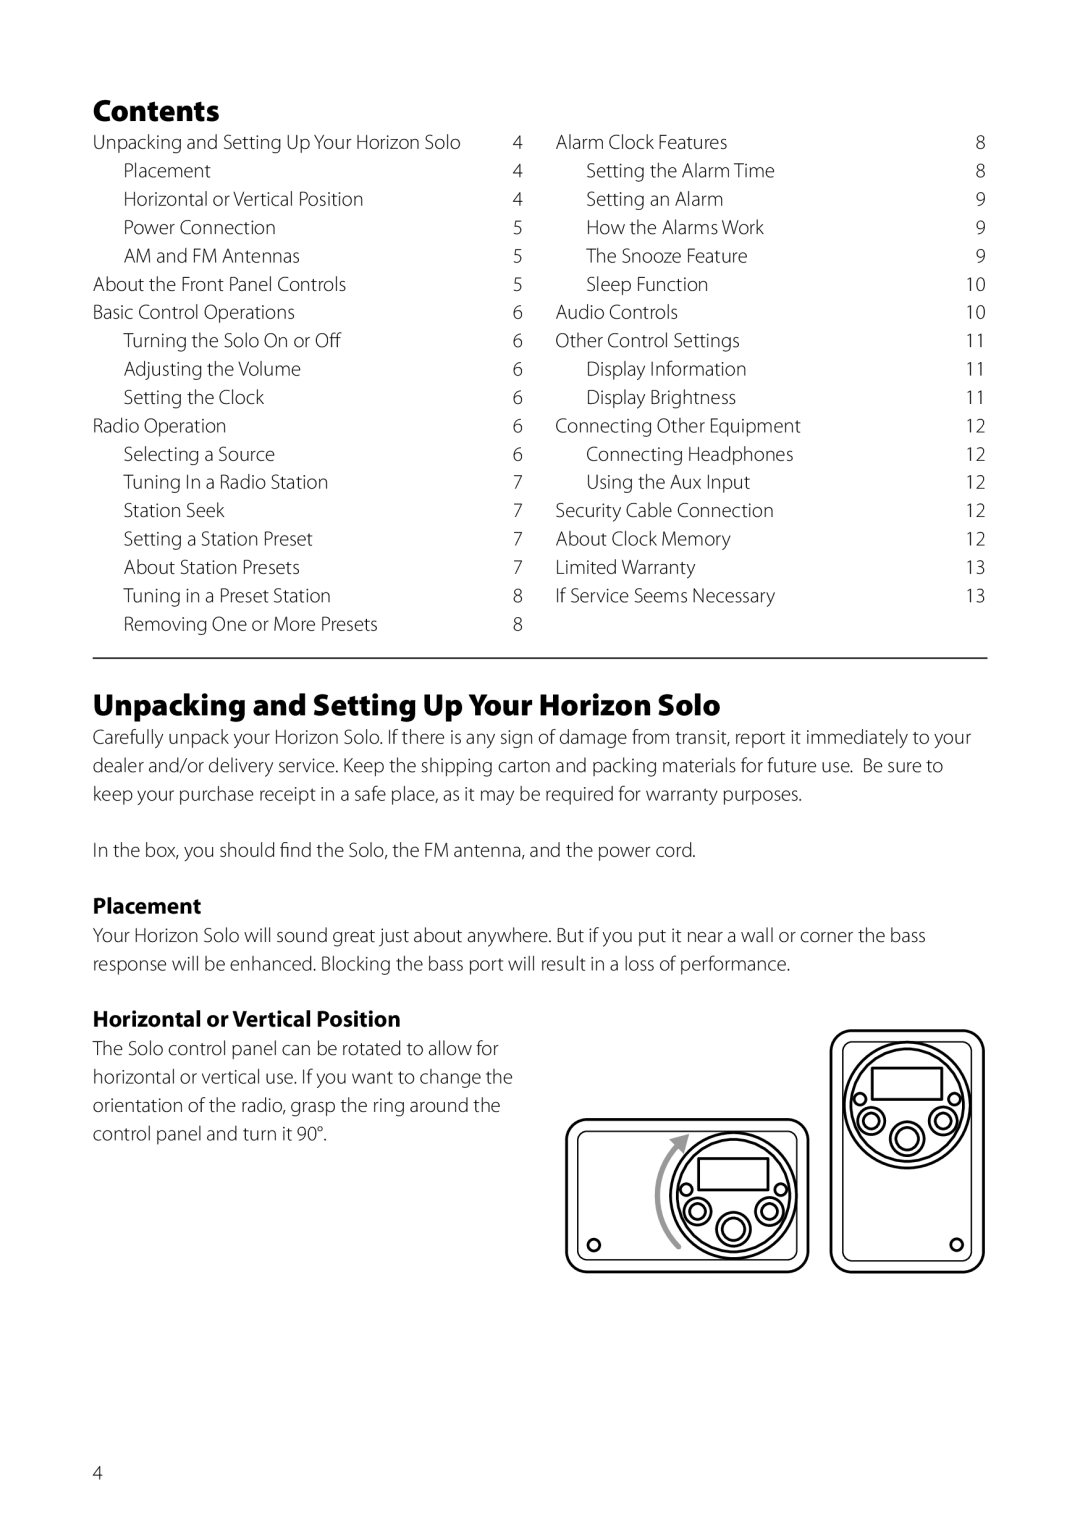
Horizontal or Vertical Position
The Solo control panel can be rotated to allow for horizontal or vertical use. If you want to change the orientation of the radio, grasp the ring around the control panel and turn it 90°.
4