Installation
Instructions
WARNING
Always turn off the amplifier or receiver when connecting speak- ers or any other components to the system.
NOTE
This manual assumes the installer possesses skill in the proper use of hand and power tools, knowledge of local building and fire codes, and a familiarity with the environment behind the wall or ceiling in which the speak- ers will be installed.
Tools You’ll Need
1.A utility knife, jig saw, or other tool for cutting the required hole in the mounting surface.
2.A #2 Phillips screwdriver.
3.A wire cutter or stripper for preparing the speaker wires.
4.A pencil.
Retrofit Installations
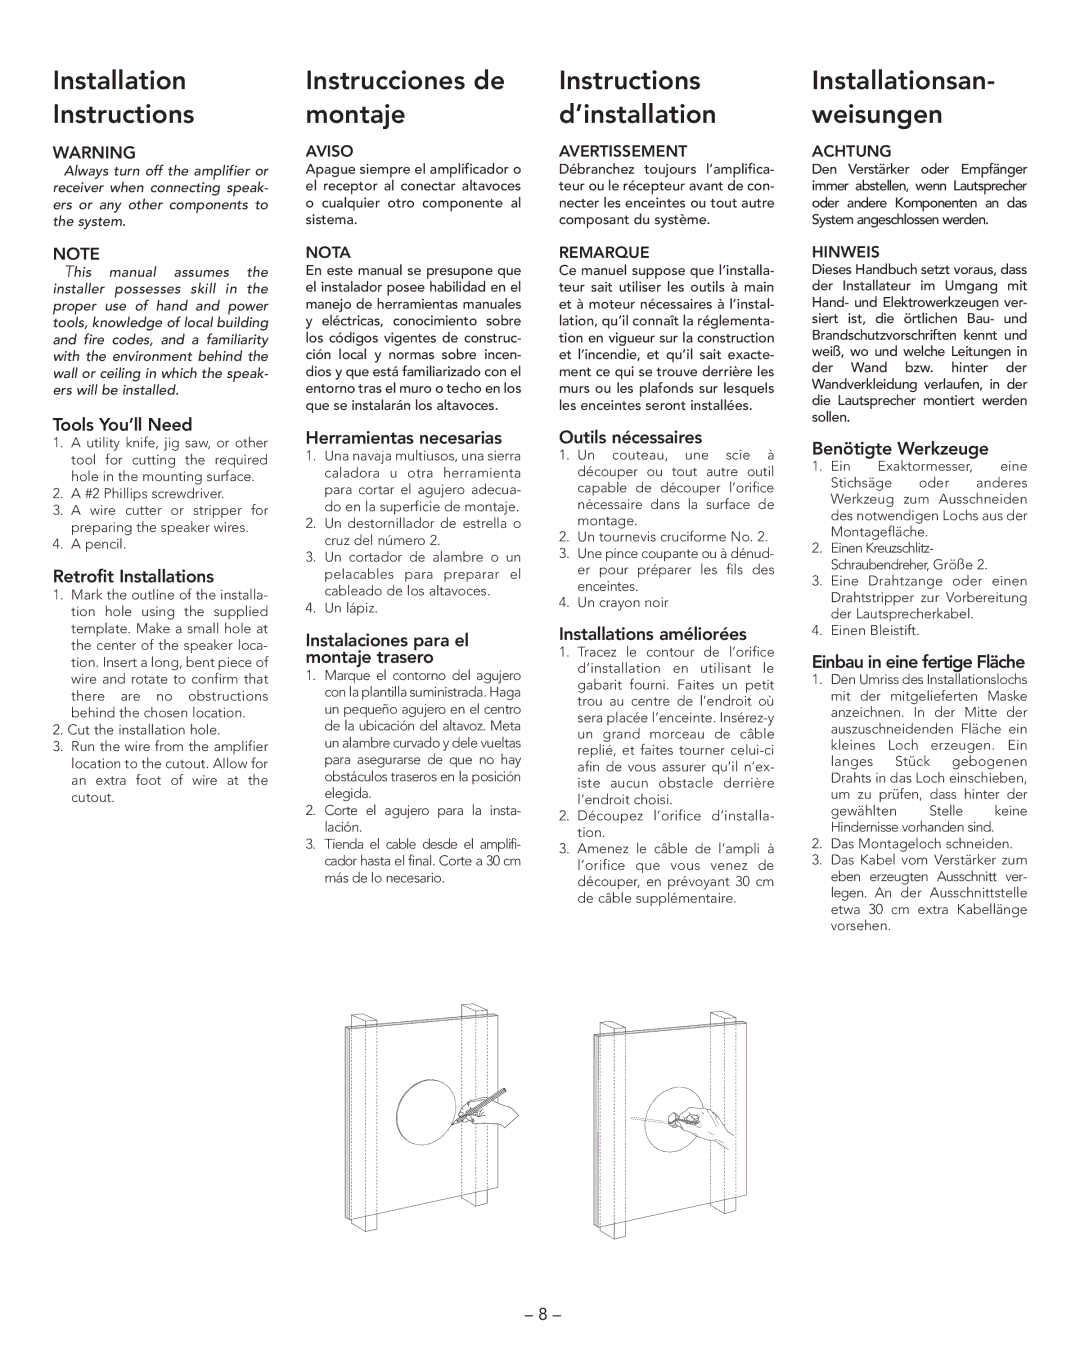
1.Mark the outline of the installa- tion hole using the supplied template. Make a small hole at the center of the speaker loca- tion. Insert a long, bent piece of wire and rotate to confirm that there are no obstructions behind the chosen location.
2.Cut the installation hole.
3.Run the wire from the amplifier location to the cutout. Allow for an extra foot of wire at the cutout.
Instrucciones de montaje
AVISO
Apague siempre el amplificador o el receptor al conectar altavoces o cualquier otro componente al sistema.
NOTA
En este manual se presupone que el instalador posee habilidad en el manejo de herramientas manuales y eléctricas, conocimiento sobre los códigos vigentes de construc- ción local y normas sobre incen- dios y que está familiarizado con el entorno tras el muro o techo en los que se instalarán los altavoces.
Herramientas necesarias
1.Una navaja multiusos, una sierra caladora u otra herramienta para cortar el agujero adecua- do en la superficie de montaje.
2.Un destornillador de estrella o cruz del número 2.
3.Un cortador de alambre o un pelacables para preparar el cableado de los altavoces.
4.Un lápiz.
Instalaciones para el montaje trasero
1.Marque el contorno del agujero con la plantilla suministrada. Haga un pequeño agujero en el centro de la ubicación del altavoz. Meta un alambre curvado y dele vueltas para asegurarse de que no hay obstáculos traseros en la posición elegida.
2.Corte el agujero para la insta- lación.
3.Tienda el cable desde el amplifi- cador hasta el final. Corte a 30 cm más de lo necesario.
Instructions d’installation
AVERTISSEMENT
Débranchez toujours l’amplifica- teur ou le récepteur avant de con- necter les enceintes ou tout autre composant du système.
REMARQUE
Ce manuel suppose que l’installa- teur sait utiliser les outils à main et à moteur nécessaires à l’instal- lation, qu’il connaît la réglementa- tion en vigueur sur la construction et l’incendie, et qu’il sait exacte- ment ce qui se trouve derrière les murs ou les plafonds sur lesquels les enceintes seront installées.
Outils nécessaires
1.Un couteau, une scie à découper ou tout autre outil capable de découper l’orifice nécessaire dans la surface de montage.
2.Un tournevis cruciforme No. 2.
3.Une pince coupante ou à dénud- er pour préparer les fils des enceintes.
4.Un crayon noir
Installations améliorées
1.Tracez le contour de l’orifice d’installation en utilisant le gabarit fourni. Faites un petit trou au centre de l’endroit où sera placée l’enceinte.
2.Découpez l’orifice d’installa- tion.
3.Amenez le câble de l’ampli à l’orifice que vous venez de découper, en prévoyant 30 cm de câble supplémentaire.
Installationsan- weisungen
ACHTUNG
Den Verstärker oder Empfänger immer abstellen, wenn Lautsprecher oder andere Komponenten an das System angeschlossen werden.
HINWEIS
Dieses Handbuch setzt voraus, dass der Installateur im Umgang mit Hand- und Elektrowerkzeugen ver- siert ist, die örtlichen Bau- und Brandschutzvorschriften kennt und weiß, wo und welche Leitungen in der Wand bzw. hinter der Wandverkleidung verlaufen, in der die Lautsprecher montiert werden sollen.
Benötigte Werkzeuge
1. Ein Exaktormesser, eine Stichsäge oder anderes Werkzeug zum Ausschneiden des notwendigen Lochs aus der Montagefläche.
2.Einen Kreuzschlitz- Schraubendreher, Größe 2.
3.Eine Drahtzange oder einen Drahtstripper zur Vorbereitung der Lautsprecherkabel.
4.Einen Bleistift.
Einbau in eine fertige Fläche
1.Den Umriss des Installationslochs mit der mitgelieferten Maske anzeichnen. In der Mitte der auszuschneidenden Fläche ein kleines Loch erzeugen. Ein langes Stück gebogenen Drahts in das Loch einschieben, um zu prüfen, dass hinter der
gewählten Stelle keine Hindernisse vorhanden sind.
2.Das Montageloch schneiden.
3.Das Kabel vom Verstärker zum eben erzeugten Ausschnitt ver- legen. An der Ausschnittstelle etwa 30 cm extra Kabellänge vorsehen.
– 8 –