Control Functions
4 |
| 7 |
| 4 |
| 10 |
| 11 |
| 9 |
N O N P R I N TA B L E A R E A
OFF | ON | STEREO | MONO | OFF | ON | STEREO | FRONT | OFF | ON |
| LOWPASS |
|
|
| L+R |
|
|
| + REAR |
|
| OFF | 12dB 24dB |
| HIGHPASS |
| REAR INPUT |
| HIGHPASS |
| MONO | SUBWOOFER LEVEL | |||
| 3 5 0 |
|
|
| 3 5 0 |
| L |
|
|
| 3 5 0 |
|
|
|
|
|
|
|
|
| |||
2 0 0 | Hz |
|
| 2 0 0 | Hz |
|
|
|
| 2 0 0 | Hz |
| 2 0 |
|
|
| 2 0 |
|
|
|
|
| 5 0 |
0 . 2 | 1 . 2 | 0 . 2 | 1 . 2 | 0 . 2 | L | R | L | R |
INPUT SENSITIVITY 2 . 6 | V | 0 . 9 5 | Q/HP | INPUT SENSITIVITY 2 . 6 | V | 0 . 9 5 | Q/HP |
|
| INPUT SENSITIVITY 2 . 6 | V |
|
|
|
| ||
| REMOTE | 5 |
| 0 . 7 |
|
| 5 |
| 0 . 7 |
|
|
| 5 |
|
|
| SUBWOOFER OUTPUT |
|
|
|
|
| REMOTE |
|
|
|
| REMOTE | SUBWOOFER LEVEL | FRONT SPEAKER OUTPUT | REAR SPEAKER OUTPUT | ||||
|
| 3 |
| 5 |
|
| 3 |
| 5 |
|
|
| 3 |
|
|
|
|
|
|
| STATUS |
|
|
|
|
|
|
|
|
| FRONT SPEAKER OUTPUT | REAR SPEAKER OUTPUT | SUBWOOFER OUTPUT | ||
|
|
|
|
|
|
|
|
|
|
|
|
| L | R | L | R |
|
|
|
| ON |
|
|
|
|
|
|
|
|
|
|
|
|
|
|
|
|
| SAFE |
|
|
|
|
|
|
|
|
|
|
|
|
|
|
1 | 2 |
| 12 |
| 6 | 2 |
|
|
| 8 | 2 | 11 |
|
|
|
|
|
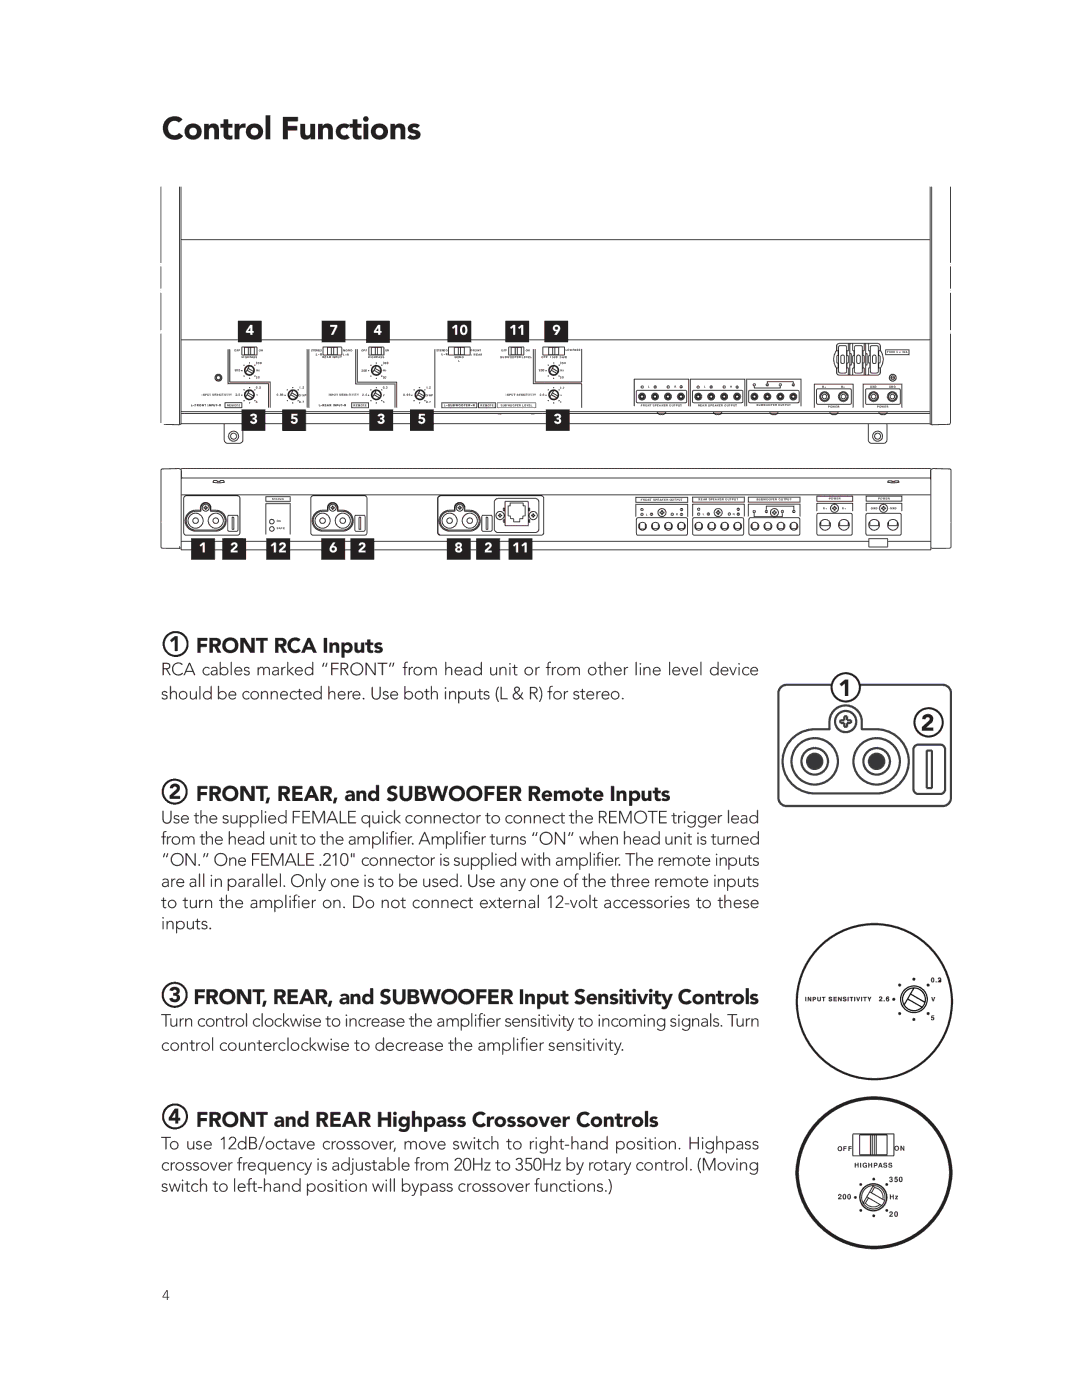
1 FRONT RCA Inputs
RCA cables marked “FRONT” from head unit or from other line level device
should be connected here. Use both inputs (L & R) for stereo.
2 FRONT, REAR, and SUBWOOFER Remote Inputs
Use the supplied FEMALE quick connector to connect the REMOTE trigger lead from the head unit to the amplifier. Amplifier turns “ON” when head unit is turned “ON.” One FEMALE .210" connector is supplied with amplifier. The remote inputs are all in parallel. Only one is to be used. Use any one of the three remote inputs to turn the amplifier on. Do not connect external
3 FRONT, REAR, and SUBWOOFER Input Sensitivity Controls
Turn control clockwise to increase the amplifier sensitivity to incoming signals. Turn control counterclockwise to decrease the amplifier sensitivity.
4 FRONT and REAR Highpass Crossover Controls
To use 12dB/octave crossover, move switch to
FUSE 3 x 30A
B+ | B+ | GND | GND |
| POWER |
| POWER |
| P OW E R |
| P OW E R |
B + | B + | G N D | G N D |
1
2
O F FO N
H I G H PA S S
3 5 0
2 0 0 ![]() H z
H z
2 0
4