GAS LEAK TESTING
![]() THE GAS LEAK TESTING PROCEDURE MUST BE PERFORMED
THE GAS LEAK TESTING PROCEDURE MUST BE PERFORMED
EVERY TIME THE TANK IS CONNECTED TO COOKER.
![]() WARNING
WARNING
•Gas leak testing must be performed outdoors in a well ventilated area.
•During the gas leak testing procedure, always keep unit away from open flames, sparks or lit cigarettes.
•Never use a flame to check for gas leaks.
•If the burner does not light within 5 seconds, turn the propane tank valve and control valve knob off immediately. Always wait at least 5 minutes for gas fumes to dissipate before repeating procedure.
•Turn the cooker “ON” or “OFF” with the propane tank valve; use the control valve knob ONLY to adjust the flame. Read all warnings on or accompanying propane tank.
•Never use a unit that has a gas leak. Contact The Brinkmann Corporation’s Customer Service Department for replacement parts at
1.Make sure the propane tank valve and control valve knob are turned OFF.
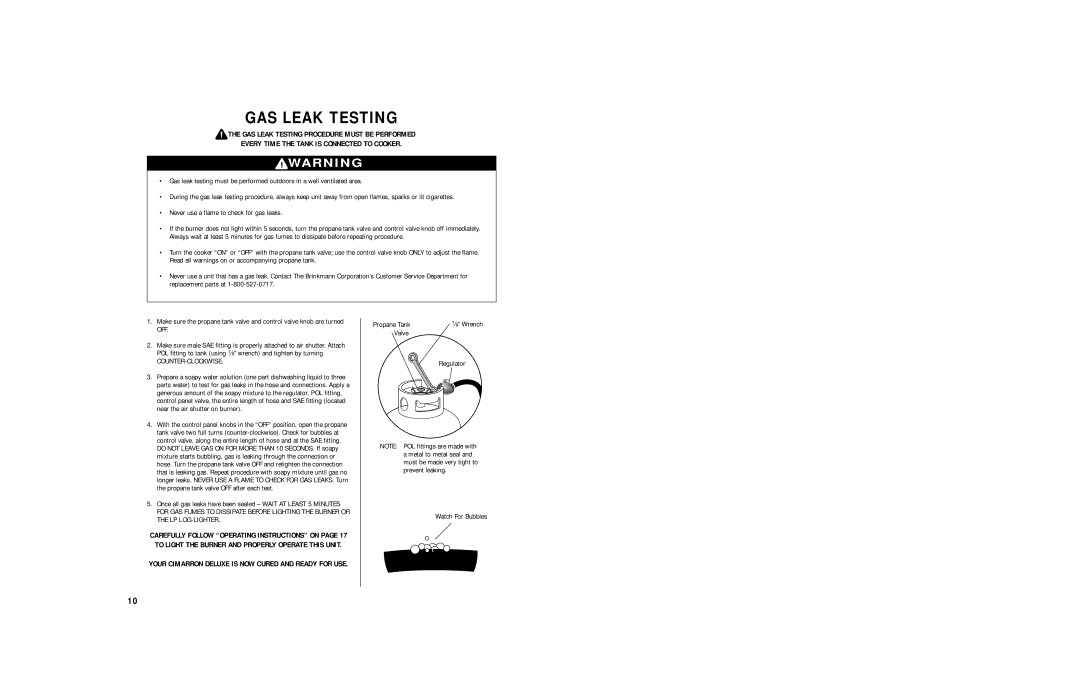
2.Make sure male SAE fitting is properly attached to air shutter. Attach POL fitting to tank (using f" wrench) and tighten by turning
COUNTER-CLOCKWISE.
3.Prepare a soapy water solution (one part dishwashing liquid to three parts water) to test for gas leaks in the hose and connections. Apply a generous amount of the soapy mixture to the regulator, POL fitting, control panel valve, the entire length of hose and SAE fitting (located near the air shutter on burner).
4.With the control panel knobs in the “OFF” position, open the propane tank valve two full turns
5.Once all gas leaks have been sealed – WAIT AT LEAST 5 MINUTES FOR GAS FUMES TO DISSIPATE BEFORE LIGHTING THE BURNER OR THE LP
CAREFULLY FOLLOW “OPERATING INSTRUCTIONS” ON PAGE 17 TO LIGHT THE BURNER AND PROPERLY OPERATE THIS UNIT.
Propane Tank | f" Wrench |
Valve |
|
| Regulator |
NOTE: POL fittings are made with a metal to metal seal and must be made very tight to prevent leaking.
Watch For Bubbles
YOUR CIMARRON DELUXE IS NOW CURED AND READY FOR USE.
10