
46000 specifications
The Broan 46000 series is a highly regarded line of range hoods that blends performance with sleek design, making it a popular choice for modern kitchens. Designed to provide efficient ventilation and elevate the culinary experience, this series boasts an impressive range of features and technologies that enhance both functionality and aesthetics.One of the standout features of the Broan 46000 series is its powerful ventilation capabilities. With options ranging from 250 to 400 CFM, these range hoods effectively eliminate smoke, heat, and odors, resulting in a fresher cooking environment. The advanced ventilator design ensures improved air circulation, ensuring that your kitchen remains comfortable, even during extensive cooking sessions.
In terms of operation, the Broan 46000 offers easy-to-use controls for hassle-free functionality. Most models are equipped with user-friendly push-button controls that allow you to select from multiple fan speeds and lighting options. The intuitive design ensures that you can adjust the settings quickly, even while you’re busy cooking.
Lighting is another vital aspect of the Broan 46000 series. Many models come equipped with bright, energy-efficient LED lights that illuminate your cooking surface. This provides not only better visibility for cooking tasks but also enhances the overall ambiance of your kitchen. The integrated lighting fixtures are designed to be both practical and aesthetically pleasing, further enhancing the range hood's sleek appearance.
The construction of the Broan 46000 also deserves mention. Made from durable stainless steel, these range hoods are designed to withstand the rigors of daily kitchen use while resisting corrosion and ensuring long-lasting performance. The smooth surfaces make for easy cleaning, which is a significant advantage for busy households.
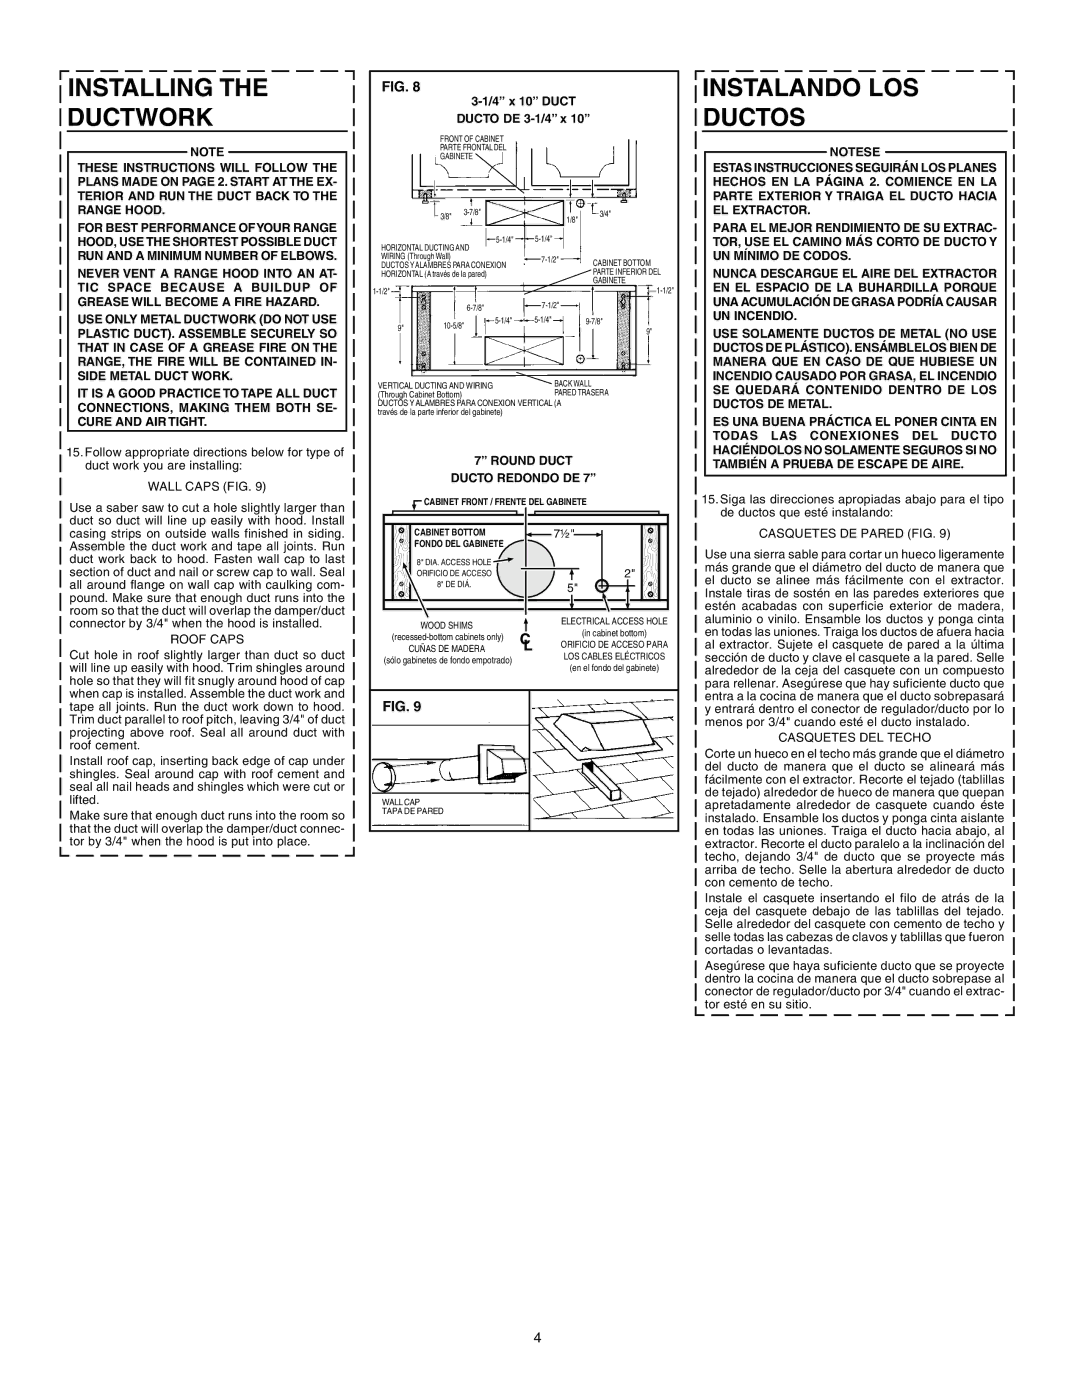
Another notable characteristic of the Broan 46000 series is its versatile installation options. The hoods in this series can be installed as either under-cabinet or wall-mounted units, offering flexibility to fit various kitchen designs. This adaptability makes it easy to incorporate the range hood into any kitchen layout, enhancing both the functionality and style of the space.
In summary, the Broan 46000 series range hoods provide exceptional performance, user-friendly features, and an elegant design, making them a smart choice for any modern kitchen. With powerful ventilation, energy-efficient lighting, and durable construction, these range hoods are engineered to meet the needs of aspiring home chefs and everyday cooks alike. Whether you are renovating your kitchen or simply seeking an upgrade, the Broan 46000 series is an excellent addition that will elevate your cooking expereince.