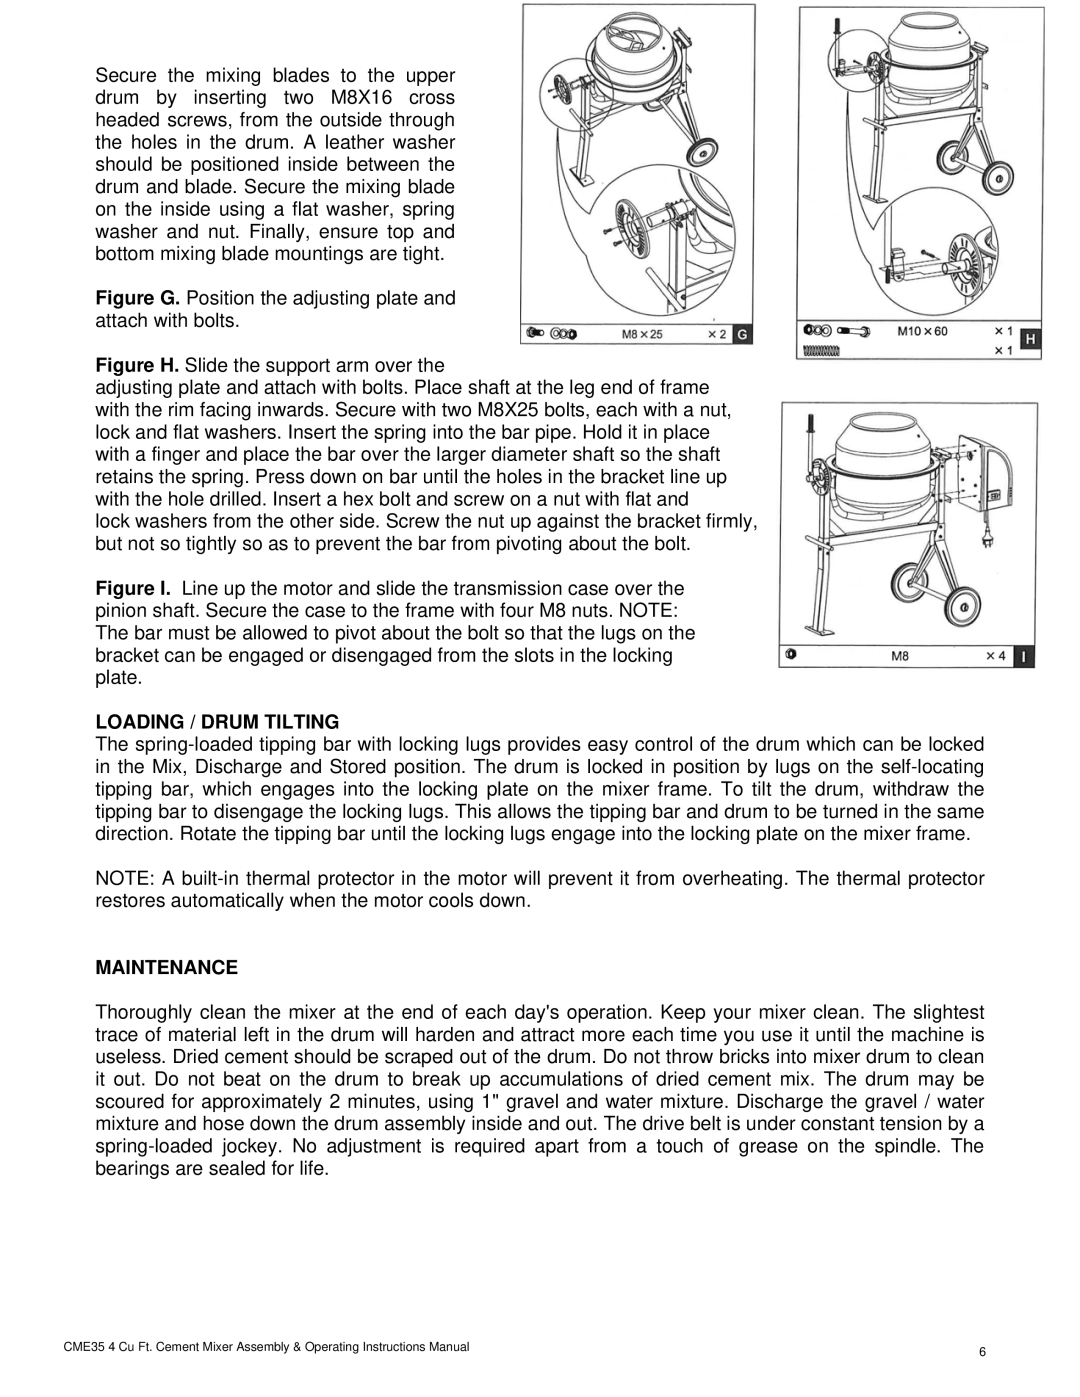
Secure the mixing blades to the upper drum by inserting two M8X16 cross headed screws, from the outside through the holes in the drum. A leather washer should be positioned inside between the drum and blade. Secure the mixing blade on the inside using a flat washer, spring washer and nut. Finally, ensure top and bottom mixing blade mountings are tight.
Figure G. Position the adjusting plate and attach with bolts.
Figure H. Slide the support arm over the
adjusting plate and attach with bolts. Place shaft at the leg end of frame with the rim facing inwards. Secure with two M8X25 bolts, each with a nut, lock and flat washers. Insert the spring into the bar pipe. Hold it in place with a finger and place the bar over the larger diameter shaft so the shaft retains the spring. Press down on bar until the holes in the bracket line up with the hole drilled. Insert a hex bolt and screw on a nut with flat and
lock washers from the other side. Screw the nut up against the bracket firmly, but not so tightly so as to prevent the bar from pivoting about the bolt.
Figure I. Line up the motor and slide the transmission case over the pinion shaft. Secure the case to the frame with four M8 nuts. NOTE: The bar must be allowed to pivot about the bolt so that the lugs on the bracket can be engaged or disengaged from the slots in the locking plate.
LOADING / DRUM TILTING
The
NOTE: A
MAINTENANCE
Thoroughly clean the mixer at the end of each day's operation. Keep your mixer clean. The slightest trace of material left in the drum will harden and attract more each time you use it until the machine is useless. Dried cement should be scraped out of the drum. Do not throw bricks into mixer drum to clean it out. Do not beat on the drum to break up accumulations of dried cement mix. The drum may be scoured for approximately 2 minutes, using 1" gravel and water mixture. Discharge the gravel / water mixture and hose down the drum assembly inside and out. The drive belt is under constant tension by a
CME35 4 Cu Ft. Cement Mixer Assembly & Operating Instructions Manual | 6 |
|
