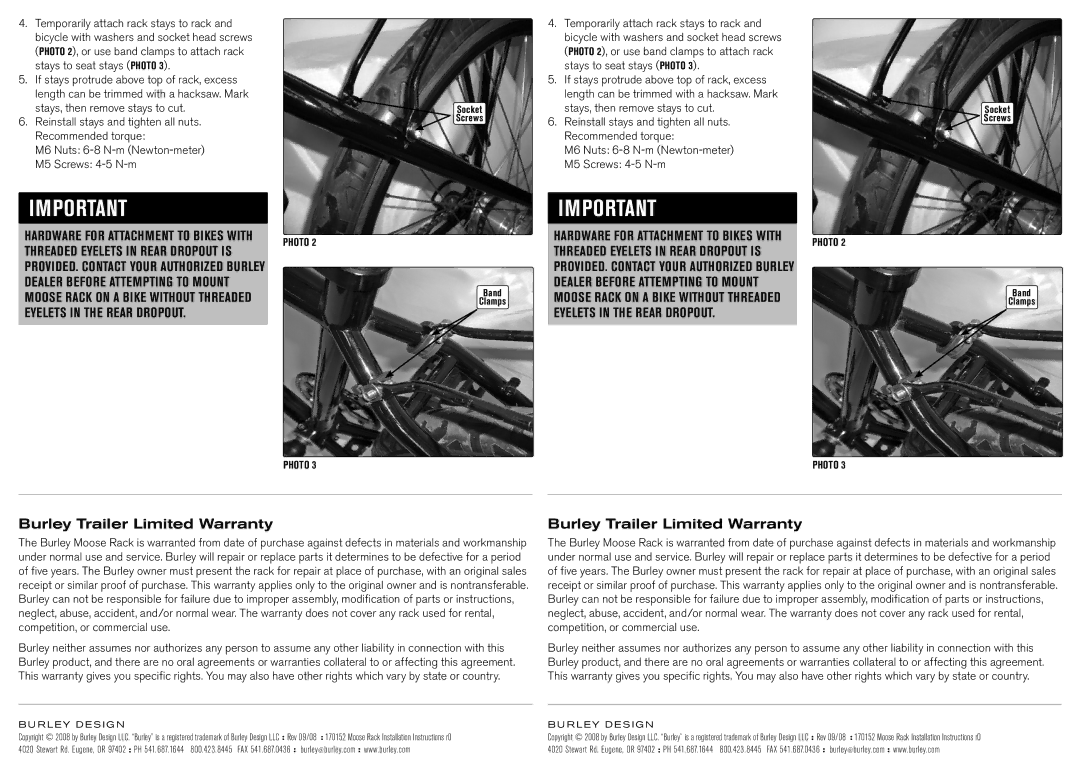
4.Temporarily attach rack stays to rack and bicycle with washers and socket head screws (Photo 2), or use band clamps to attach rack stays to seat stays (Photo 3).
5.If stays protrude above top of rack, excess length can be trimmed with a hacksaw. Mark stays, then remove stays to cut.
6.Reinstall stays and tighten all nuts. Recommended torque:
M6 Nuts:
M5 Screws:
IMPORTANT
HARDWARE FOR ATTACHMENT TO BIKES WITH THREADED EYELETS IN REAR DROPOUT IS PROVIDED. CONTACT YOUR AUTHORIZED BURLEY DEALER BEFORE ATTEMPTING TO MOUNT MOOSE RACK ON A BIKE WITHOUT THREADED EYELETS IN THE REAR DROPOUT.
PHOTO 2
PHOTO 3
Socket
Screws
Band
Clamps
Burley Trailer Limited Warranty
The Burley Moose Rack is warranted from date of purchase against defects in materials and workmanship under normal use and service. Burley will repair or replace parts it determines to be defective for a period of five years. The Burley owner must present the rack for repair at place of purchase, with an original sales receipt or similar proof of purchase. This warranty applies only to the original owner and is nontransferable. Burley can not be responsible for failure due to improper assembly, modification of parts or instructions, neglect, abuse, accident, and/or normal wear. The warranty does not cover any rack used for rental, competition, or commercial use.
Burley neither assumes nor authorizes any person to assume any other liability in connection with this Burley product, and there are no oral agreements or warranties collateral to or affecting this agreement. This warranty gives you specific rights. You may also have other rights which vary by state or country.
BURLEY DESIGN
Copyright © 2008 by Burley Design LLC. “Burley” is a registered trademark of Burley Design LLC : Rev 09/08 : 170152 Moose Rack Installation Instructions r0
4020 Stewart Rd. Eugene, OR 97402 : PH 541. 687.1644 800.423. 8445 FAX 541.687.0436 : burley@burley.com : www.burley.com