
BMS05DABIP specifications
The Bush BMS05DABIP is a versatile and compact digital radio that has gained popularity for its exceptional sound quality and array of features aimed at enhancing the listening experience. Designed for modern users who prioritize convenience and functionality, this radio embodies the perfect blend of style and technology.One of the standout features of the Bush BMS05DABIP is its dual-band functionality, allowing users to access both DAB and FM radio stations. This capability ensures a wide selection of channels, giving listeners the freedom to choose from an extensive array of programming, including music, news, and talk shows. The DAB (Digital Audio Broadcasting) technology provides clearer sound and less interference than traditional FM radio, making it a preferred choice for many audiophiles.
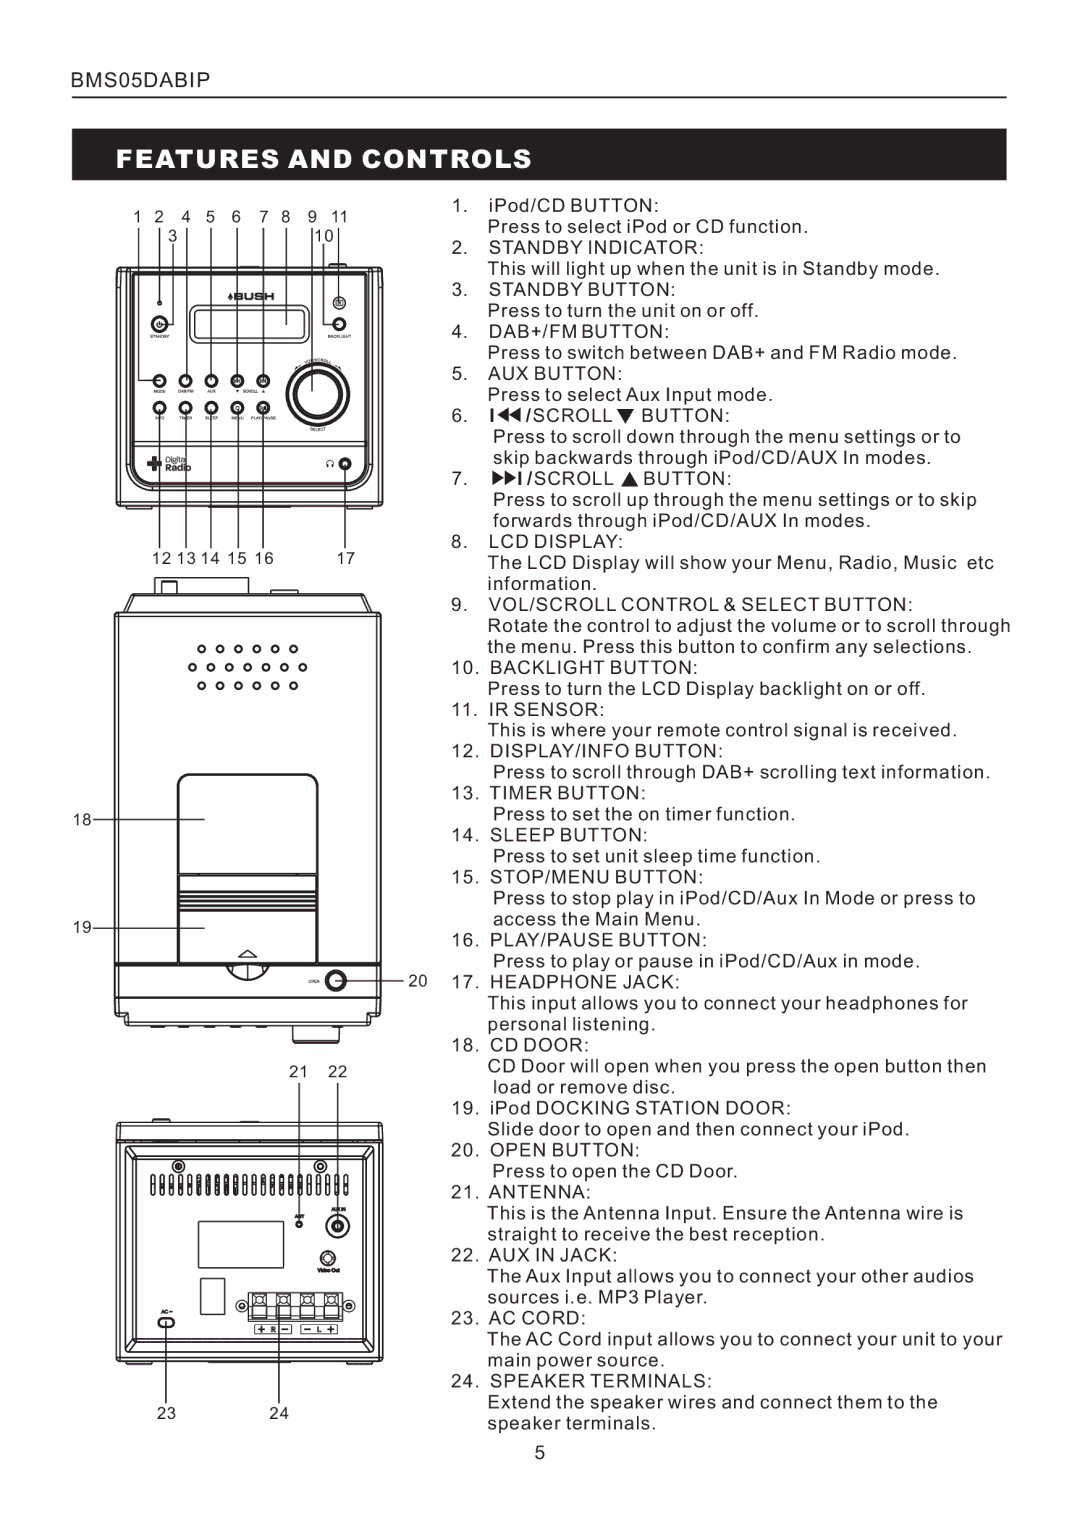
The sleek design of the Bush BMS05DABIP combines aesthetics with practicality. Its compact size makes it suitable for various settings, whether you want to enjoy music in the living room, the kitchen, or even on your bedside table. The high-contrast LCD display is easy to read, providing clear information on the station, track details, and other relevant data.
In addition to its radio capabilities, the Bush BMS05DABIP also features Bluetooth connectivity, enabling users to stream music directly from their smartphones, tablets, or other devices. This means that you can enjoy your personal playlists or podcasts seamlessly without the need for additional equipment.
Another noteworthy characteristic is the inclusion of an alarm clock function, complete with a snooze feature. This makes the Bush BMS05DABIP an excellent addition to your morning routine, allowing you to wake up to your favorite station or a soothing tone.
Battery performance is another critical aspect of the Bush BMS05DABIP. It can be powered by batteries, making it a perfect companion for outdoor activities or travel where access to power sources might be limited.
Overall, the Bush BMS05DABIP stands out as an excellent choice for anyone seeking a reliable and stylish digital radio. With its combination of DAB/FM functionality, Bluetooth streaming, and convenient features, it is well-suited for diverse listening environments, making it a worthy investment for music lovers and radio enthusiasts alike.