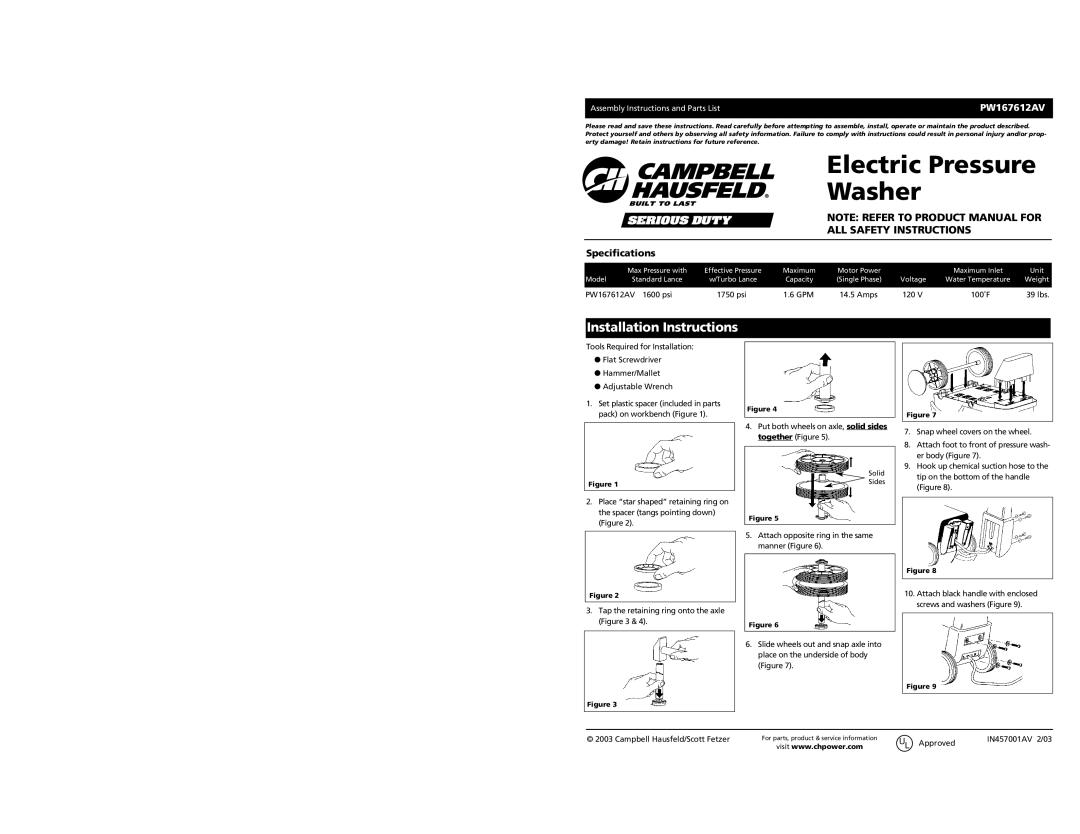
PW167612AV specifications
The Campbell Hausfeld PW167612AV is a robust and efficient electric pressure washer designed to handle a variety of cleaning tasks around the home and garden. This powerful unit combines convenience and performance, making it ideal for tackling dirt, grime, and stubborn stains from surfaces such as patios, driveways, and vehicles.One of the standout features of the PW167612AV is its powerful 1700 PSI motor which delivers strong pressure, enabling users to effectively clean surfaces without excessive effort. This pressure level is suitable for most household cleaning tasks, from washing cars to renewing patio furniture. Coupled with a flow rate of 1.2 gallons per minute, it provides a perfect balance of power and water consumption, ensuring efficient use of resources during cleaning.
The unit is equipped with an adjustable spray wand that allows users to select different spray patterns, providing versatility for various cleaning applications. Whether a wide spray is needed for large surface areas or a concentrated stream for tough stains, the PW167612AV can adapt to accommodate different cleaning challenges. Additionally, it features a quick-connect nozzle system that simplifies the swapping of nozzles, saving time and effort during cleaning sessions.
Portability is another key characteristic of the Campbell Hausfeld PW167612AV. The pressure washer is designed with mobility in mind, featuring a lightweight frame and ergonomic handle, making it easy to maneuver around the yard or to store when not in use. The built-in wheels add an extra layer of convenience, allowing users to roll the unit easily rather than lifting it.
Safety features are also a priority with this model. The PW167612AV includes a safety lock on the trigger, preventing accidental start-ups, which is particularly important in households with children or pets.
In terms of technology, the Campbell Hausfeld brand has a reputation for durability and innovation. The PW167612AV is built with high-quality materials and components that ensure longevity, minimizing maintenance requirements.
Overall, the Campbell Hausfeld PW167612AV electric pressure washer stands out for its combination of power, versatility, and user-friendly design. It is a solid choice for homeowners seeking an effective solution for their cleaning needs, promising to deliver reliable performance year after year.