V. Specifications
Pickup Device: | 1/3 inch interline |
| transfer CCD |
Picture Element: | 510x492(/E,EIA) |
| 500x580(/C,CCIR) |
Horizontal resolution: | 420 TV lines |
Sensitivity: | 0.04 lux/F=1.2 |
S/N ratio: | Over 48 dB |
Electronic shutter: | Up to 1/10,000 |
Auto. Iris: | Video Drive |
BLC: | Yes |
AGC ON/OFF: | Yes |
Gamma Correction: | 0.45 |
Video output: | |
Power source: | AC 198 ~ 264V |
Sync. Mode: | Internal Sync. |
Lens Mount: | C or CS with Ring |
Dimension: | 42x47x100mm |
Operating Temperature: | |
Storage Temperature: | |
| MES1G00100 |
ES100 Series
INSTRUCTION
MANUAL
1/3" B/W CCD Cameras
I.General
The ES100 Series Cameras are compact, full performance, general purpose B/W CCD Cameras, which use high sensitive 1/3" B/W interline transfer CCDs (Charge Coupled Device). ES100, with AC power cord , has functions of ES on/off, AGC on/off , and BLC on/off. Audio feature is
II.Precautions
•Do not expose the camera to humidity and dust. If the camera is mounted outdoor, a camera housing is required.
•Do not disassemble it or place it on an unstable base.
•Do not touch the surface of CCD sensor by hand directly. When the camera is not in use, put the cover cap on the lens mount.
•Never face the camera toward the sun.
•Use
•Use proper AC power source otherwise the camera will not function correctly.
III. Installation Instructions
!Remove the cover cap from the top of the lens mount.
"If CS mount lens is used, please also remove the C Mount Ring (the 5mm thick ring on top of the lens mount).
#Screw the lens firmly onto the lens mount.
$Connect the video output of the camera to a B/W monitor or other video device through a 75 ohm type coaxial cable with BNC female connector at camera end.
IV. Using Special Features
)Using Auto Iris Lens
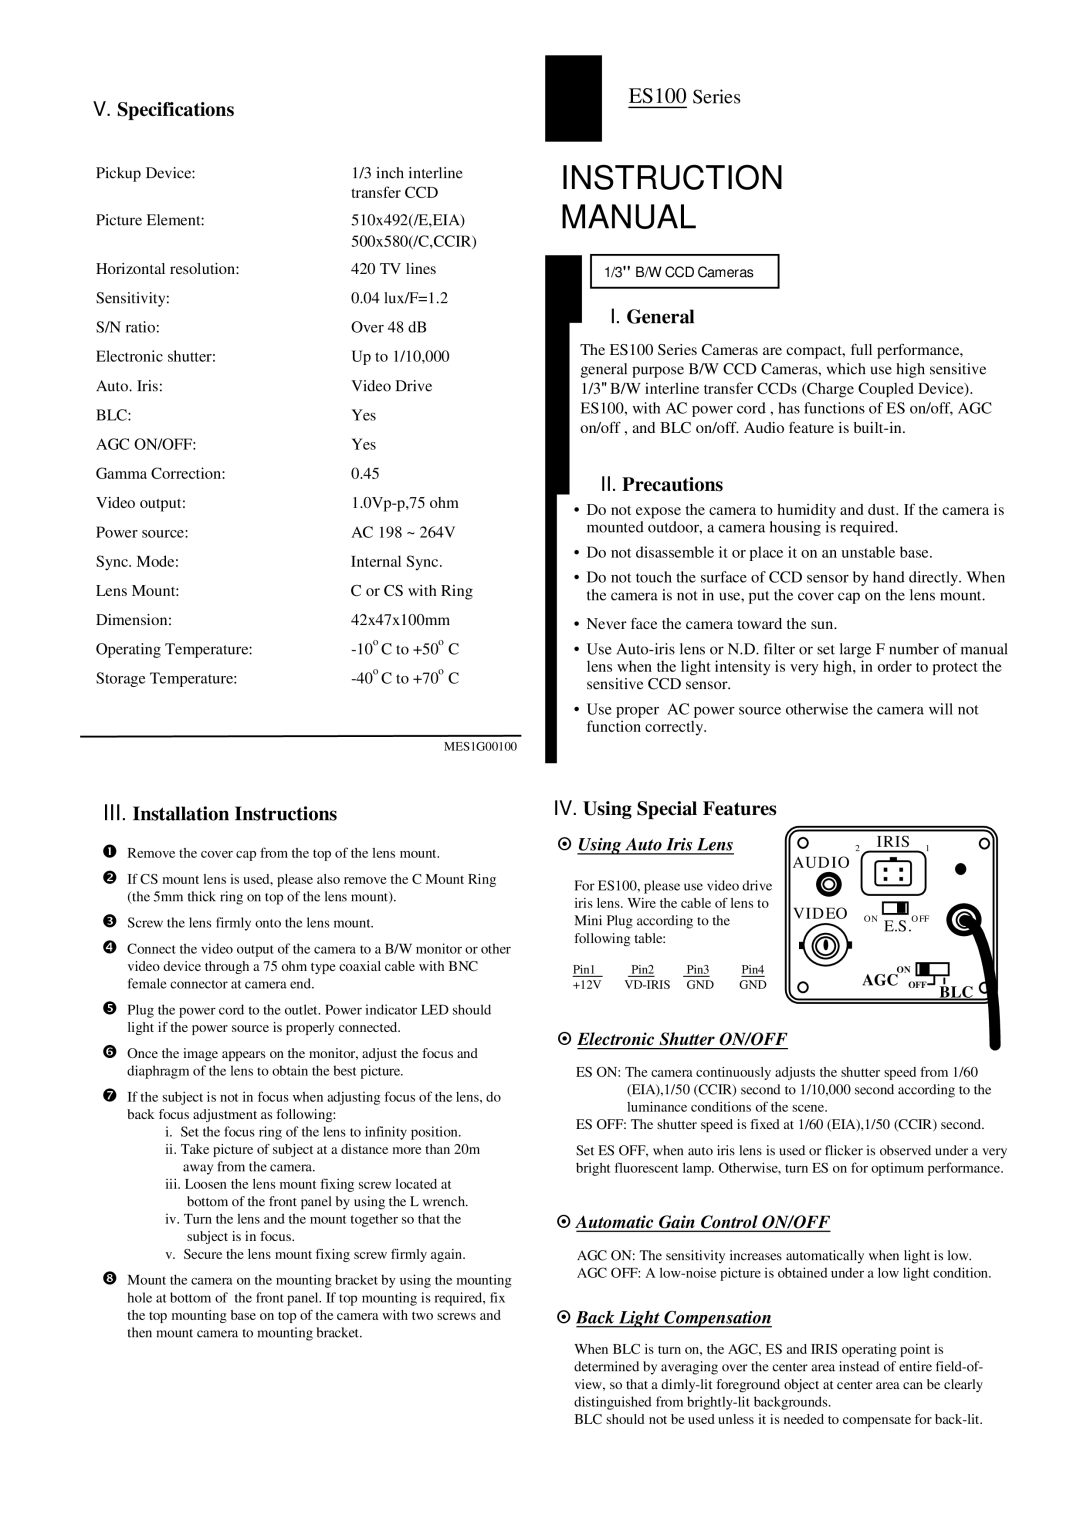
For ES100, please use video drive iris lens. Wire the cable of lens to Mini Plug according to the following table:
Pin1 | Pin2 | Pin3 | Pin4 |
+12V | GND | GND |
2 IRIS 1
AUDIO
VIDEO ON E.S.OFF
AGCONOFF ![]() BLC
BLC
%Plug the power cord to the outlet. Power indicator LED should light if the power source is properly connected.
&Once the image appears on the monitor, adjust the focus and diaphragm of the lens to obtain the best picture.
'If the subject is not in focus when adjusting focus of the lens, do back focus adjustment as following:
i.Set the focus ring of the lens to infinity position.
ii.Take picture of subject at a distance more than 20m away from the camera.
iii.Loosen the lens mount fixing screw located at
bottom of the front panel by using the L wrench.
iv.Turn the lens and the mount together so that the subject is in focus.
v.Secure the lens mount fixing screw firmly again.
(Mount the camera on the mounting bracket by using the mounting hole at bottom of the front panel. If top mounting is required, fix the top mounting base on top of the camera with two screws and then mount camera to mounting bracket.
)Electronic Shutter ON/OFF
ES ON: The camera continuously adjusts the shutter speed from 1/60 (EIA),1/50 (CCIR) second to 1/10,000 second according to the luminance conditions of the scene.
ES OFF: The shutter speed is fixed at 1/60 (EIA),1/50 (CCIR) second.
Set ES OFF, when auto iris lens is used or flicker is observed under a very bright fluorescent lamp. Otherwise, turn ES on for optimum performance.
)Automatic Gain Control ON/OFF
AGC ON: The sensitivity increases automatically when light is low.
AGC OFF: A
)Back Light Compensation
When BLC is turn on, the AGC, ES and IRIS operating point is determined by averaging over the center area instead of entire
BLC should not be used unless it is needed to compensate for