CLEAR GATE - MODEL CP30
FOR OPENINGS 26.5” (67cm) - 41.5” (105cm)
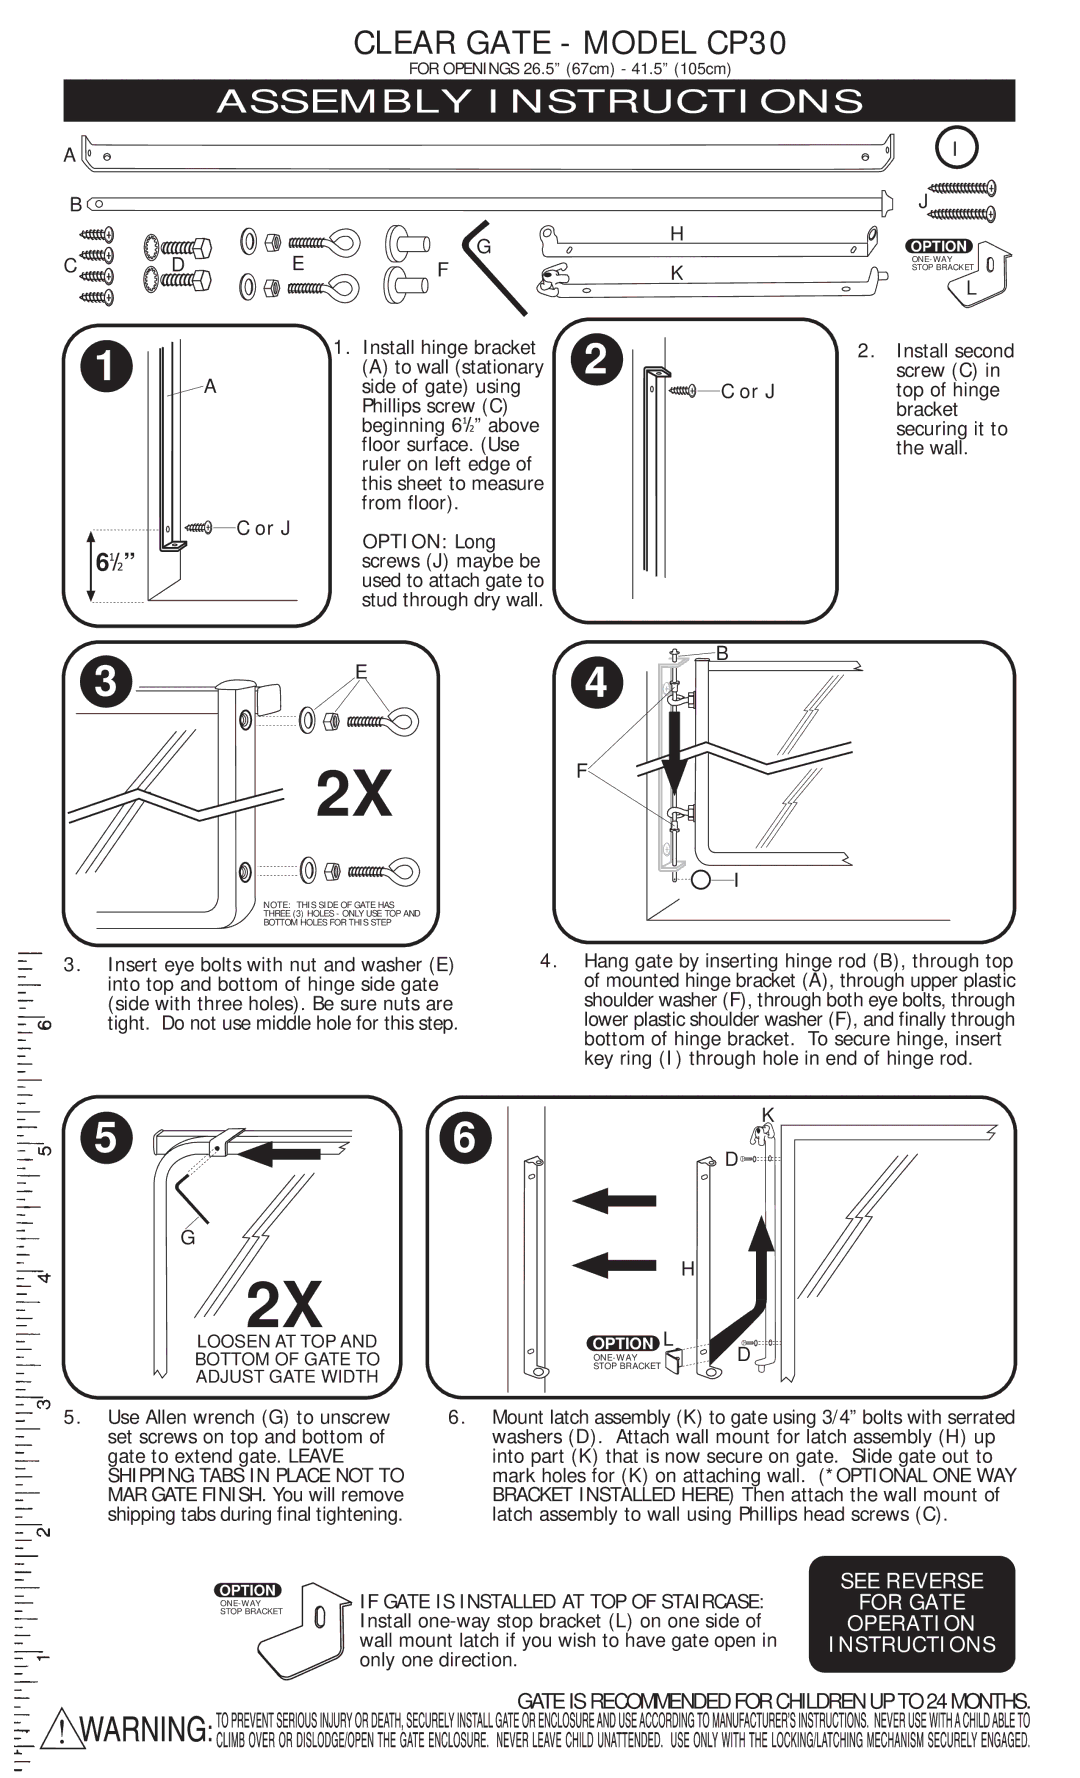
ASSEMBLY INSTRUCTIONS
A |
|
|
B |
|
|
D | E | G |
|
H
I
J
OPTION
C |
| F |
1 | 1. | Install hinge bracket |
A | (A) to wall (stationary | |
side of gate) using | ||
|
| Phillips screw (C) |
|
| beginning 6 ” above |
|
| floor surface. (Use |
|
| ruler on left edge of |
|
| this sheet to measure |
|
| from floor). |
| C or J | OPTION: Long |
6 ” |
| |
| screws (J) maybe be | |
|
| used to attach gate to |
|
| stud through dry wall. |
3 ![]() E
E
2X
2
4
F
KSTOP BRACKET
L
2. | Install second |
| screw (C) in |
C or J | top of hinge |
| bracket |
| securing it to |
| the wall. |
![]() B
B
I
NOTE: THIS SIDE OF GATE HAS
THREE (3) HOLES - ONLY USE TOP AND
BOTTOM HOLES FOR THIS STEP
3.Insert eye bolts with nut and washer (E) into top and bottom of hinge side gate (side with three holes). Be sure nuts are tight. Do not use middle hole for this step.
4.Hang gate by inserting hinge rod (B), through top of mounted hinge bracket (A), through upper plastic shoulder washer (F), through both eye bolts, through lower plastic shoulder washer (F), and finally through bottom of hinge bracket. To secure hinge, insert key ring (I) through hole in end of hinge rod.
56
G
2X
LOOSEN AT TOP AND
BOTTOM OF GATE TO
ADJUST GATE WIDTH
OPTION L
K
![]() D
D![]()
![]()
![]()
H
D |
5.Use Allen wrench (G) to unscrew set screws on top and bottom of gate to extend gate. LEAVE SHIPPING TABS IN PLACE NOT TO MAR GATE FINISH. You will remove shipping tabs during final tightening.
6.Mount latch assembly (K) to gate using 3/4” bolts with serrated washers (D). Attach wall mount for latch assembly (H) up into part (K) that is now secure on gate. Slide gate out to mark holes for (K) on attaching wall. (*OPTIONAL ONE WAY BRACKET INSTALLED HERE) Then attach the wall mount of latch assembly to wall using Phillips head screws (C).
OPTION
IF GATE IS INSTALLED AT TOP OF STAIRCASE: Install
SEE REVERSE
FOR GATE
OPERATION
INSTRUCTIONS
GATE IS RECOMMENDED FOR CHILDREN UP TO 24 MONTHS.