
P707 specifications
The Carrier P707 is a pioneering air conditioning unit designed for both residential and commercial applications, enhancing indoor climate control while maintaining energy efficiency and environmental sustainability. With an array of advanced features, the P707 stands out in the competitive market of HVAC solutions.One of the key characteristics of the Carrier P707 is its variable speed technology. This innovative feature allows the unit to adjust its compressor speed according to the cooling or heating demand, ensuring optimal comfort while using less energy. By avoiding the on-off cycles typical of traditional systems, the P707 provides a more stable temperature and significantly reduces energy consumption, contributing to lower utility bills.
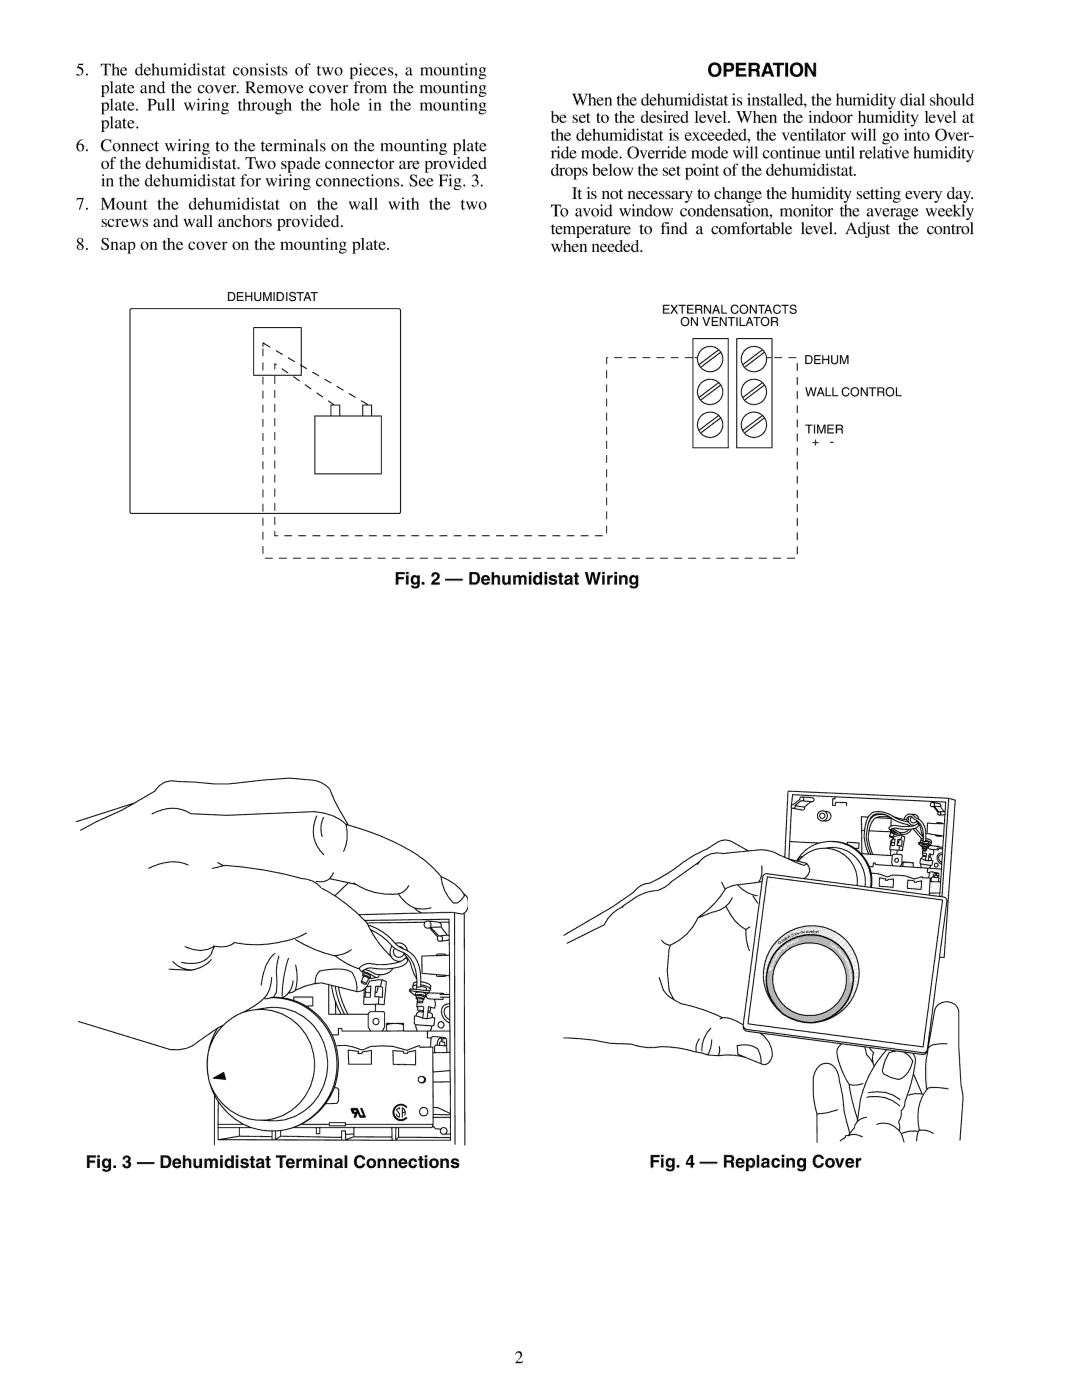
Incorporating eco-friendly refrigerants, the P707 adheres to modern environmental standards. The use of R-32 refrigerant minimizes its global warming potential, aligning with the industry's shift toward more sustainable practices. This commitment to eco-friendliness not only helps protect the environment but also makes the unit compliant with various regulatory requirements.
The P707 boasts a highly efficient design, achieving impressive SEER (Seasonal Energy Efficiency Ratio) ratings. This efficiency translates to year-round comfort, with the ability to maintain desired temperatures in diverse climates while keeping energy usage to a minimum. The unit features a robust build and is equipped with durable components that extend its lifespan, thus providing an excellent return on investment for users.
Additionally, the Carrier P707 embraces smart technology. It can be integrated into home automation systems, allowing users to control their air conditioning remotely via mobile apps. This one-touch control lets homeowners adjust settings, schedule operations, and monitor energy usage from anywhere, making it an ideal choice for tech-savvy consumers.
Noise reduction is another highlighted feature, with the P707 designed to operate quietly, contributing to a comfortable indoor environment. Its innovative fan design and sound-dampening materials ensure that sound levels are minimized, making it suitable for bedrooms, offices, and other noise-sensitive areas.
In summary, the Carrier P707 represents a significant advancement in heating and cooling technology. Combining energy efficiency, environmental responsibility, smart integration, and quiet operation, it meets the needs of modern consumers looking for reliable climate control solutions. With its state-of-the-art features and commitment to sustainability, the P707 sets a standard for quality and performance in the HVAC industry.