
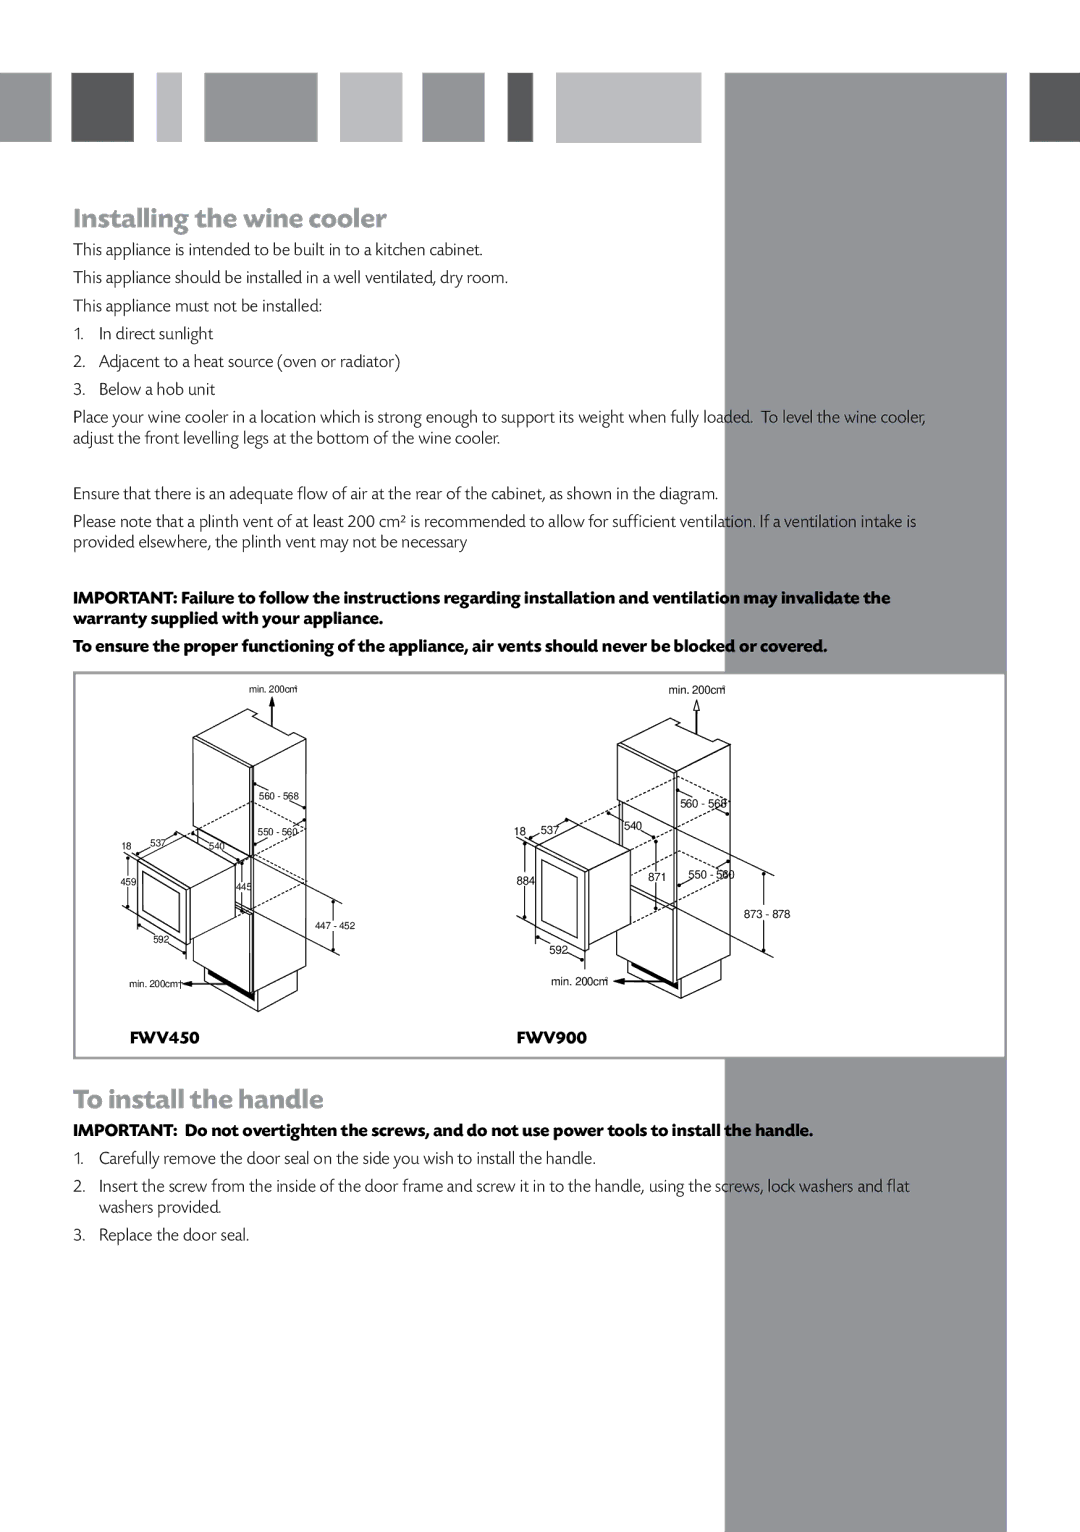
FWV450, FWV900 specifications
The CDA FWV900 and FWV450 are remarkable wine coolers designed to cater to the needs of wine enthusiasts who value both style and functionality. These models embody a perfect blend of advanced technology and elegant design, making them a popular choice for anyone looking to store and display their wine collection.One of the standout features of both the FWV900 and FWV450 is their impressive capacity. The FWV900 boasts a spacious interior capable of holding up to 45 bottles, making it ideal for avid collectors. The FWV450, while slightly smaller, offers an ample space for 20 bottles, ensuring that both options are suitable for various collection sizes.
In terms of temperature control, these wine coolers utilize dual-zone cooling technology. This feature allows users to store both red and white wines at their optimal temperatures simultaneously. The FWV900 offers a temperature range of 5°C to 20°C for each zone, while the FWV450 has a slightly narrower range, ensuring that wines are preserved in perfect condition.
The aesthetics of the FWV900 and FWV450 are equally impressive. Each model features a sleek, modern design with a stainless steel finish and a double-glazed UV-protected glass door. This not only enhances the visual appeal but also protects the wine from harmful UV rays. The interior LED lighting elegantly showcases the bottles, adding a sophisticated touch to any room.
Both wine coolers operate quietly due to their vibration-free technology, which prevents disturbance to the wine, ensuring a calm environment for proper aging. The adjustable shelving in both models allows for flexible storage options, accommodating various bottle sizes, including oversized bottles.
User convenience is enhanced with features like a digital control panel, letting users easily set and monitor temperatures. The FWV900 even includes a child lock function, ensuring safety in households with young children.
In conclusion, the CDA FWV900 and FWV450 are exceptional wine coolers that combine advanced features with stylish design. With their ample storage capacity, precise temperature control, elegant aesthetics, and user-friendly characteristics, these models serve as perfect additions for any wine lover's home. Whether you're a seasoned collector or an occasional drinker, these wine coolers provide the ideal environment for your cherished bottles.