Heater Assembly (Dual burner models only)
The tank collar bracket must be assembled before the heaters can be attached to the propane tank.
1.Align bolt holes in tank collar bracket and piezo bracket with bolt holes in center plate on manifold.
2.Thread two machine screws into the bolt holes attaching tank collar bracket and piezo bracket to center plate on manifold. (Fig. 1)
3.Connect spark plug cable (left) and spark plug cable (right) into each terminal of piezo lighter.
CAUTION: The spark plug cables have different connectors. Be sure to connect each spark plug into the correct terminal. Make sure terminals are securely con-
nected. |
| |
| Fuel | |
| Connector | |
| Nut | |
| Spark Cable | |
Manifold | (Right) | |
Spark Plug |
| |
Cable (Left) | Heat | |
Center Plate | Regulator | |
Knob | ||
| Machine | |
Piezo Bracket | Screw | |
Tank Collar Bracket | Mounting Bolt | |
Knob | ||
RMC134 | ||
| ||
Fig. 1 Assemble tank collar bracket. | ||
Connecting Heater to Propane Tank
Read and understand all safety information before connecting heater to propane tank.
1.(Applies to dual burner models only). Place heater onto tank with tank collar bracket over tank collar (Fig. 1) Mounting bolt knob should be positioned to the outside of tank collar.
2.(Applies to dual burner models only). Firmly secure to tank by
3.Make sure heater regulator knob is in the “OFF” position.
4.Wrench tighten the fuel connector nut into the propane tank valve with both gas hose fittings in a horizontal position. (Fig. 1) Turn fuel connector nut counterclockwise to tighten. Threads are left- handed.
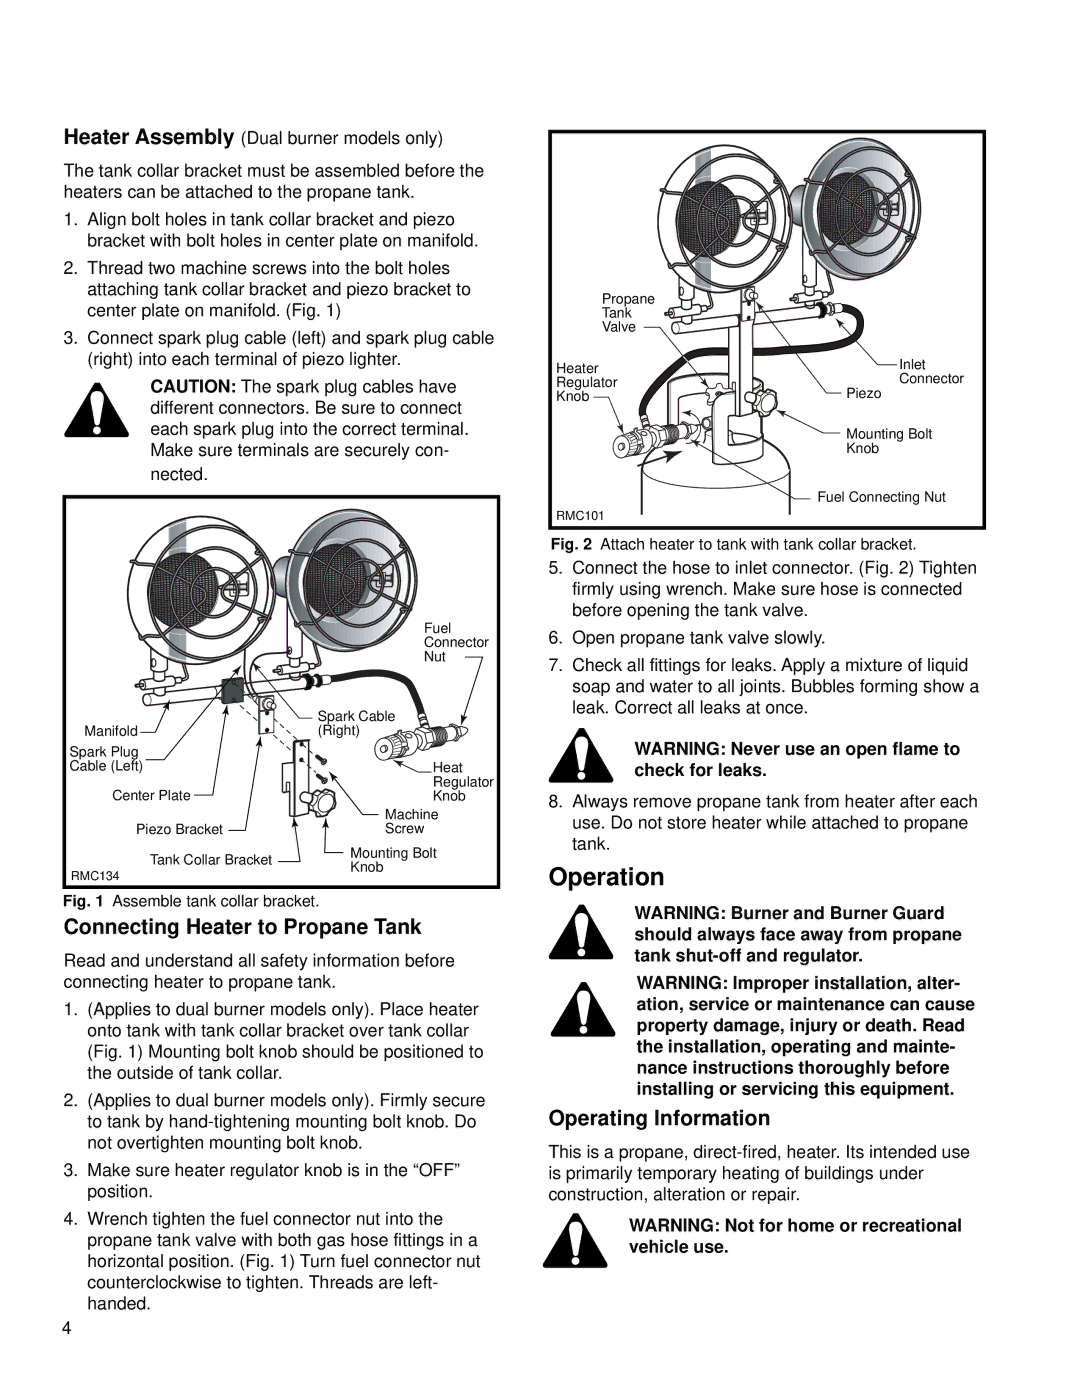
Propane
Tank
Valve
Heater | Inlet |
Regulator | Connector |
Knob | Piezo |
| Mounting Bolt |
| Knob |
| Fuel Connecting Nut |
RMC101 |
|
Fig. 2 Attach heater to tank with tank collar bracket.
5.Connect the hose to inlet connector. (Fig. 2) Tighten firmly using wrench. Make sure hose is connected before opening the tank valve.
6.Open propane tank valve slowly.
7.Check all fittings for leaks. Apply a mixture of liquid soap and water to all joints. Bubbles forming show a leak. Correct all leaks at once.
WARNING: Never use an open flame to check for leaks.
8.Always remove propane tank from heater after each use. Do not store heater while attached to propane tank.
Operation
WARNING: Burner and Burner Guard should always face away from propane tank
WARNING: Improper installation, alter- ation, service or maintenance can cause property damage, injury or death. Read the installation, operating and mainte- nance instructions thoroughly before installing or servicing this equipment.
Operating Information
This is a propane,
WARNING: Not for home or recreational vehicle use.
4