4 ASSEMBLY GUIDE | GRILL Assembly | |
|
|
|
Part | Qty |
A1– Handle | 1 |
A2 | 1 |
– Heat Sheld |
Fasteners
#10x24x5/8” | Hinge Pin | Hitch Pin | #8 Fiber Washer | |
Machine Screw | (Qty. 2) | (Qty. 2) | (Qty. 4) | |
(Qty. 4) | ||||
|
|
|
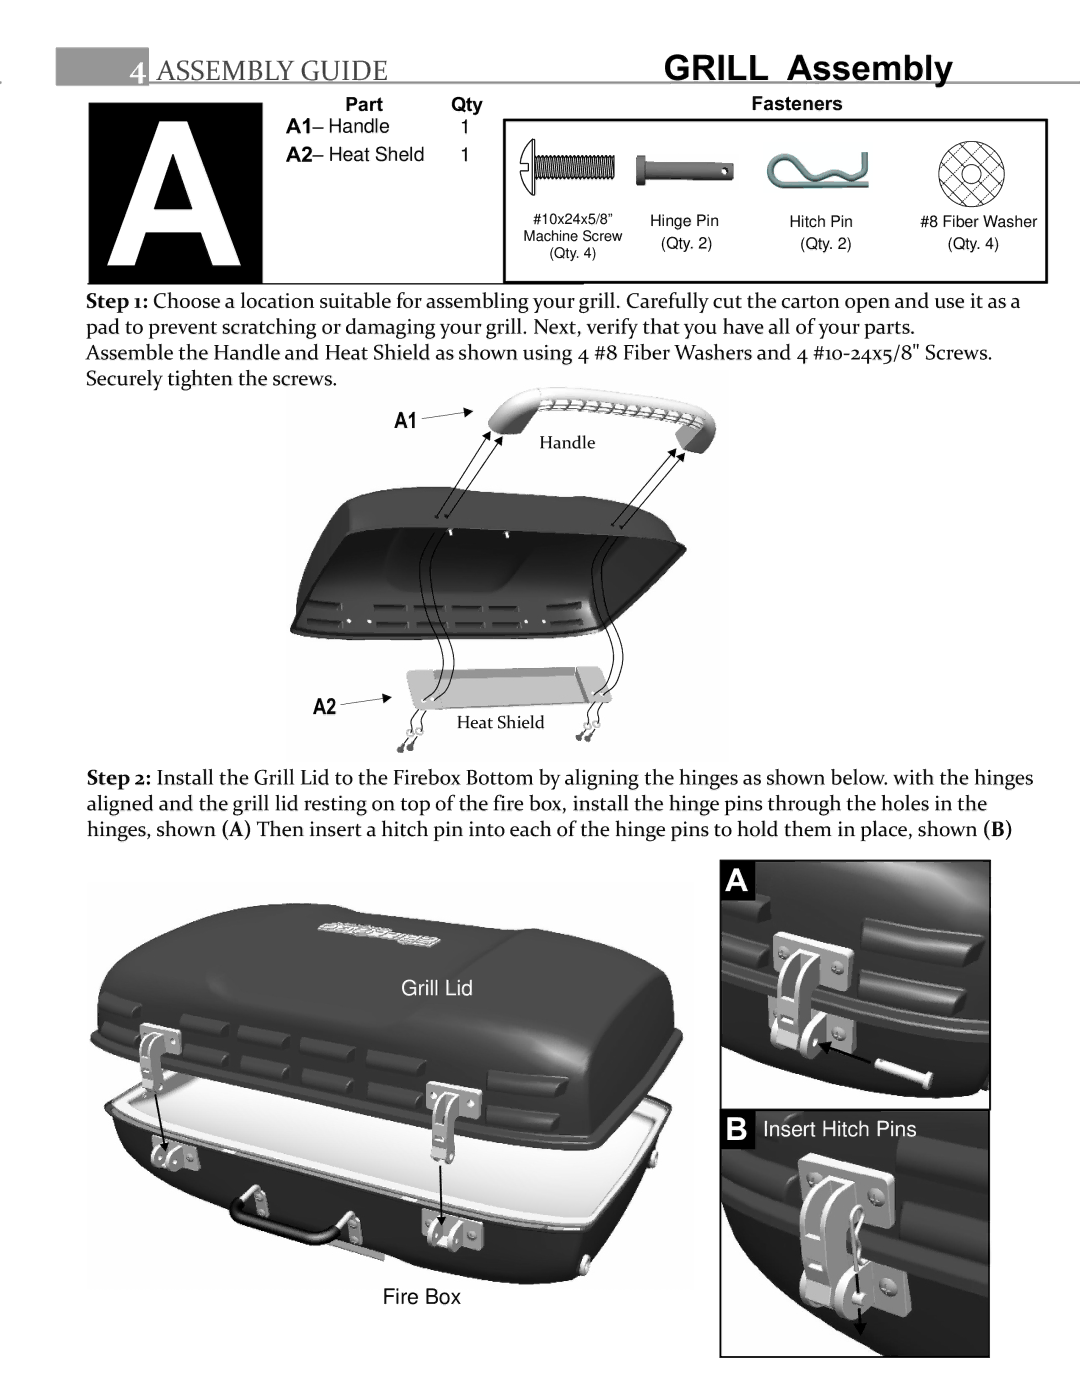
Step 1: Choose a location suitable for assembling your grill. Carefully cut the carton open and use it as a pad to prevent scratching or damaging your grill. Next, verify that you have all of your parts.
Assemble the Handle and Heat Shield as shown using 4 #8 Fiber Washers and 4
A1 ![]()
Handle
A2 ![]()
Heat Shield
Step 2: Install the Grill Lid to the Firebox Bottom by aligning the hinges as shown below. with the hinges aligned and the grill lid resting on top of the fire box, install the hinge pins through the holes in the hinges, shown (A) Then insert a hitch pin into each of the hinge pins to hold them in place, shown (B)
A
Grill Lid
B
Insert Hitch Pins
Fire Box
