Ignitor Lighting (continued)
8.For grills equipped with ELECTRONIC IGNITION at each burner:
Repeat steps 4 through 6 to light each burner.
9.Once each burner has ignited, turn knobs to desired setting.
WARNING
Turn controls and gas source or tank OFF when not in use.
CAUTION
If ignition does NOT occur in 5 seconds, turn the burner controls OFF, wait 5 minutes and repeat the lighting procedure. If the burner does not ignite with the valve open, gas will continue to flow out of the burner and could accidently ignite with risk of injury.
sDo not lean over grill while lighting.
1.Open lid. Turn ON gas at LP cylinder.
2.Place match into match holder (hanging from side panel of grill). Light match; then light burner by placing match through the match light hole on right or left side of grill.
3.Push in and turn far right or far left burner knob to the HI position, depending on match light hole selected. Be sure burner lights and stays lit.
4.Light adjacent burners in sequence by pushing knobs in and turning to the HI position.
Sideburner Ignitor Lighting
sDo not lean over grill while lighting.
1.Open sideburner lid. Turn ON gas at LP cylinder.
2.Turn sideburner knob to the HI position, push and hold ELECTRONIC IGNITOR button.
3.If sideburner does NOT light within 5 seconds, turn knob to OFF, wait 5 minutes, then
repeat lighting procedure.
Sideburner Match Lighting
1.Open sideburner lid. Turn ON gas at LP cylinder.
2.Place lit match near burner.
3. Turn sideburner knob to the HI position.
Be sure burner lights and stays lit.
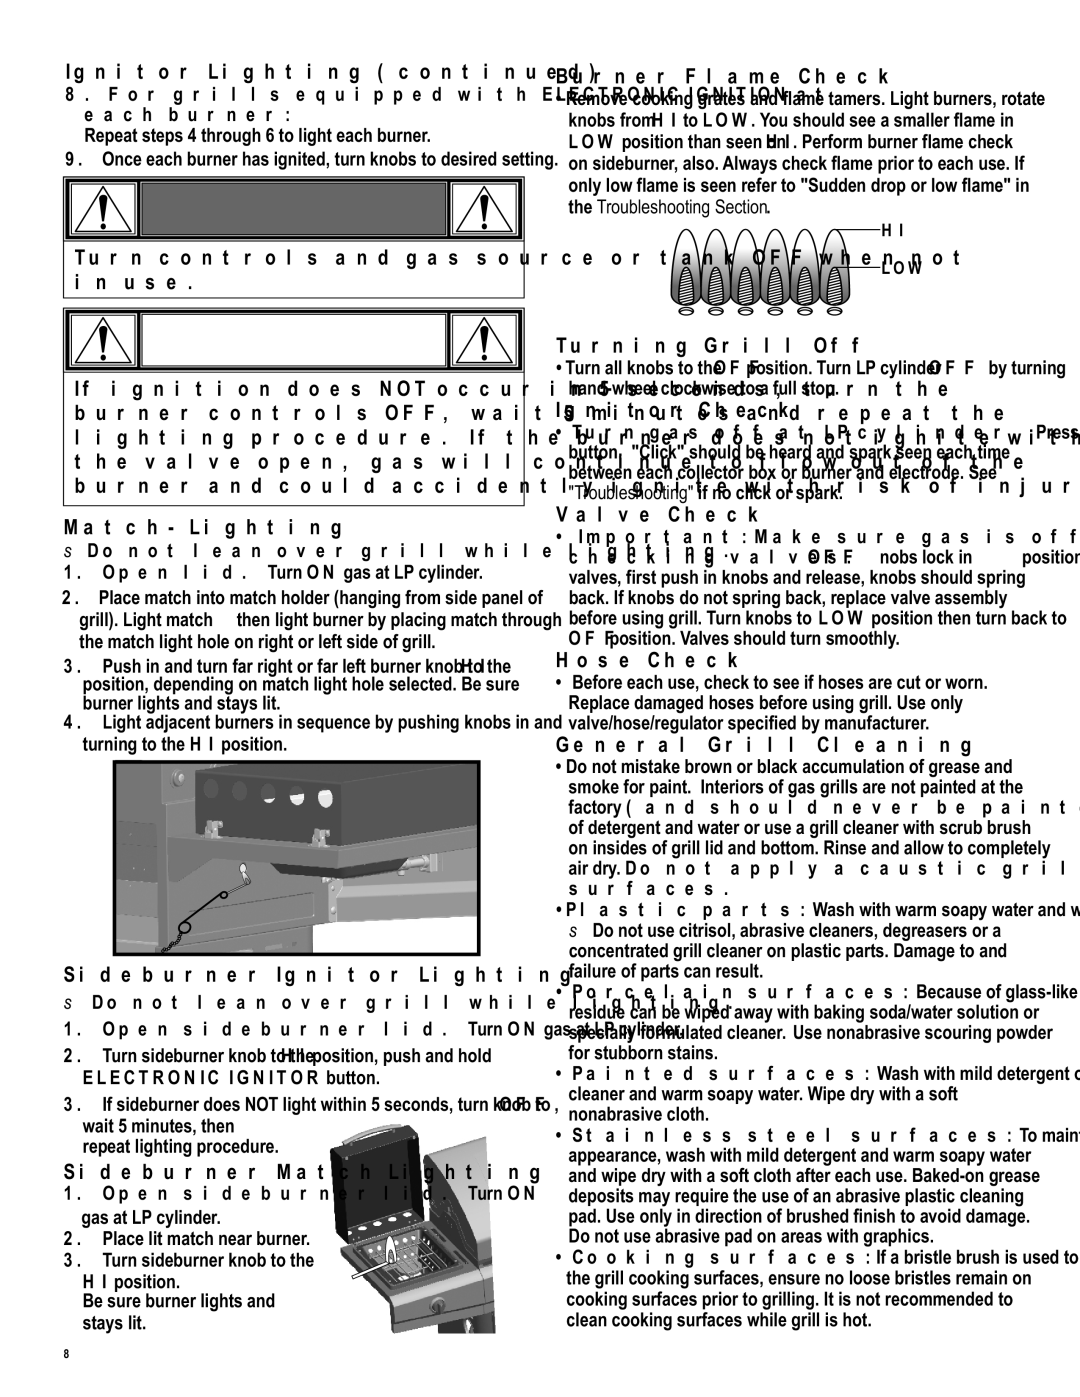
Burner Flame Check
•Remove cooking grates and flame tamers. Light burners, rotate knobs from HI to LOW. You should see a smaller flame in LOW position than seen on HI. Perform burner flame check on sideburner, also. Always check flame prior to each use. If only low flame is seen refer to "Sudden drop or low flame" in the Troubleshooting Section.
HI
LOW
Turning Grill Off
•Turn all knobs to the OFFposition. Turn LP cylinder OFF by turning
Ignitor Check
•Turn gas off at LP cylinder. Press and hold electronic ignitor button. "Click" should be heard and spark seen each time between each collector box or burner and electrode. See "Troubleshooting" if no click or spark.
Valve Check
•Important: Make sure gas is off at LP cylinder before checking valves. Knobs lock in OFF position. To check valves, first push in knobs and release, knobs should spring back. If knobs do not spring back, replace valve assembly before using grill. Turn knobs to LOW position then turn back to OFF position. Valves should turn smoothly.
Hose Check
•Before each use, check to see if hoses are cut or worn. Replace damaged hoses before using grill. Use only valve/hose/regulator specified by manufacturer.
General Grill Cleaning
•Do not mistake brown or black accumulation of grease and smoke for paint. Interiors of gas grills are not painted at the factory (and should never be painted). Apply a strong solution of detergent and water or use a grill cleaner with scrub brush on insides of grill lid and bottom. Rinse and allow to completely air dry. Do not apply a caustic grill/oven cleaner to painted surfaces.
•Plastic parts: Wash with warm soapy water and wipe dry.
useDo not citrisol, abrasive cleaners, degreasers or a concentrated grill cleaner on plastic parts. Damage to and failure of parts can result.
•Porcelain surfaces: Because of
•Painted surfaces: Wash with mild detergent or nonabrasive cleaner and warm soapy water. Wipe dry with a soft nonabrasive cloth.
•Stainless steel surfaces: To maintain your grill’s high quality appearance, wash with mild detergent and warm soapy water and wipe dry with a soft cloth after each use.
•Cooking surfaces: If a bristle brush is used to clean any of the grill cooking surfaces, ensure no loose bristles remain on cooking surfaces prior to grilling. It is not recommended to clean cooking surfaces while grill is hot.
8