EN | Goal Post Kit QRG |
Instructions
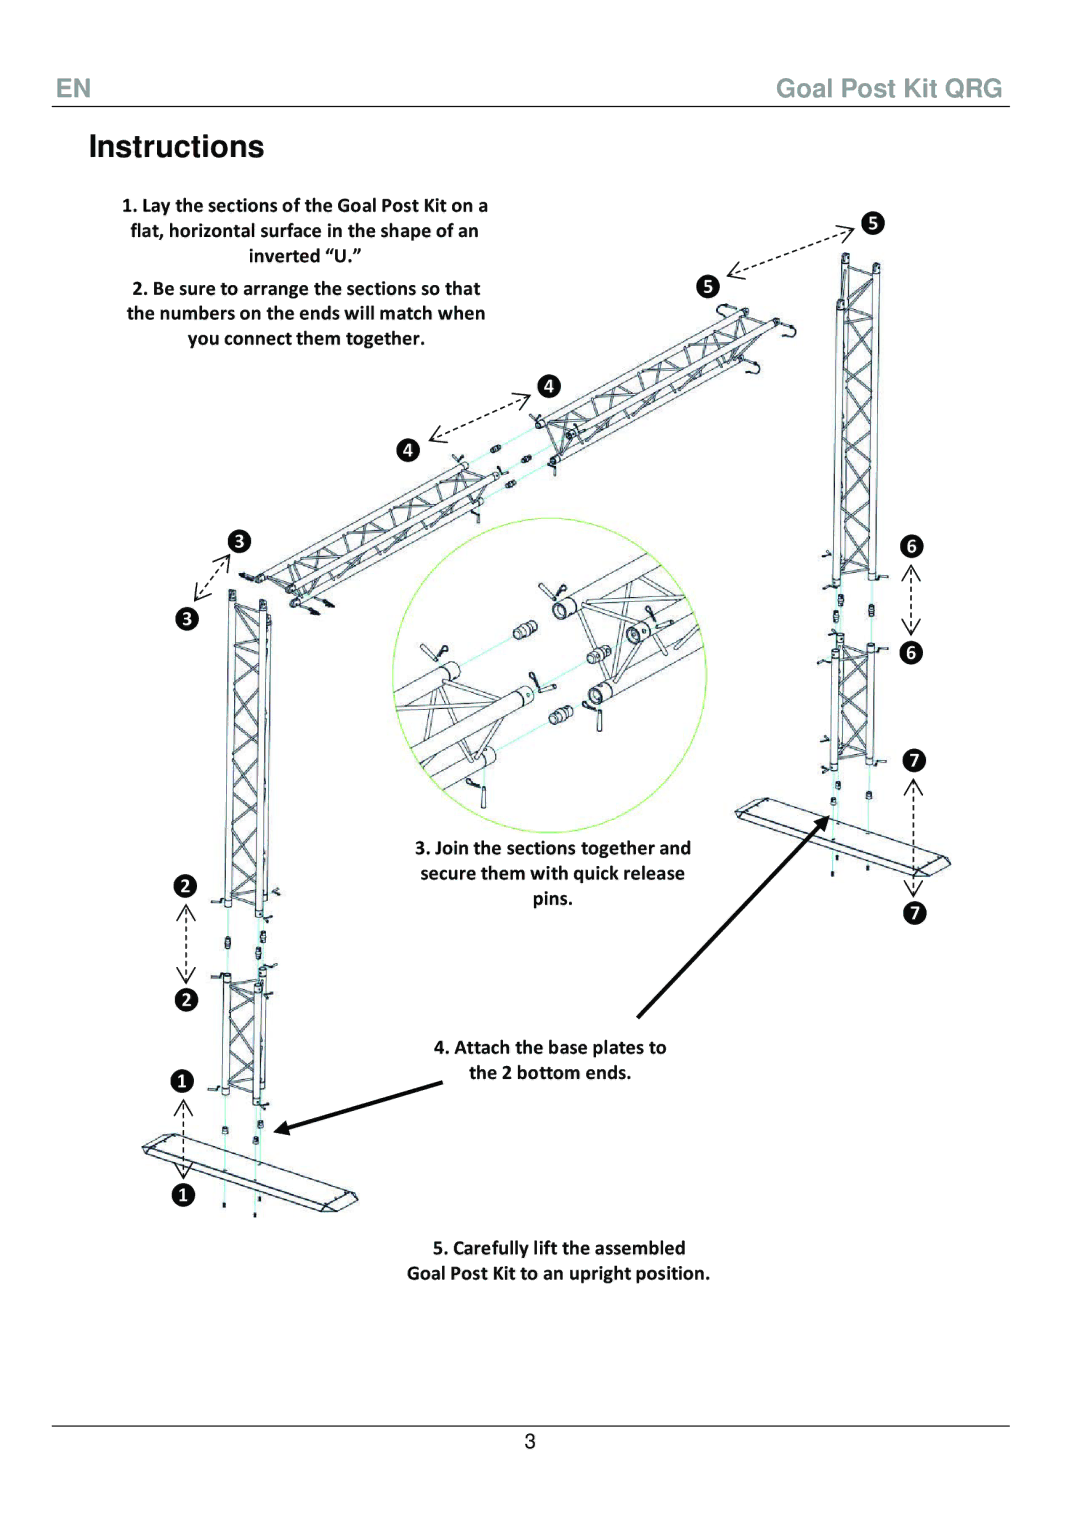
1.Lay the sections of the Goal Post Kit on a flat, horizontal surface in the shape of an
inverted “U.”
2. Be sure to arrange the sections so that |
|
|
| ❺ | ||
the numbers on the ends will match when |
|
|
|
| ||
|
|
|
| |||
you connect them together. |
|
|
|
| ||
|
|
|
|
|
|
|
|
|
|
|
| ||
|
|
|
| ❹ |
| |
|
|
|
|
|
|
|
| ❹ |
|
|
|
|
|
|
|
|
|
|
|
|
❸
❸
|
|
|
|
| 3. Join the sections together and |
| ||
|
|
|
|
| secure them with quick release |
| ||
| ❷ |
|
|
| ||||
|
|
|
| pins. |
| |||
|
|
|
|
|
|
| ||
|
|
|
|
|
|
| ||
|
|
|
|
|
|
|
|
|
|
|
|
|
|
|
|
| |
| ❷ |
|
|
|
|
|
| |
|
|
|
|
|
| 4. Attach the base plates to |
| |
|
|
|
|
|
|
|
| |
|
|
|
|
|
| the 2 bottom ends. |
| |
| ❶ |
|
|
|
|
|
| |
|
|
|
|
|
|
|
| |
|
|
|
|
|
|
|
|
|
|
|
|
|
|
|
|
|
|
|
|
|
|
|
|
|
|
|
| ❶ |
|
|
|
|
|
| |
|
|
|
|
| 5. Carefully lift the assembled | |||
|
|
|
|
| ||||
|
|
|
| Goal Post Kit to an upright position. | ||||
❺
❻
❻
❼
❼
3