positive (+ or P) terminal of the bat- tery. Connect the negative (BLACK with --) Battery Clamp to an unpaint- ed, solid metal portion of the vehicle. Do not connect to the carburetor or fuel lines.

4.

After the Battery Clamps are con-


nected, slightly rotate the Clamps to


remove any dirt or oxidation layer to


ensure proper contact.


5.

Plug the Power Cord of the Battery


Charger into the nearest 120 volt,


grounded, electrical outlet.


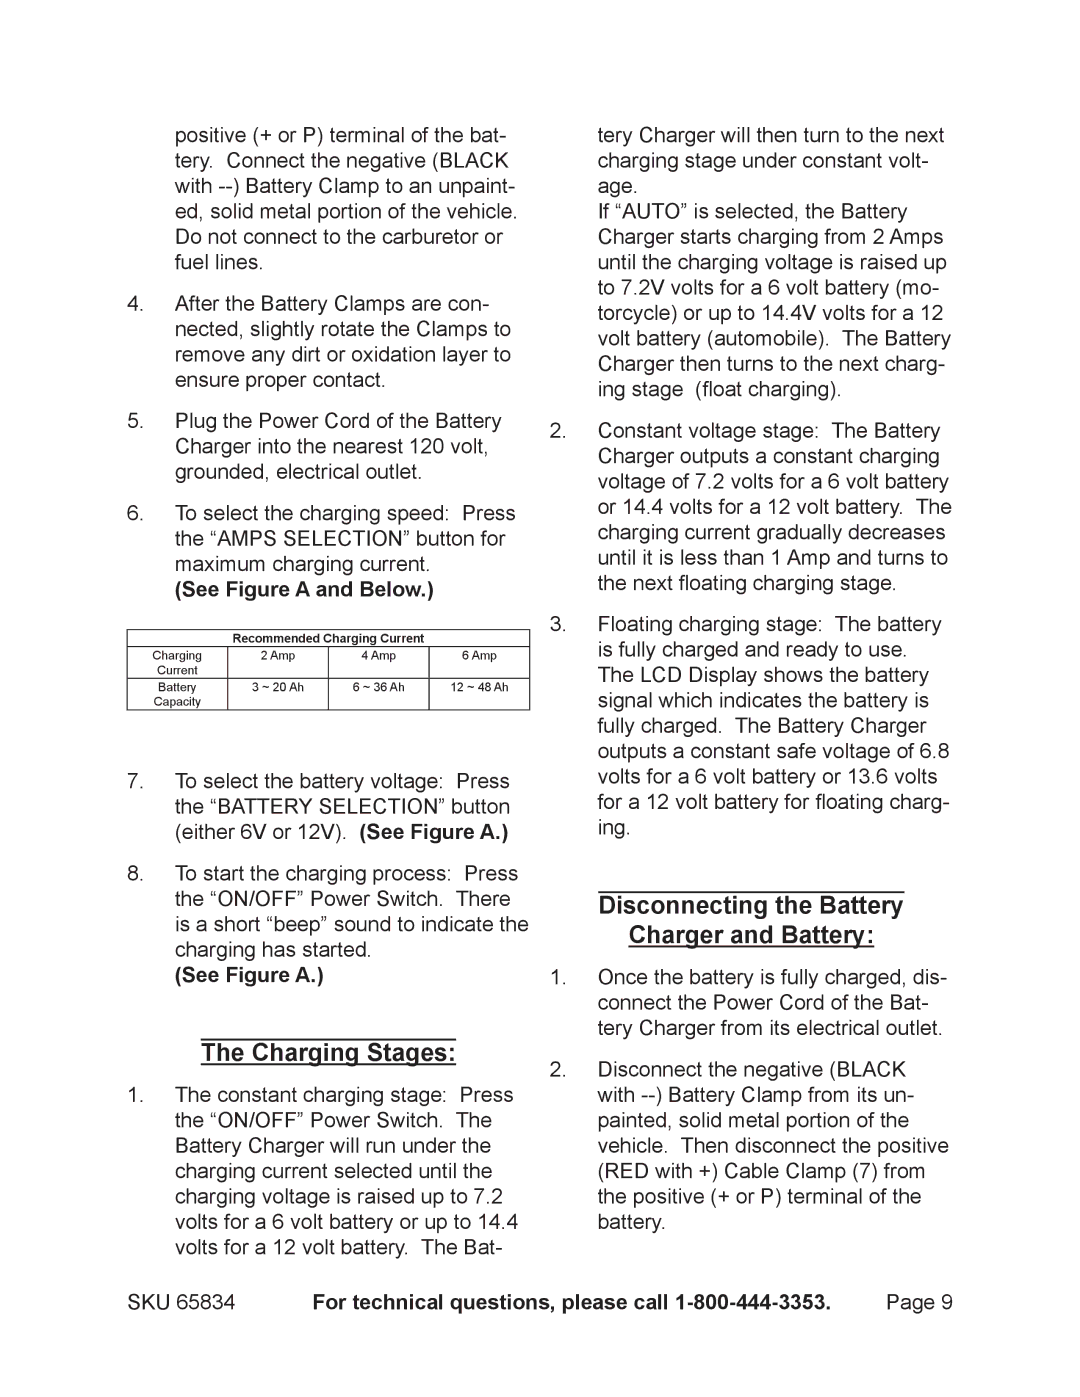
6.

To select the charging speed: Press


the “AMPS SELECTION” button for


maximum charging current.


(See Figure A and Below.)


Recommended Charging Current


Charging

2 Amp

4 Amp


6 Amp


Current


Battery

3 ~ 20 Ah

6 ~ 36 Ah


12 ~ 48 Ah


Capacity


7.

To select the battery voltage: Press


the “BATTERY SELECTION” button


(either 6V or 12V). (See Figure A.)

8.

To start the charging process: Press


the “ON/OFF” Power Switch. There


is a short “beep” sound to indicate the

charging has started.

(See Figure A.)

The Charging Stages:

1.The constant charging stage: Press the “ON/OFF” Power Switch. The Battery Charger will run under the charging current selected until the charging voltage is raised up to 7.2 volts for a 6 volt battery or up to 14.4 volts for a 12 volt battery. The Bat-

tery Charger will then turn to the next charging stage under constant volt- age.

If “AUTO” is selected, the Battery Charger starts charging from 2 Amps until the charging voltage is raised up to 7.2V volts for a 6 volt battery (mo- torcycle) or up to 14.4V volts for a 12 volt battery (automobile). The Battery Charger then turns to the next charg- ing stage (float charging).

2.Constant voltage stage: The Battery Charger outputs a constant charging voltage of 7.2 volts for a 6 volt battery or 14.4 volts for a 12 volt battery. The charging current gradually decreases until it is less than 1 Amp and turns to the next floating charging stage.

3.Floating charging stage: The battery is fully charged and ready to use. The LCD Display shows the battery signal which indicates the battery is fully charged. The Battery Charger outputs a constant safe voltage of 6.8 volts for a 6 volt battery or 13.6 volts for a 12 volt battery for floating charg- ing.

Disconnecting the Battery

Charger and Battery:

1.Once the battery is fully charged, dis- connect the Power Cord of the Bat- tery Charger from its electrical outlet.

2.Disconnect the negative (BLACK with --) Battery Clamp from its un- painted, solid metal portion of the vehicle. Then disconnect the positive (RED with +) Cable Clamp (7) from the positive (+ or P) terminal of the battery.

SKU 65834

For technical questions, please call 1-800-444-3353.

Page 9

Page 9
Image 9
Chicago Electric 65834 Charging Stages, Disconnecting the Battery Charger and Battery, See Figure a and Below

65834 specifications

The Chicago Electric 65834 is a versatile tool that has gained attention for its combination of reliability and user-friendly features. This product is particularly favored among DIY enthusiasts and professionals alike, thanks to its powerful capabilities and broad range of applications.

At the heart of the Chicago Electric 65834 is a robust 1500-watt motor that delivers enough strength for various cutting tasks. Whether it’s handling wood, metal, or plastics, the tool provides the necessary torque to get through tougher materials without compromising speed or accuracy. With a no-load speed of up to 3000 RPM, users can expect fast and efficient performance, making their projects quicker and more productive.

One of the standout features of the Chicago Electric 65834 is its adjustable speed settings. This allows users to tailor the tool's performance to match the specific requirements of each task. Be it delicate work or heavy-duty cutting, the ability to adjust the speed is a game-changer, providing greater control and versatility.

Another characteristic that sets this tool apart is its ergonomic design. The handle is designed for comfort, reducing fatigue during prolonged use. The lightweight nature of the tool also means that it can be maneuvered easily, giving users the confidence to tackle intricate cutting tasks without strain.

Safety is a priority in tool design, and the Chicago Electric 65834 includes several safety features. The tool comes equipped with a protective guard that shields the user from splinters and debris. It also has a lock-off switch to prevent accidental activation, ensuring that the tool remains secure during use and transportation.

The convenience of the Chicago Electric 65834 is further enhanced by its compatibility with a wide array of blades, allowing users to switch between different cutting tasks effortlessly. This adaptability makes it an ideal choice for both home improvement projects and professional workshops.

In conclusion, the Chicago Electric 65834 is a powerhouse of a tool, merging strength, speed, and safety features into one reliable package. Its adjustable speed settings, ergonomic design, and compatibility with various blades make it a valuable addition to any toolkit, catering to the needs of various users, from novice DIYers to seasoned professionals.