Symbology
| Double Insulated |
|
|
| Canadian Standards Association |
|
|
| Underwriters Laboratories, Inc. |
|
|
V~ | Volts Alternating Current |
A | Amperes |
| |
| |
n0 xxxx/min. No Load Revolutions per Minute (RPM) | |
| WARNING marking concerning Risk |
| of Eye Injury. Wear ANSI‑approved |
| safety goggles with side shields. |
Read the manual before
WARNING marking concerning Risk of Hearing Loss.
Wear hearing protection.
WARNING marking concerning Risk of Fire.
Do not cover ventilation ducts. Keep flammable objects away. WARNING marking concerning Risk of Electric Shock.
Properly connect power cord to appropriate outlet.
Instructions for Putting into Use
Read the ENTIRE IMPORTANT SAFETY INFORMATION section at the beginning of this manual including all text under subheadings therein before set up or use of this product.
TO PREVENT SERIOUS INJURY FROM ACCIDENTAL OPERATION:
Turn the Power Switch of the tool off and unplug the tool from its electrical outlet before assembling or making any adjustments to the tool.
Note: For additional information regarding the parts listed in the following pages, refer to Parts List and Assembly Diagram on page 12.
Assembly/Mounting
Attaching The Rip Guide and Adjusting Cut Width
1.Prior to performing this procedure, make sure the Trigger Switch of the Saw is in its’ “OFF” position and the Power Cord is unplugged from its electrical outlet.
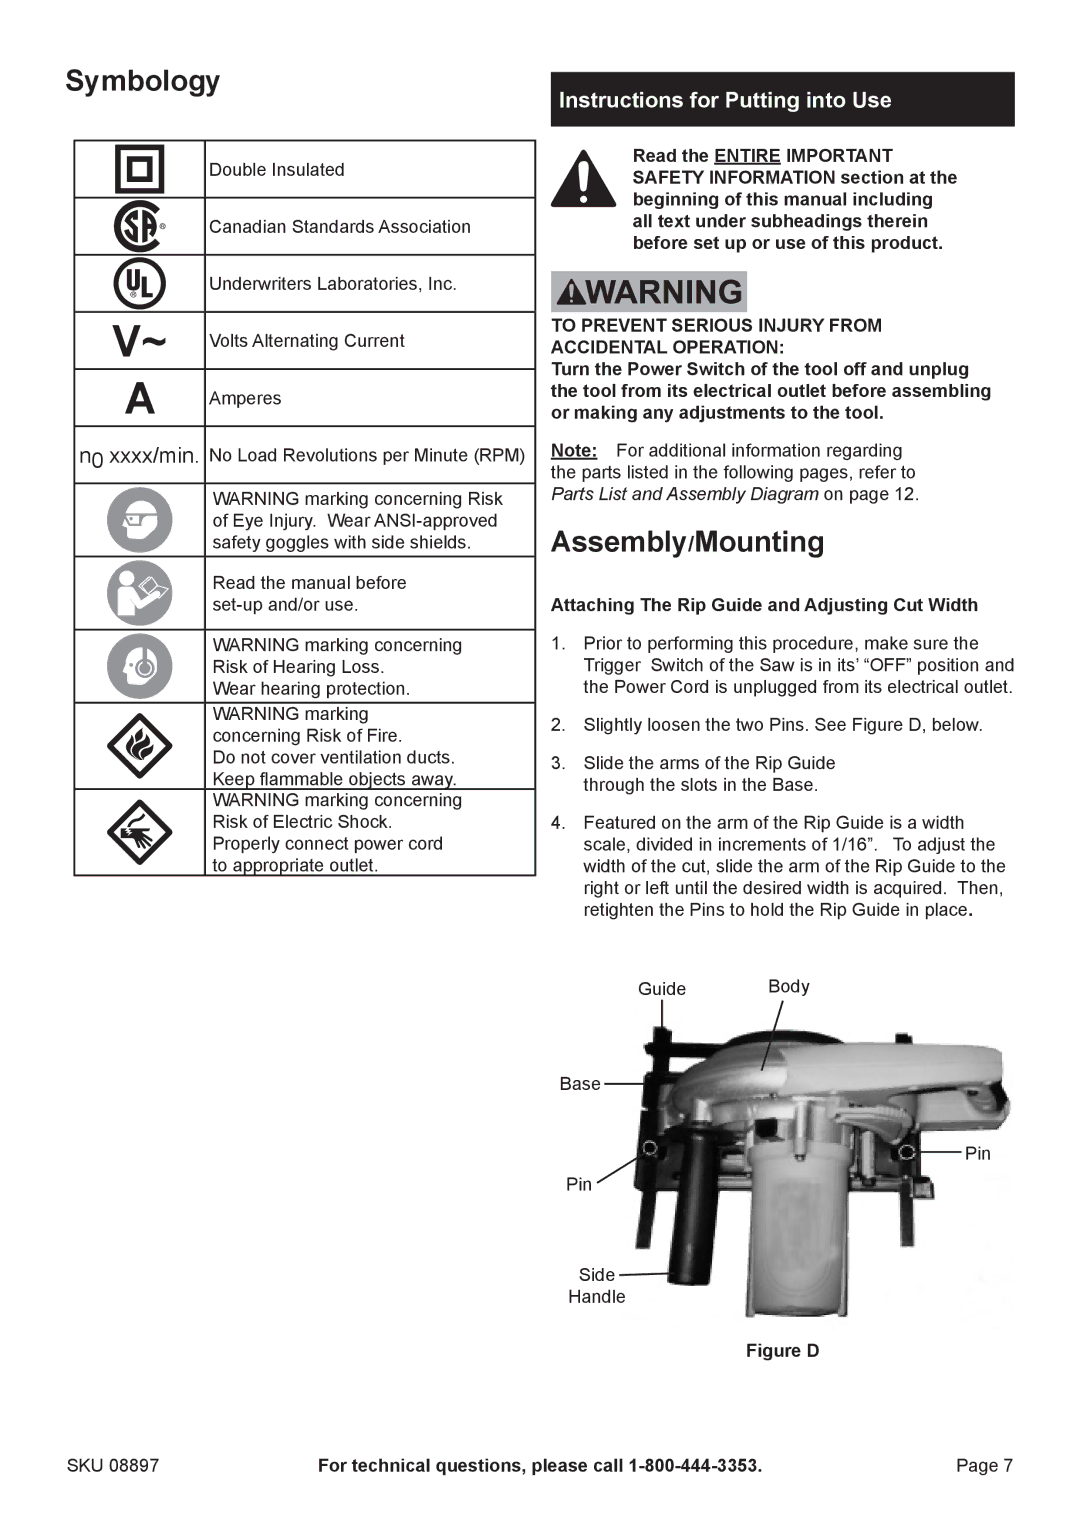
2.Slightly loosen the two Pins. See Figure D, below.
3.Slide the arms of the Rip Guide through the slots in the Base.
4.Featured on the arm of the Rip Guide is a width scale, divided in increments of 1/16”. To adjust the width of the cut, slide the arm of the Rip Guide to the right or left until the desired width is acquired. Then, retighten the Pins to hold the Rip Guide in place.
Guide Body
Base
Pin
Pin
Side
Handle
Figure D
SKU 08897 | For technical questions, please call | Page 7 |
