INSTALLATION INSTRUCTIONS
FSA-1005 and KSA-1005
FLAT PANEL DISPLAY SECURITY KIT
Prior to assembly, unpack carton completely and verify contents.
If you are missing any of the following components, please contact Customer Service at
(4) Security Pivot Bolt, 4”
(1)
(1)
(1)
Figure 1 | (4) | M4 x 12mm Security Screw |
| ||
| (4) | M4 x 20mm Security Screw |
| (1) | 1/8” Hex Key |
| (1) 5/32” Security Hex Key | |
| (1) 3/16” Security Hex Key | |
BEFORE PROCEEDING, READ INSTALLATION INSTRUCTIONS COMPLETELY
CAUTION! FLAT PANEL DISPLAYS ARE EXTREMELY FRAGILE.
Note: In some installations (i.e. single arm mount) not all fasteners included in this kit will be required.
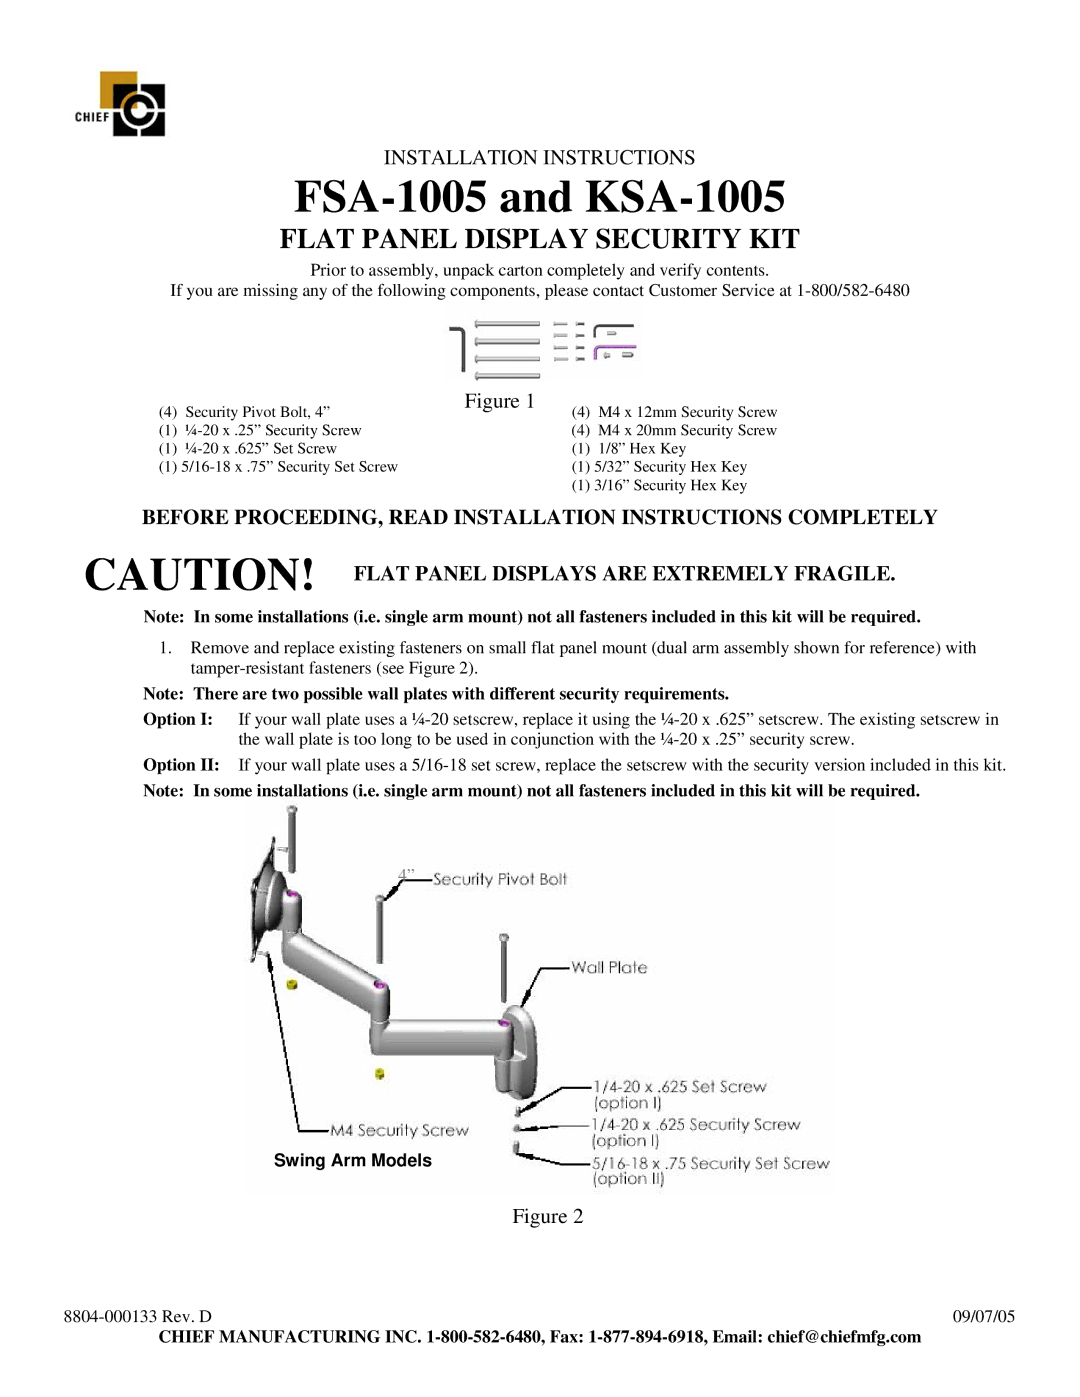
1.Remove and replace existing fasteners on small flat panel mount (dual arm assembly shown for reference) with
Note: There are two possible wall plates with different security requirements.
Option I:
Option II:
Note: In some installations (i.e. single arm mount) not all fasteners included in this kit will be required.
4”
Swing Arm Models
Figure 2
09/07/05 |
CHIEF MANUFACTURING INC.