Installation Instructions | Model |
NOTE: If the flat panel display has a table stand attached, remove existing stand.
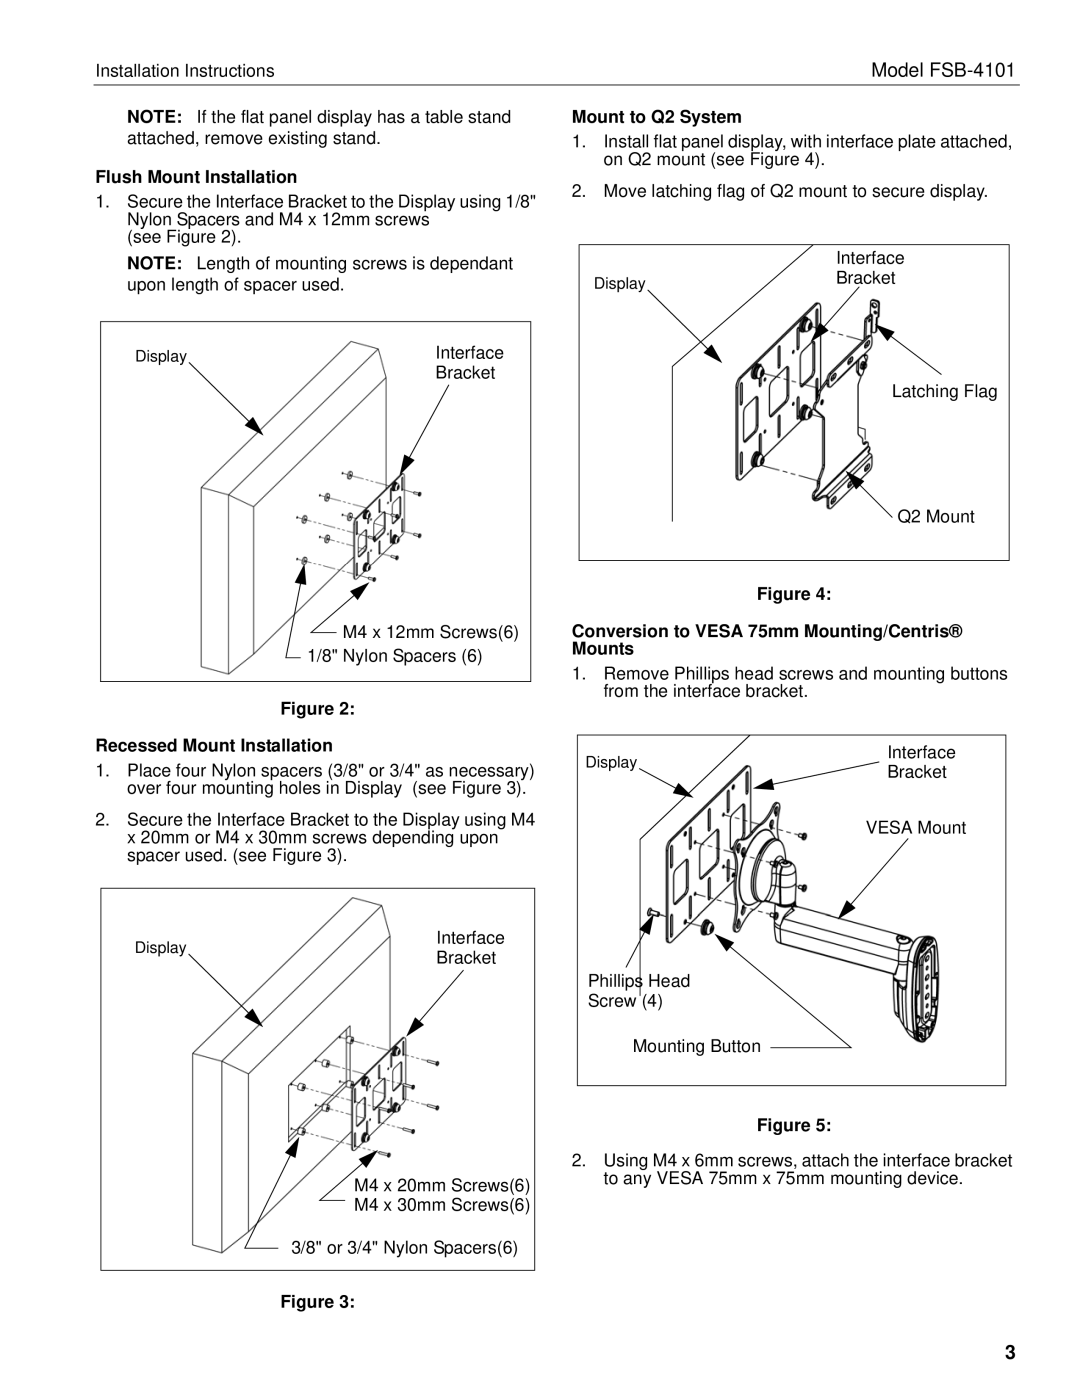
Flush Mount Installation
1.Secure the Interface Bracket to the Display using 1/8" Nylon Spacers and M4 x 12mm screws
(see Figure 2).
NOTE: Length of mounting screws is dependant upon length of spacer used.
Display | Interface |
| Bracket |
M4 x 12mm Screws(6)
1/8" Nylon Spacers (6)
Figure 2:
Recessed Mount Installation
1.Place four Nylon spacers (3/8" or 3/4" as necessary) over four mounting holes in Display (see Figure 3).
2.Secure the Interface Bracket to the Display using M4 x 20mm or M4 x 30mm screws depending upon spacer used. (see Figure 3).
Display | Interface | |
Bracket | ||
|
M4 x 20mm Screws(6)
M4 x 30mm Screws(6)
3/8" or 3/4" Nylon Spacers(6)
Figure 3:
Mount to Q2 System
1.Install flat panel display, with interface plate attached, on Q2 mount (see Figure 4).
2.Move latching flag of Q2 mount to secure display.
Interface
DisplayBracket
Latching Flag
![]() Q2 Mount
Q2 Mount
Figure 4:
Conversion to VESA 75mm Mounting/Centris® Mounts
1.Remove Phillips head screws and mounting buttons from the interface bracket.
Display | Interface | |
Bracket | ||
| ||
| VESA Mount |
Phillips Head
Screw (4)
Mounting Button
Figure 5:
2.Using M4 x 6mm screws, attach the interface bracket to any VESA 75mm x 75mm mounting device.
3
