LCD2C specifications
The Chief Manufacturing LCD2C is a premium display mount designed for the dynamic needs of modern workspace environments. Known for its exceptional engineering and innovative features, the LCD2C caters to various applications ranging from office settings to classrooms and conference rooms.One of the primary features of the LCD2C is its adjustable height and tilt options, allowing users to achieve the perfect viewing angle. This flexibility is particularly beneficial when accommodating multiple viewers or when the display is used in collaborative settings. The mount supports a wide range of display sizes, typically accommodating screens from 32 inches up to 65 inches, catering to diverse display needs.
The Chief LCD2C is built with robust steel construction, ensuring durability and stability for heavy displays. This construction is complemented by a sleek design that minimizes visual clutter, contributing to a professional appearance in any environment. The mount also features a quick-release latch that simplifies the installation and maintenance process, making it user-friendly for AV technicians and end-users alike.
Technologically, the LCD2C employs Chief’s innovative micro-adjustment features. This allows for precise alignment during installation, ensuring that displays are perfectly level and positioned. The mount also incorporates integrated cable management, which helps keep all wiring organized and out of sight, contributing to a clean, professional look.
Another notable characteristic of the LCD2C is its compatibility with Chief's extensive line of accessories. This flexibility enables users to customize their mounting solution further, accommodating additional hardware such as shelves, camera mounts, or even sound systems. The modularity of this system ensures the mount can evolve with the changing needs of a workspace.
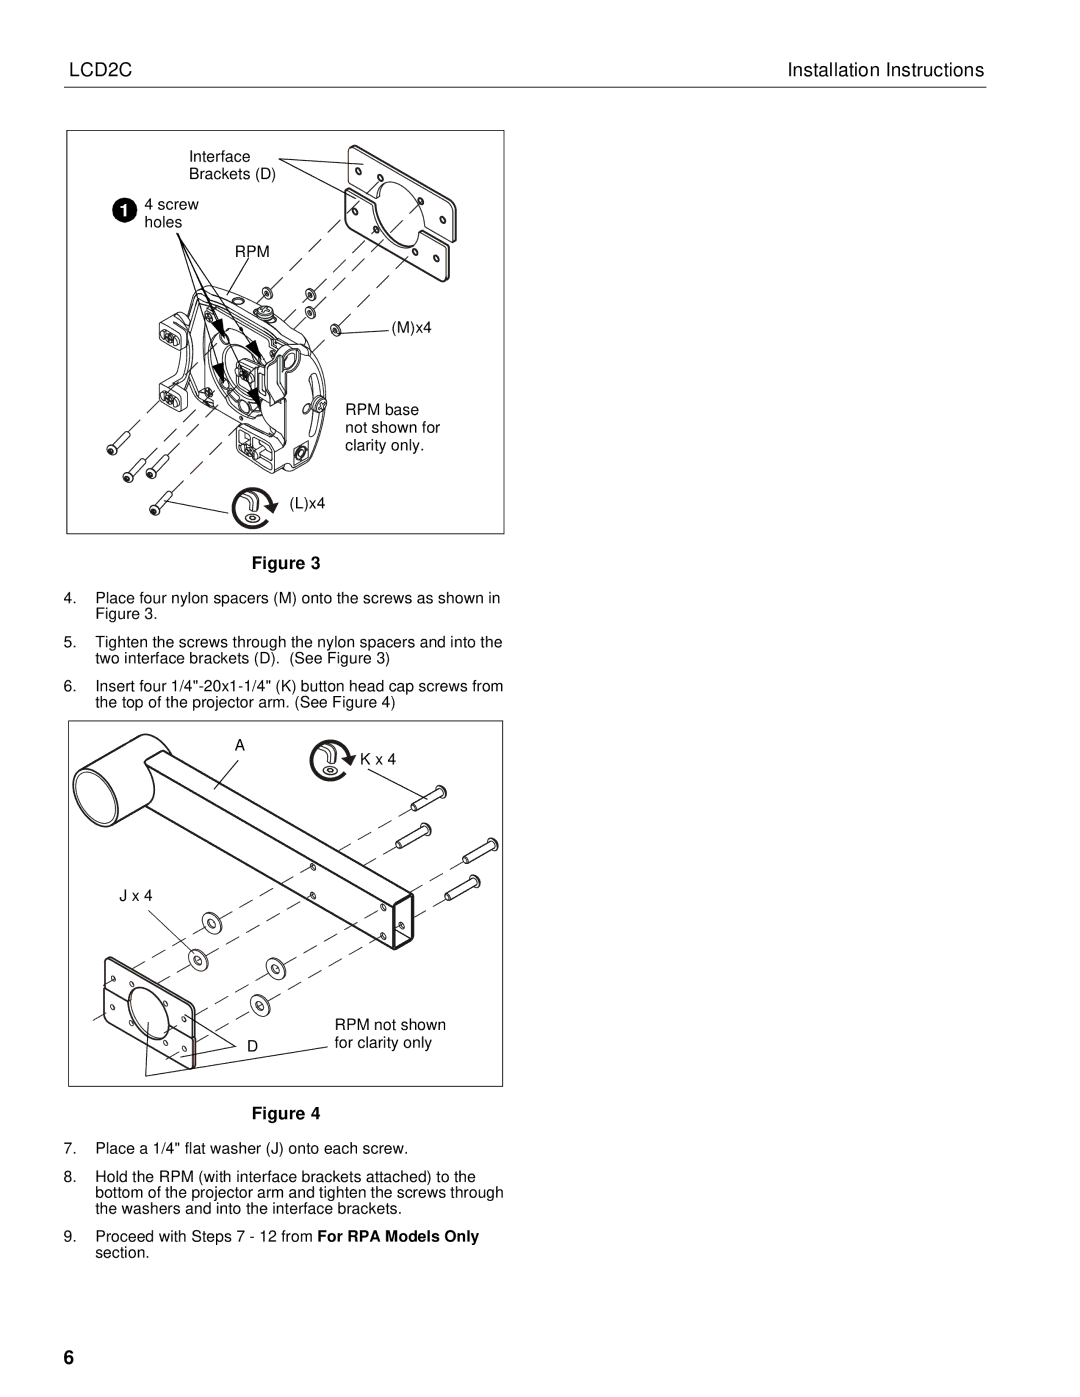
Furthermore, the LCD2C boasts a straightforward installation process, thanks to its pre-assembled components and well-designed user guides. This allows for quicker deployment of display solutions, minimizing downtime in work environments.
In summary, the Chief Manufacturing LCD2C epitomizes reliability, flexibility, and user-centric design for display mounting solutions. With features like adjustable height and tilt, robust construction, micro-adjustments, and integrated cable management, it stands out as an ideal choice for professionals seeking an efficient and aesthetically pleasing display mount. Whether for collaboration, presentations, or information sharing, the LCD2C is a compelling solution in today’s technologically driven workplaces.