
GS, GSL3 specifications
Chromalox is a well-known name in the field of industrial heating solutions, and its GSL3 and GS series exemplify the company’s commitment to quality and innovation. These models are designed to provide efficient and reliable heat management for a variety of applications, showcasing impressive features and advanced technologies.The GSL3 and GS series are primarily electric heat tracing components, ideal for maintaining pipe temperatures and preventing freeze damage in various industrial sectors. One of the standout characteristics of these systems is their flexibility in installation. Both series offer easy installation options, allowing for customization based on specific requirements and site conditions. This adaptability makes them suitable for applications in oil and gas, chemical processing, and power generation.
A major highlight of the Chromalox GSL3 and GS series is their use of advanced materials and construction methods. The elements are constructed with high-quality materials that ensure durability and resistance to environmental factors. This robustness translates to a longer lifespan and reduced maintenance requirements, ultimately providing cost savings over time.
In terms of heating performance, the GSL3 and GS series leverage state-of-the-art technology for precise temperature control. The embedded heating cables allow for uniform heat distribution, minimizing hot spots and inefficiencies. This precise control is crucial in processes that have strict temperature requirements, ensuring product integrity and operational safety.
Energy efficiency is another hallmark of these series. Chromalox has engineered the GSL3 and GS models to minimize energy consumption while maximizing heat output. This eco-friendly consideration not only helps organizations meet sustainability goals but also reduces operating costs.
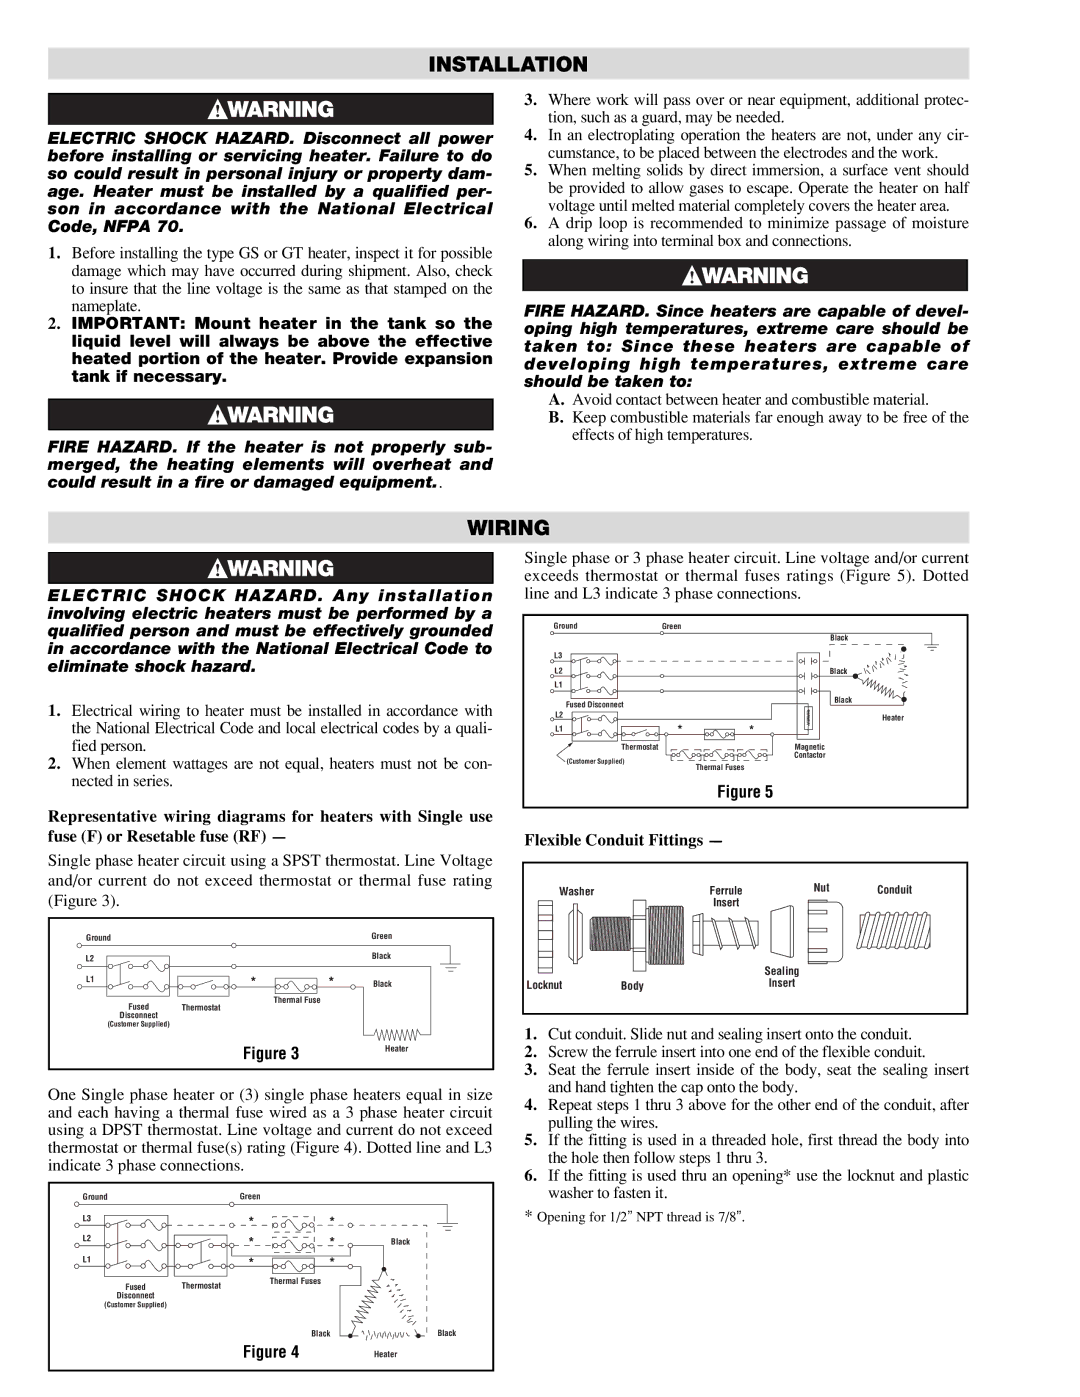
Both series are equipped with advanced safety features, including thermal cut-offs and various industry-standard certifications, ensuring safe operation even under challenging conditions. With features like these, users can have peace of mind knowing their heating systems are reliable and compliant.
Overall, the Chromalox GSL3 and GS series represent a blend of advanced heating technology, flexible installation options, and a strong focus on safety and efficiency. These qualities make them an excellent choice for industries looking to enhance their heating capabilities while reducing energy consumption and ensuring operational reliability. Whether for freeze protection or temperature maintenance, the GSL3 and GS series stand out as leading solutions in the market.