Chapter 3
Advanced Configuration
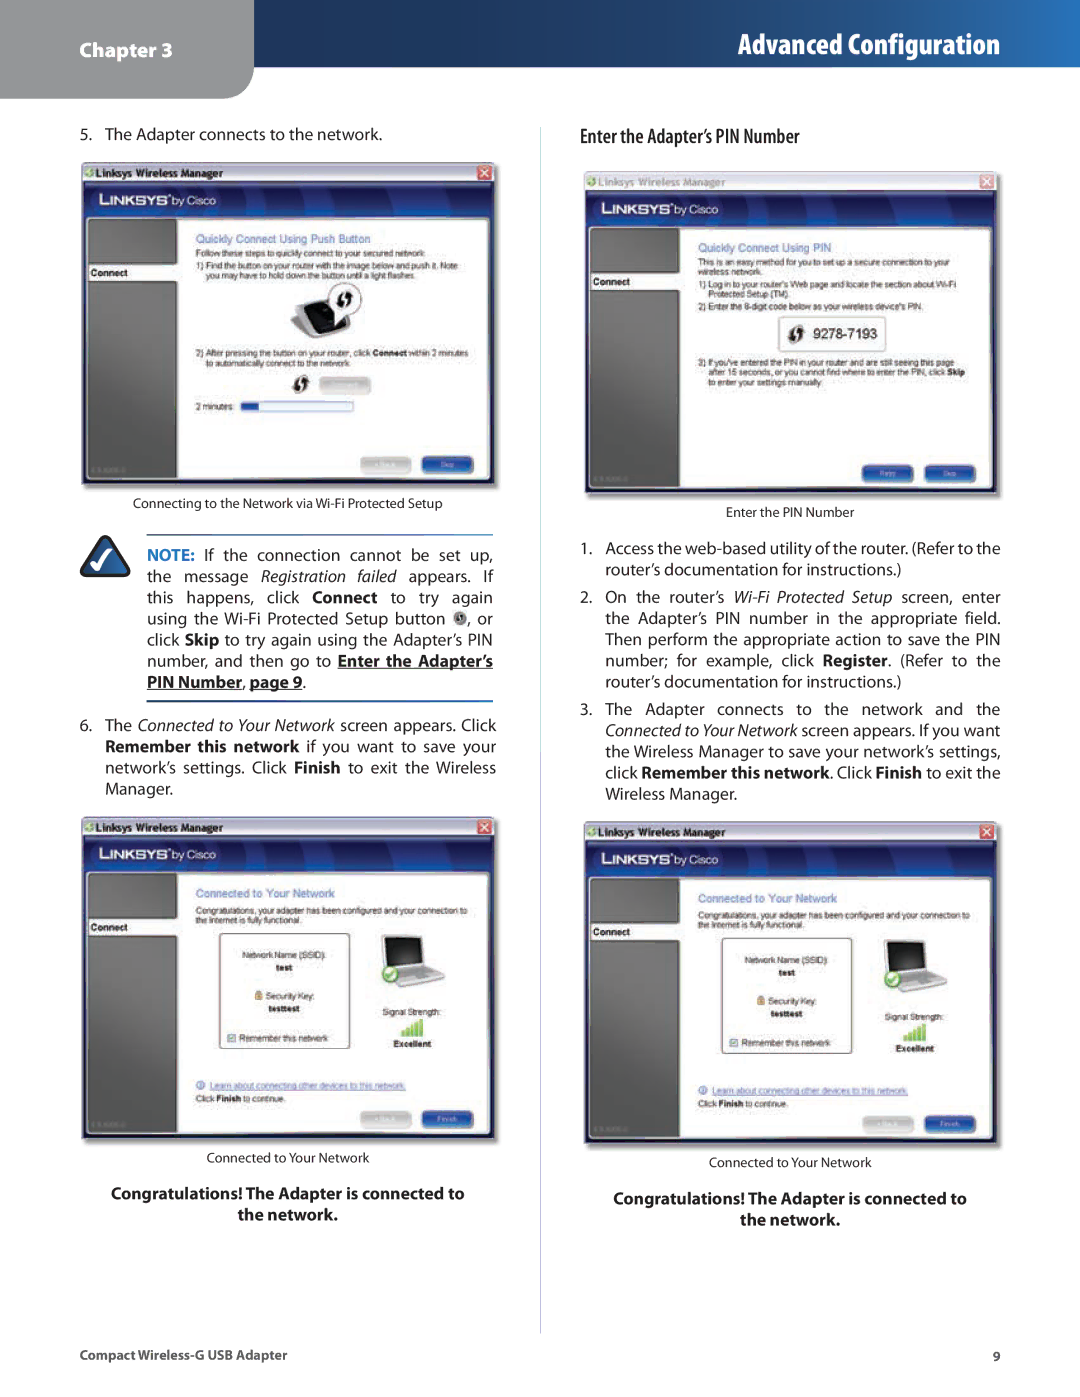
5. The Adapter connects to the network.
Connecting to the Network via
NOTE: If the connection cannot be set up, the message Registration failed appears. If this happens, click Connect to try again using the ![]() , or click Skip to try again using the Adapter’s PIN number, and then go to Enter the Adapter’s PIN Number, page 9.
, or click Skip to try again using the Adapter’s PIN number, and then go to Enter the Adapter’s PIN Number, page 9.
6.The Connected to Your Network screen appears. Click Remember this network if you want to save your network’s settings. Click Finish to exit the Wireless Manager.
Connected to Your Network
Congratulations! The Adapter is connected to
the network.
Enter the Adapter’s PIN Number
Enter the PIN Number
1.Access the
2.On the router’s
3.The Adapter connects to the network and the Connected to Your Network screen appears. If you want the Wireless Manager to save your network’s settings, click Remember this network. Click Finish to exit the Wireless Manager.
Connected to Your Network
Congratulations! The Adapter is connected to
the network.
Compact | 9 |
