II.RUN WIRE HARNESS
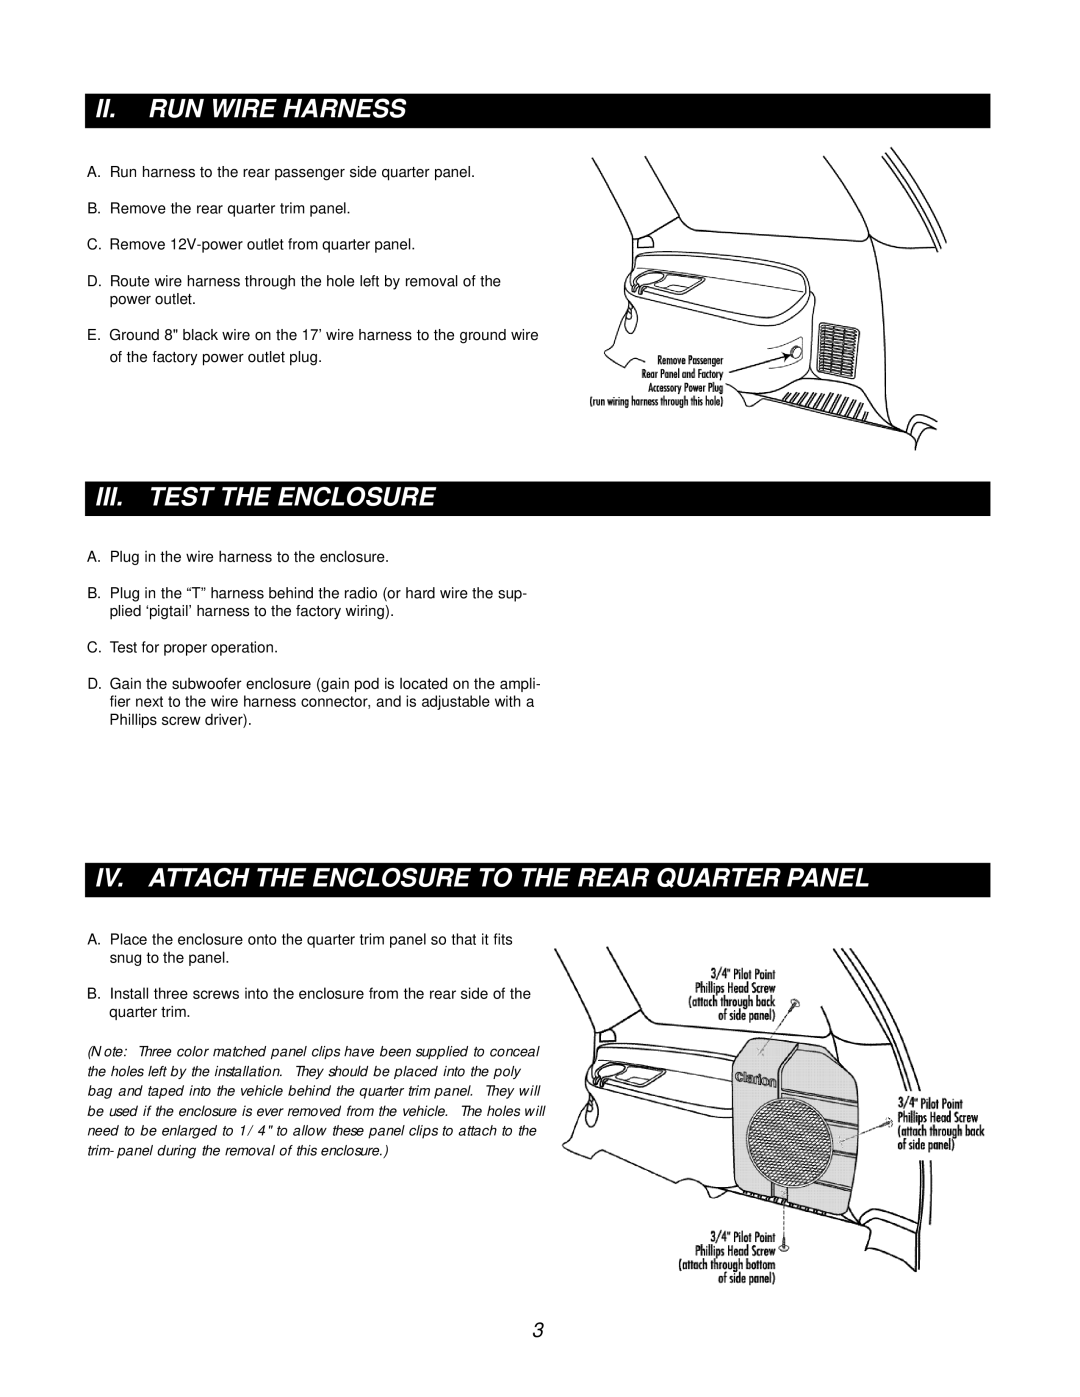
A.Run harness to the rear passenger side quarter panel.
B.Remove the rear quarter trim panel.
C.Remove
D.Route wire harness through the hole left by removal of the power outlet.
E.Ground 8" black wire on the 17’ wire harness to the ground wire of the factory power outlet plug.
III.TEST THE ENCLOSURE
A.Plug in the wire harness to the enclosure.
B.Plug in the “T” harness behind the radio (or hard wire the sup- plied ‘pigtail’ harness to the factory wiring).
C.Test for proper operation.
D.Gain the subwoofer enclosure (gain pod is located on the ampli- fier next to the wire harness connector, and is adjustable with a Phillips screw driver).
IV. ATTACH THE ENCLOSURE TO THE REAR QUARTER PANEL
A.Place the enclosure onto the quarter trim panel so that it fits snug to the panel.
B.Install three screws into the enclosure from the rear side of the quarter trim.
(Note: Three color matched panel clips have been supplied to conceal the holes left by the installation. They should be placed into the poly bag and taped into the vehicle behind the quarter trim panel. They will be used if the enclosure is ever removed from the vehicle. The holes will need to be enlarged to 1/4" to allow these panel clips to attach to the trim- panel during the removal of this enclosure.)
3
