To Attach Rainfly (continued)
4.Pull down the two vestibule flaps on the rainfly after all seven hook & loop fasteners are secured.
5.Attach the hooks on the rainfly to the plastic loops on the four corner web straps (Fig. 8), and the metal loops on the sides of the tent.
Fig. 8
6.Locate the elastic loop,on the back of rainfly, stretch until taut, and secure with a stake.
7.Tie guylines (5 total) onto web straps located on the sides and back of the rainfly, stretch until taut, and secure with stakes. (Fig 9 & 10)
|
|
|
|
|
|
| Fig. 9 |
|
| Fig. 10 |
|
|
|
|
|
|
|
|
|
|
|
|
|
Vestibule, Window Flap & Vent
The vestibule, on the front of the rainfly, provides privacy and space for gear storage. Both flaps may be rolled back and secured for maximum air flow.
1.Unzip rainfly vestibule, roll up one or both flaps, then insert toggle through fabric loop to secure. (Fig. 11 & 12)
2.If using as a windbreak: select one flap, stretch elastic cord until taut, then secure with a stake (Fig. 13). Roll the other flap back and secure by inserting toggle through fabric loop. (Fig. 12)
Front of Tent
Fig. 11
Fig. 12
Fig. 13
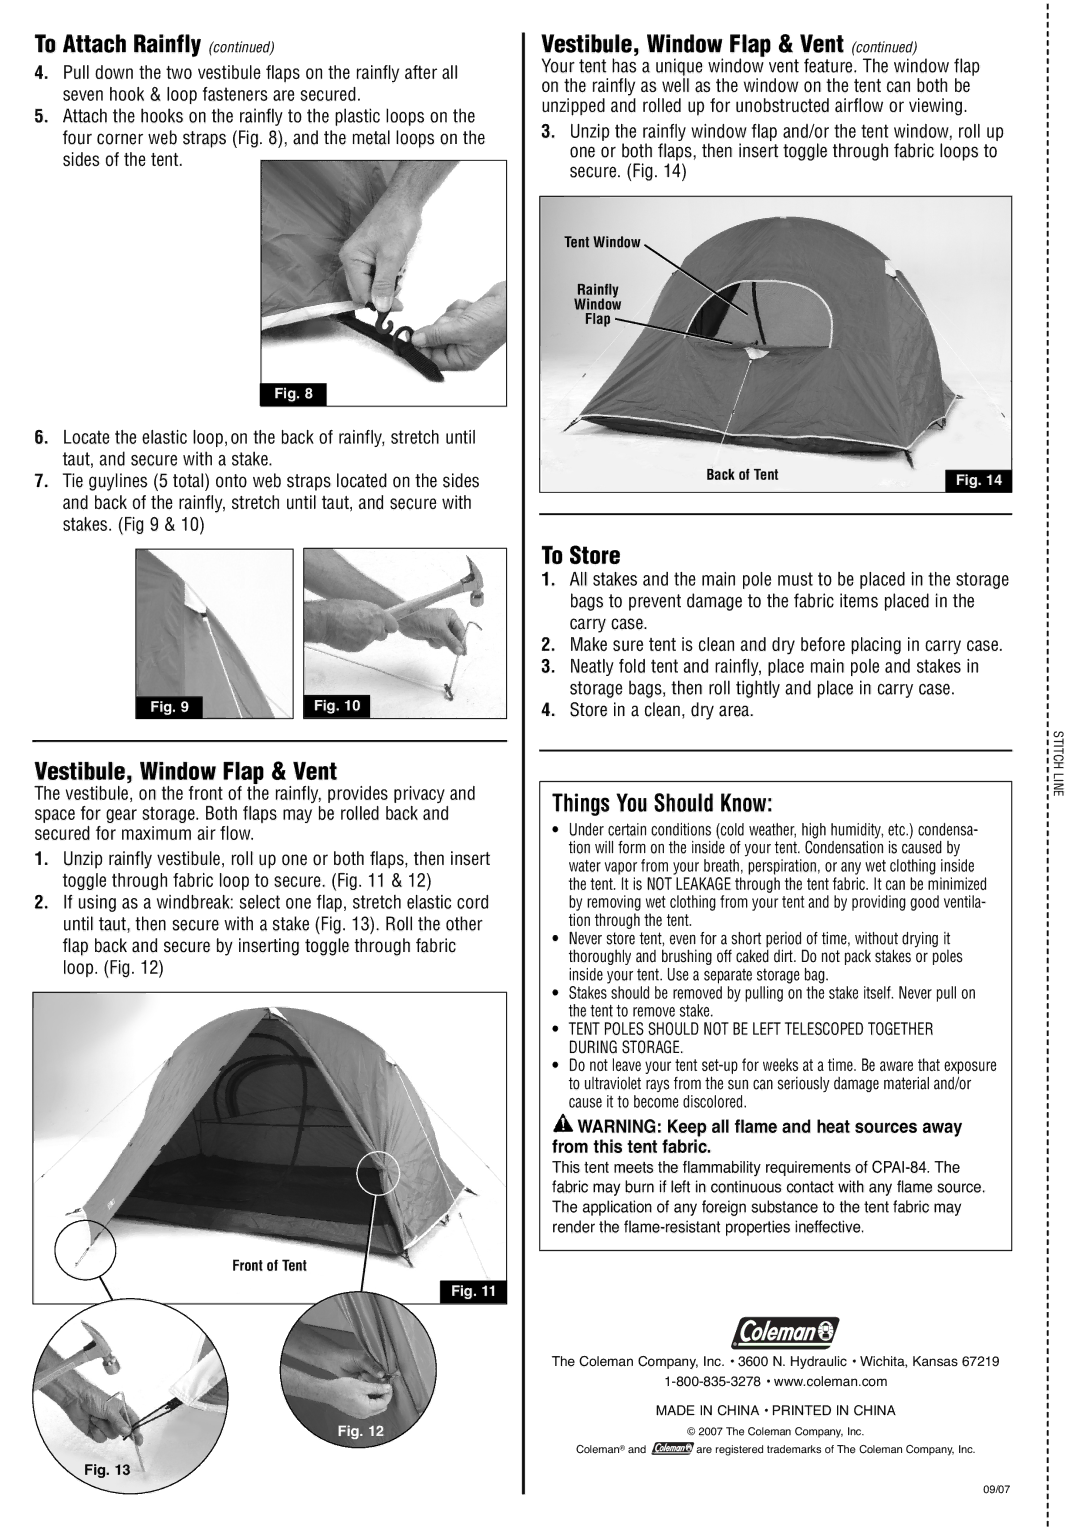
Vestibule, Window Flap & Vent (continued)
Your tent has a unique window vent feature. The window flap on the rainfly as well as the window on the tent can both be unzipped and rolled up for unobstructed airflow or viewing.
3.Unzip the rainfly window flap and/or the tent window, roll up one or both flaps, then insert toggle through fabric loops to secure. (Fig. 14)
Tent Window
Rainfly
Window
Flap ![]()
Back of Tent | Fig. 14 |
|
To Store
1.All stakes and the main pole must to be placed in the storage bags to prevent damage to the fabric items placed in the carry case.
2.Make sure tent is clean and dry before placing in carry case.
3.Neatly fold tent and rainfly, place main pole and stakes in storage bags, then roll tightly and place in carry case.
4.Store in a clean, dry area.
Things You Should Know:
•Under certain conditions (cold weather, high humidity, etc.) condensa- tion will form on the inside of your tent. Condensation is caused by water vapor from your breath, perspiration, or any wet clothing inside the tent. It is NOT LEAKAGE through the tent fabric. It can be minimized by removing wet clothing from your tent and by providing good ventila- tion through the tent.
•Never store tent, even for a short period of time, without drying it thoroughly and brushing off caked dirt. Do not pack stakes or poles inside your tent. Use a separate storage bag.
•Stakes should be removed by pulling on the stake itself. Never pull on the tent to remove stake.
•TENT POLES SHOULD NOT BE LEFT TELESCOPED TOGETHER DURING STORAGE.
•Do not leave your tent
![]() WARNING: Keep all flame and heat sources away from this tent fabric.
WARNING: Keep all flame and heat sources away from this tent fabric.
This tent meets the flammability requirements of
The Coleman Company, Inc. • 3600 N. Hydraulic • Wichita, Kansas 67219
MADE IN CHINA • PRINTED IN CHINA
© 2007 The Coleman Company, Inc.
Coleman® and ![]() are registered trademarks of The Coleman Company, Inc.
are registered trademarks of The Coleman Company, Inc.
09/07
STITCH LINE