LONG FLY SUNDOME 12’ X 10’
Before you begin
Read all instructions before set up.
•Select a level campsite clear of rocks, branches, and other hard or sharp objects, to install your tent.
![]() WARNING: Keep clear of overhead power lines.
WARNING: Keep clear of overhead power lines.
•Do not set up your tent under trees.
•For best results in windy conditions, position end of tent into the wind.
•Enlist the help of at least one other person to assist you when it is time to assemble the tent.
MODEL 2000001107
Parts and Components
Description | Part Number |
Main Poles, Long, Black (2) | 5010000377 |
Ridge Pole w/rubber tips, Black (1) | 5010000378 |
Rainfly | 5010000379 |
STITCH LINE
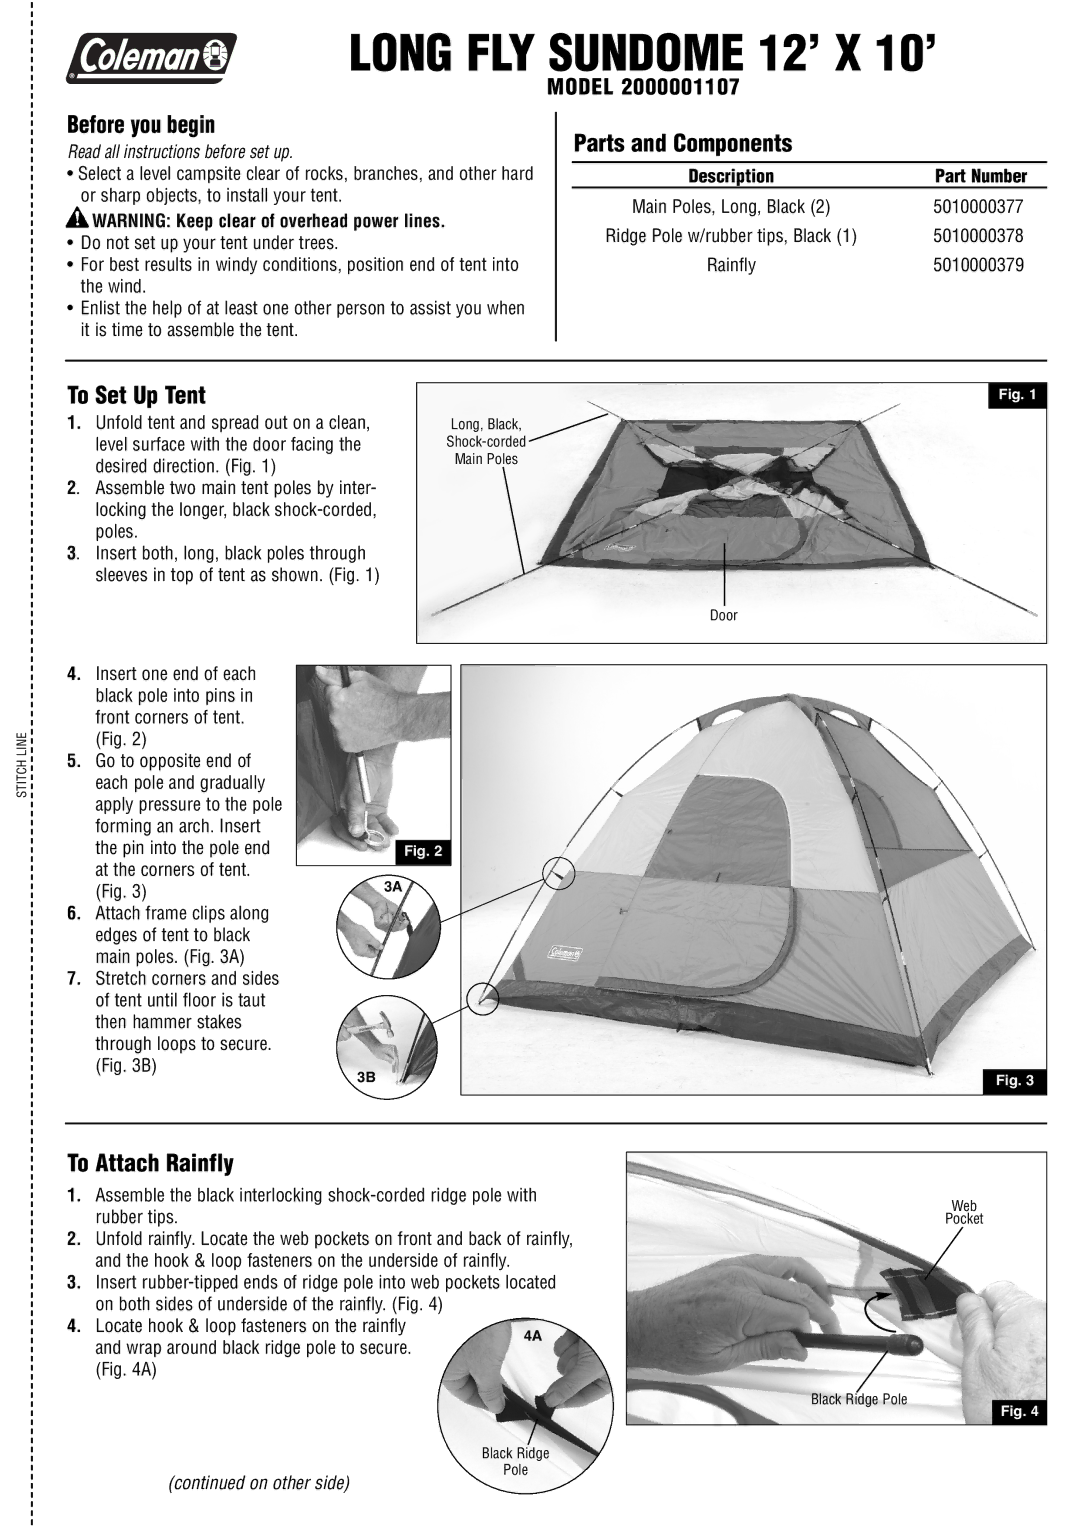
To Set Up Tent |
|
| Fig. 1 | |
1. | Unfold tent and spread out on a clean, | Long, Black, | ||
| level surface with the door facing the | |||
| desired direction. (Fig. 1) | Main Poles | ||
2. | Assemble two main tent poles by inter- |
|
|
|
| locking the longer, black |
|
|
|
| poles. |
|
|
|
3. | Insert both, long, black poles through |
|
|
|
| sleeves in top of tent as shown. (Fig. 1) |
|
|
|
|
|
|
| |
|
| Door | ||
|
|
|
|
|
4.Insert one end of each black pole into pins in front corners of tent.
(Fig. 2)
5.Go to opposite end of each pole and gradually apply pressure to the pole forming an arch. Insert
the pin into the pole end |
| Fig. 2 | |
at the corners of tent. |
|
| |
3A | |||
(Fig. 3) | |||
6.Attach frame clips along edges of tent to black main poles. (Fig. 3A)
7.Stretch corners and sides of tent until floor is taut
then hammer stakes through loops to secure. (Fig. 3B)
3B | Fig. 3 |
To Attach Rainfly
1. Assemble the black interlocking
2. Unfold rainfly. Locate the web pockets on front and back of rainfly, and the hook & loop fasteners on the underside of rainfly.
3. Insert
4. Locate hook & loop fasteners on the rainfly
4A
and wrap around black ridge pole to secure. (Fig. 4A)
Black Ridge
Pole
(continued on other side)
Web
Black Ridge Pole
Fig. 4